How to create photo slideshow in iMovie
iMovie is a video editing application that can let you create presentations easily.
When you need to make slideshow presentations, you can think about using applications like Microsoft PowerPoint or Keynote. But have you ever used iMovie?
iMovie is a video editing application that can let you create presentations easily. It gives you a lot of control over the audio, so you can listen to recorded music and narration during your presentation. The program also offers great title and transition options to make your slideshow stand out.
Read the following article to learn how to set up, edit, and export slideshows in iMovie!
Step 1. Get your photos ready for slideshow
When creating a slideshow in iMovie, the main things you can present are the title and the photo. This is great for business presentations or to show off holiday photos in a fun way.
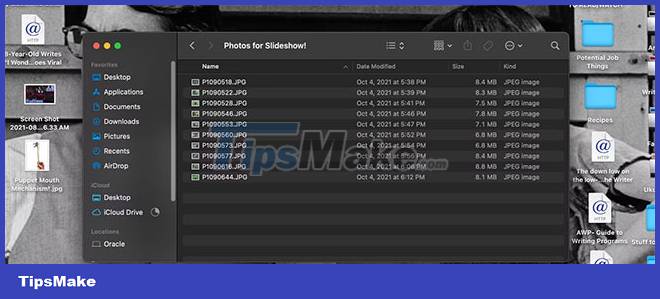
However, before you start creating photo slideshows in iMovie, you can pre-edit your photos so they are ready to be imported into the program. You can crop photos and adjust color balance in iMovie, but other photo-editing programs will give you more options.

Step 2. Set up iMovie to create slideshow
Once the photos are ready, you can go ahead and open iMovie. On a Mac, you'll find it in the Applications folder.
Click the Create New button and select the Movie option in the menu that appears. You'll now be taken into the iMovie Project workspace, where you can start importing your photos and assembling them into a slideshow.

To import, click the Import Media button in the My Media tab of this workspace or go to File > Import Media . In the Import window that opens, navigate to wherever you've saved your presentation images and highlight them all by Shift -clicking each image or clicking and dragging through the entire list. Then press the Import All button.

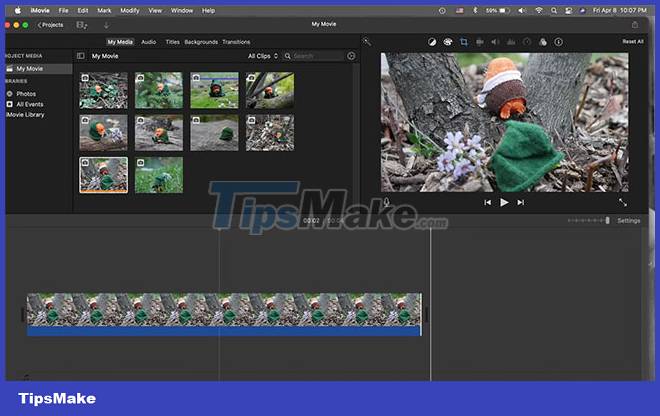
Your photos should now appear where the Import Media button is in the My Media tab , with camera icons on them to indicate that they are photos.
Step 3. Arrange the order of photos in the slideshow
To start putting your slideshow presentation in order, find the first photo you want to appear in the My Media list , then click and drag it into the timeline area below.

When the photo is in the timeline, iMovie will default to treating it as a clip that stays on screen for 4 seconds with a Ken Burns effect on it - an effect that starts when the photo is zoomed in, slowly shrinking over 4 seconds .
To adjust how long a photo stays on screen, hover your pointer over the right side of the photo clip until it looks like two arrows pointing away from each other, then click and drag the photo. Drag the photo to the right to keep it on screen longer, or to the left to make it shorter.
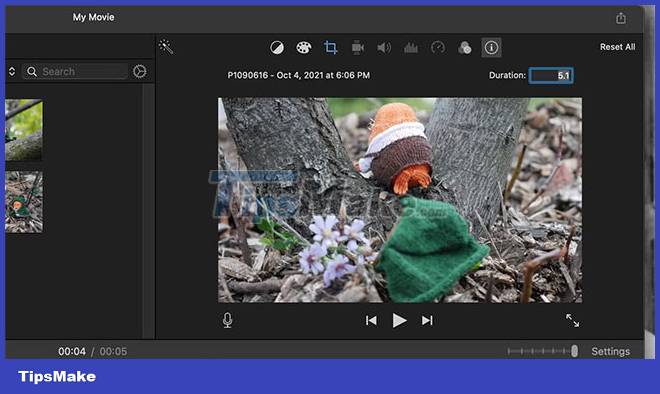
You can also set the photo duration by clicking on the photo clip and tapping the i icon above the media player window. You can put the Duration textbox in it for as many seconds as you want. It is the time the image is displayed on the screen.

To remove the Ken Burns effect on a photo and replace it with a static effect, double-click the photo clip or click it once and then click the Crop icon above the media player.
Set the Style there to Fit or Crop to Fill to make the image still while the slideshow plays. Selecting Crop to Fill will allow you to decide the size of the images in the slideshow.
You can also keep the effect set to Ken Burns and adjust the Start and End boxes to decide how to zoom in or out of the image while the slideshow is playing.

Once you've decided on the duration and cropping style for a photo clip, click and drag the other photos into the timeline after the first one and decide on their duration and crop type.
To change the order of photos in a presentation, simply click and drag the photo clips forward or backward in the timeline. To delete a photo from the timeline, click it and press the Backspace key on your keyboard. Or Control-click it and choose Delete.

To adjust the view on your timeline to make adding and adjusting clips easier, click and drag the slider at the top right of the timeline to zoom in or out.
Step 4. Add titles and transitions to your iMovie slideshow
Once the photos are in order, you can add any text you want to your presentation by adding a title. Click the Titles tab and choose the format you want your text to have. For a standalone title text tag, try the Slide title type. To display text on an image, you can try Standard Lower Third .
Add a standalone title tag by clicking and dragging the title type to the timeline to the right or left of the image, just like you would with another clip. To add text to the top of the image, click and drag the title type to the top of the photo clip in the timeline.

Once the title or text is added, double-click the title or text and click the T icon above the media player. This will allow you to enter whatever text you want on the title. You can also adjust the font here, decide its size and orientation, and choose a color for the text by double-clicking the white box in the T menu .
You can change the duration of titles and delete them the same way you would with photos in the timeline.
Adding transitions between your photos and titles is also very easy. Click the Transitions tab to see all of iMovie's options, and click and drag them between clips to clip the photo and title with animation and back-and-forth motion.

Step 5. Make slideshow more attractive by adding music
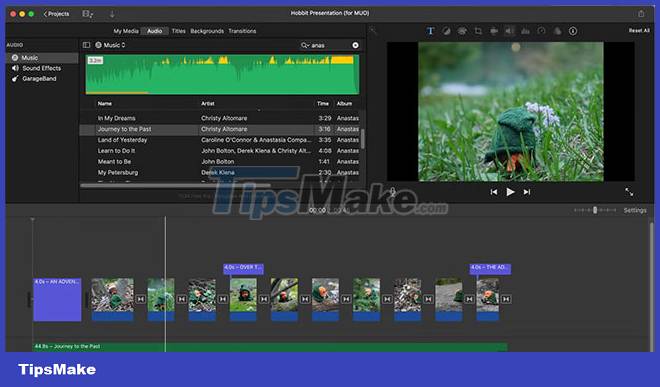
To add music to the iMovie slideshow, click the Audio tab. The Apple Music library will be displayed. You can click and drag songs from here to the timeline to play them during the presentation.

Audio clips can be shortened and lengthened the way the article instructed you to do with the photo clips above.
You can add audio clips from iMovie's Sound Effects library and access the GarageBand files you've created. Want more audio options? Find new songs in Apple Music or download new music files in Music or GarageBand to use in slideshows.
To record your own voice for a presentation, click the microphone icon below the media player, then tap the red Start Recording button to start recording your voice into the computer's internal microphone (or an external microphone you plug in). Press Done when you're done.

Step 6. Export and play iMovie slideshow
After trying out your slideshow and being happy with it, it's time to export it! Go to File > Share > File and give your project a name. Click Next and decide where to save your project on your computer.

Click Save and your slideshow will be exported as an MP4 file in just a few minutes. Don't forget to save your iMovie project, in case you have to export it again later!
iMovie is a great program for creating photo slideshows on your Mac. It allows you to make presentations like videos, instead of regular slides. This can give you more creative freedom with your presentation, as well as give you more audio options.
Hope this guide helps you make your next slideshow even more interesting. Keep using iMovie for other projects - it's a great program for more than just presentations.


 Configuration steps for multiple Users to remotely connect to Windows Server 2016 using Remote Desktop
  How to Shut Down or Restart Another Computer Using CMD
  3 ways to turn off Your Windows license will expire soon notification on windows
  3 ways to remove a Windows 10 computer from a domain that no longer exists
  How to Convert Excel to Dat
  Fix the error of not being able to convert PostScript files on the printer