Table of Contents
Run slideshows with Windows Photos
This guide explains how to view Photos as a Slide Show on Windows 10, with clear steps, practical tips, and important checks before you begin.
The first way, you open the photo folder, press Ctrl + A to select all photos, or hold Shift and select each photo you want to show.

On the menu bar, select the Picture Tools tab, then click Slide Show .
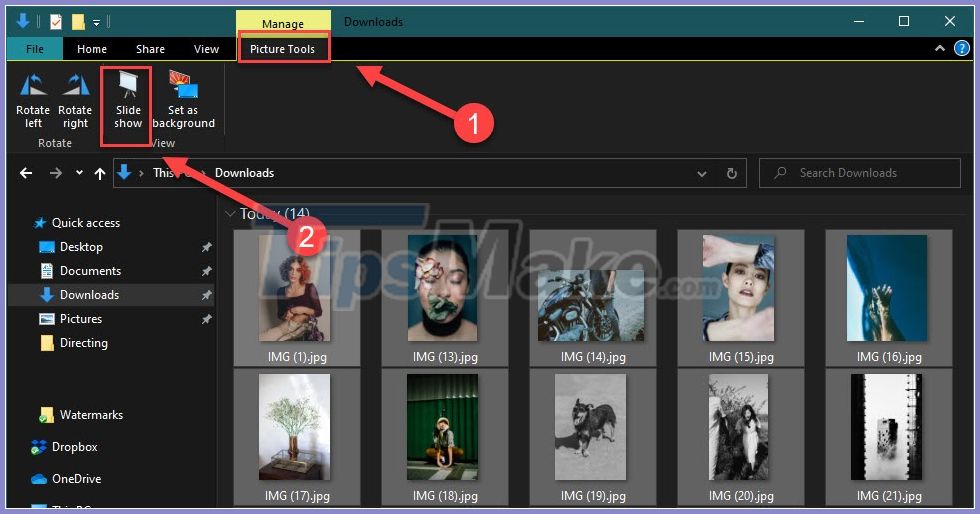
All photos you choose will be viewed in full screen and appear one by one. You can right-click and for the following options:
- Pause: Pause playback, now you can automatically control the transition with the arrow keys.
- Loop: Images automatically move continuously.
- Slide Show Speed: Transfer speed between images: Slow, Medium, Fast.

Option 2, you can enable Slideshow feature directly from photos:
First, open the photo in Photos.

Click the 3-dot icon, then select Slideshow .

For older versions of Windows, if you don't have Photos as the default photo viewer, you can also run SlideShow on Windows apps like Windows Photo Viewer, Photo Gallery, and Picasa.
Use the Icecream slideshow generator
When you want to create a Slideshow for sharing on Facebook or Instagram, the slideshow must be converted to a movie format. IceCream Slideshow Maker is the tool to help you do this, it is compatible with all Windows versions.
First, download and install the IceCream Slideshow Maker app. At the main interface of the software, select Add files to start your photostory .
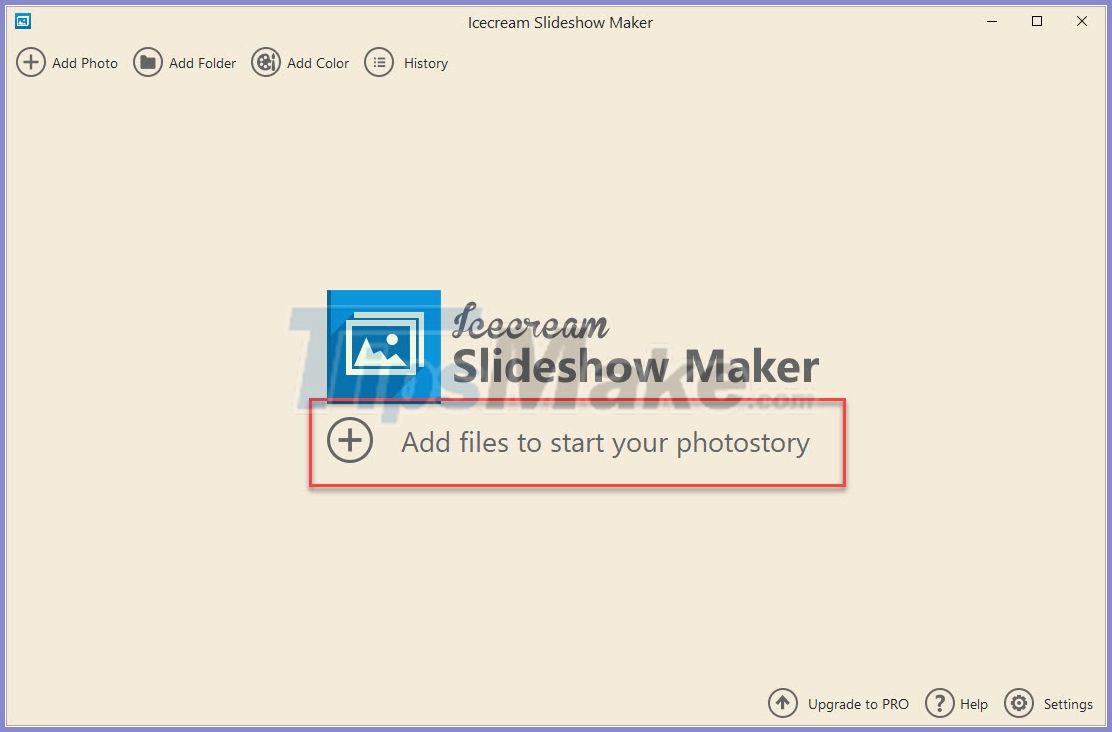
Select the photos you want to show, then Open .

In the free version, you can only add up to 10 photos at a time to create a slideshow video. Once you've added the photos, you'll have the following basic tweaks:
- Time : You click on the time column next to each image to set the playback time as desired:

- Transition : Image transitions.
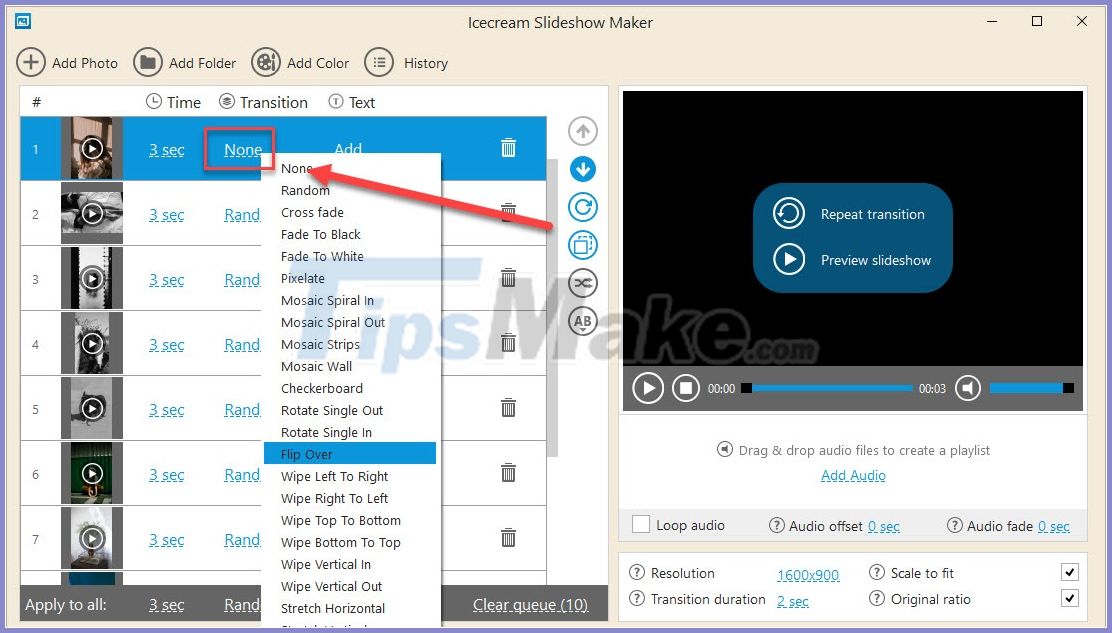
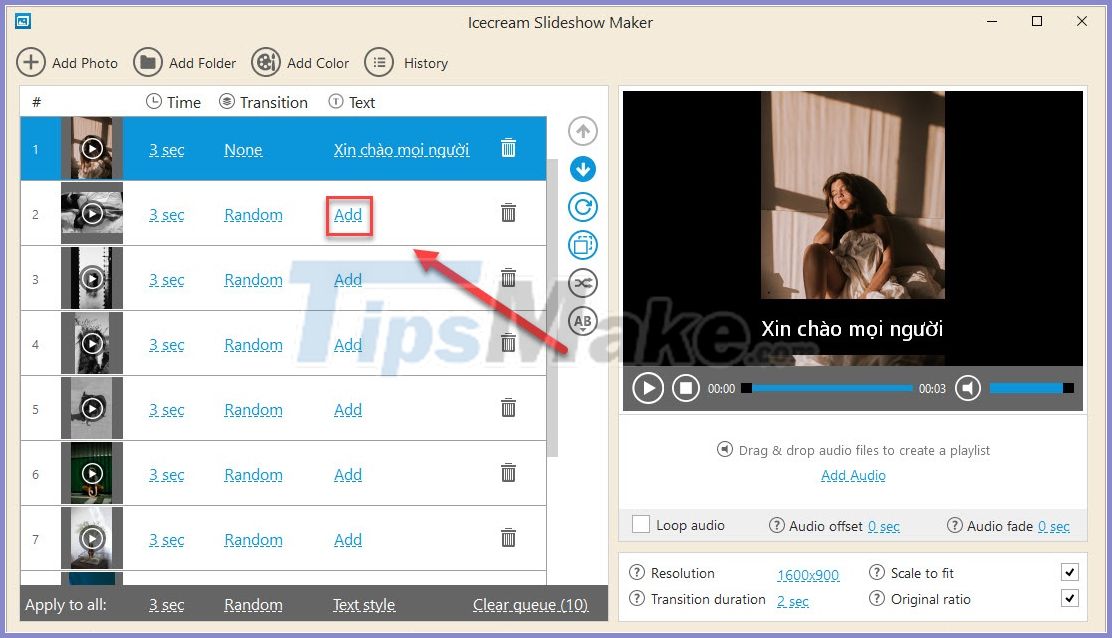
- Text : Subtitles are placed in each image
- Add Audio : Add background music to your video
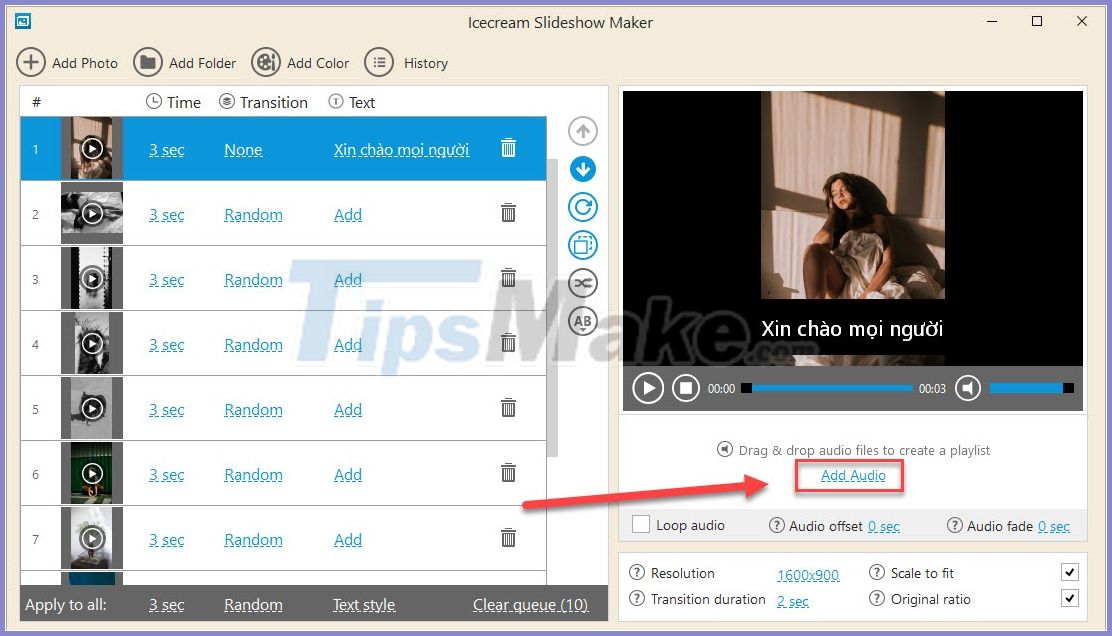
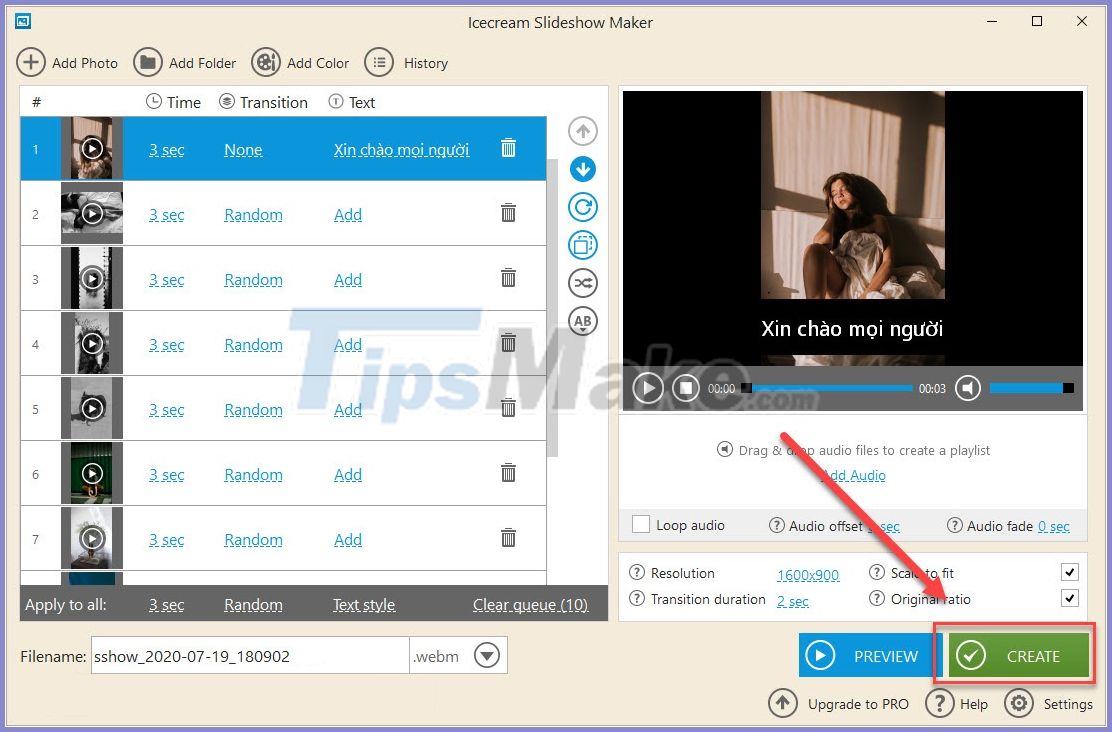
After completing all the settings for the Slideshow, click Create to create the video.
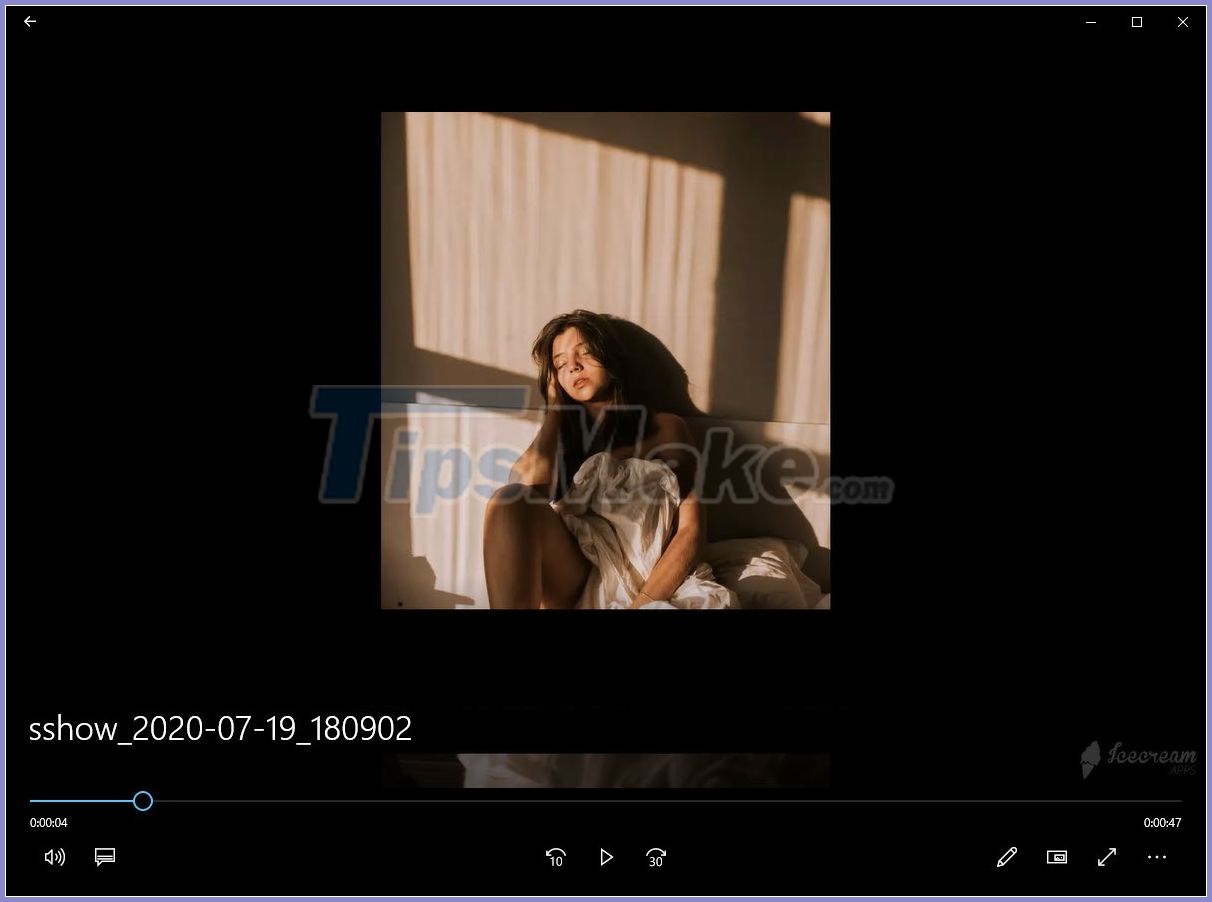
Wait for the export file to finish, you will have your own Slideshow video.
So, you already know how to view photos as a slide show on a computer. This method will help viewers save time and have a pleasant experience when viewing photos. If you know any other way to view your photos as a slideshow, please share them in the comments!
FAQ
What should I know about View Photos as a Slide Show on Windows 10?
Focus on the key features, requirements, limitations, and practical use cases explained in this guide.
How do I get the best results with View Photos as a Slide Show on Windows 10?
Follow the recommended steps, use current software or information, confirm compatibility, and review settings before major changes.
Are there any risks or limitations?
Potential limitations depend on compatibility, data quality, cost, privacy, support, and how the product or method is used.
Related Articles
 Learn About Slide Master View in PowerPoint 201611 minutes read
 PowerPoint 2016: Learn About Slide Master View: What You Need to Know12 minutes read
 Open Photos App: How to Open the Photos App on Windows 105 minutes read
 Presenting Slide Shows in PowerPoint 20169 minutes read
 Get Back Windows Photo Viewer on Windows 10 to Help You See8 minutes read
 Increase // Decrease the Speed of Slide Show4 minutes read
Reader Comments 0
Sign in with email or Google to join the discussion.