Table of Contents
This guide provides a clear overview of create photo slideshow, including 1. How to Set Up a Desktop Slideshow, 2. How to Set Up Slideshow Screensaver. Use it to understand the topic, compare the available options, and make a more informed decision.
1. How to Set Up a Desktop Slideshow
Windows 11 includes a feature that allows you to set up a slideshow on the desktop. When enabled, the desktop displays images in a selected folder for a specified time. This is a relatively basic slideshow feature, but you can still display all your favorite photos on your PC screen with it. Here's how to set up an image slideshow on the desktop in Windows 11:
1. Click anywhere on the desktop with the right mouse button to select Personalize .
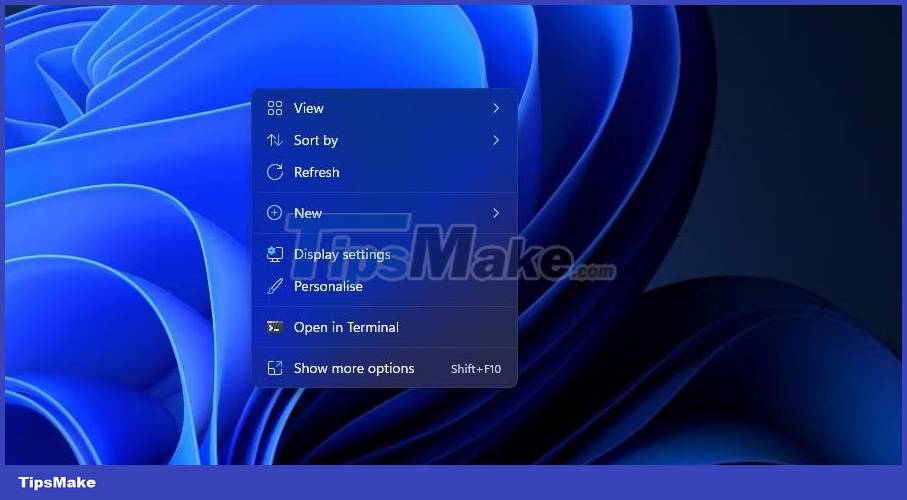
2. Select Background in Settings.
3. Double-click Personalize your background to expand its settings.
4. Select the Slideshow option in the Personalize your background drop-down menu.

5. Click Browse to select the folder containing the images for the slideshow.
6. Select the Choose this folder option.
7. Then, select the image display time interval on the Change picture every drop-down menu.
2. How to Set Up Slideshow Screensaver
If you want to see your favorite images without the overlapping desktop icons, set up a slideshow screensaver instead. Windows 11 still includes screensavers, even if some think screensavers are no longer relevant.
This is how you can set up slideshow screensavers in Windows 11:
1. Type screensavers in the Start menu search text box.
2. Click Change screensaver in the search results.
3. Select the Photos option in the drop-down menu shown directly below.

4. Adjust the Wait option to configure how long screensavers appear.
5. Press the Settings button to display other options.

6. Click the Browse button to select an image.
7. Select a folder including the photos you want to display in the slideshow and click OK to confirm.
8. Select an option on the Slide show speed drop-down menu.
9. Click the Save > Apply option.
3. How to Set Up a Slideshow with the Photos App
Photos is the default photo editing and viewing application for Windows 11. That application includes a Slideshow option that you can choose to view a collection of images. You can view a slideshow in Photos with that option as follows:
1. Click the Pinned Photos app on the Windows 11 Start menu.
2. Select the Albums tab.

3. Click New album to select images in Photos to include in the slideshow. You can click the Import > From folder option to select images that you can't find in the Photos app.
4. Press the Create button to set up the album.

5. Select the album you just set up in Photos.
6. Click the Slideshow button to view your photo presentation.

4. How to Set Up Slideshow with Video Editor
Video Editor is an extension for Photos. That application allows users to set up photo video slideshow with many different themes and background music. Here are the steps to create a slideshow clip of your favorite snapshots in Video Editor:
1. Click in the search box on the Windows 11 Start menu.
2. Type Video Editor in the search utility.
3. Select Video Editor to open that tab in Photos.
4. Click the New video project button.

5. Enter a title for the clip and click the OK option.
6. Click + Add > From this PC to select some images for the slideshow. Then select Open to add them.
7. Drag the image thumbnails from the project library onto the slides at the bottom of the My Slideshow tab.

8. Tick all the checkboxes of the slide and right-click a slide to select Duration . Then enter a value to set how long the slideshow shows all the images before changing.

9. You can add captions to specific images by right-clicking on them and selecting the Edit > Text option. Enter a caption in the text box, select a font, and click Done .

10. To add some sound, click the Background music option. Then, select an audio scheme and press the Done button.
11. Click the three-dot button at the top right of the Video Editor to select Themes. Select a theme to set for the slideshow and click Done .

12. Click the Finish video button.
13. Select an option on the Video quality drop-down menu and click the Export option.
5. How to Set Up a Slideshow with Google Photos
Google Photos is a cloud storage web app for storing images that you can use in Windows 11's Edge browser. Anyone with a Google account can save snapshots there. Then follow these steps to set up a slideshow in Google Photos:
1. Open Google Photos in Edge or another browser.
2. If you haven't saved the image there, click Upload > Computer in Google Photos. Press Ctrl key to select some photos and click Open option.
3. Select Albums on the left side of Google Photos.
4. Click the Create album option.
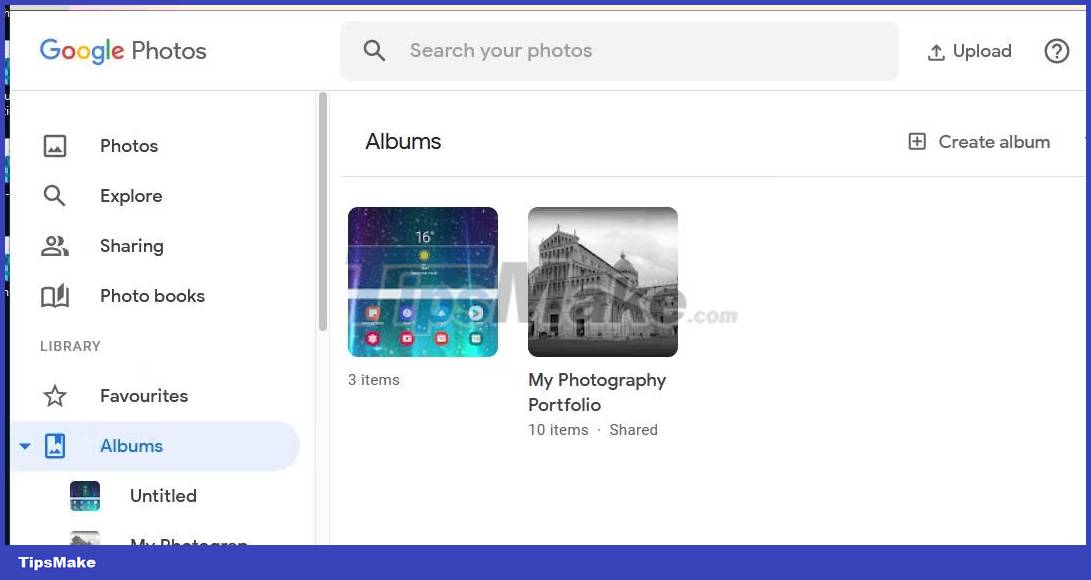
5. Enter the album title and press the Add photos button.
6. Select some photos and click the Done button.
7. Select your new album in Google Photos.
8. Click the More options button (three dots) to select Slideshow.

9. Your album slideshow will now play in full screen mode. Click the left and right arrows to scroll through the image.
6. How to Set Up a Slideshow with Google Slides
Slide is a G Suite presentation web app that you can also use with a Google account. That app includes more extensive options for setting up photo slideshows with different layouts, transitions, animations, and captions than Google Photos. Here are the steps to set up a basic image slideshow with Slides:
1. Open the Google Slides home page.
2. Click the Go to Slides button.
3. Then select Blank presentation option.
4. Enter a title in the Untitled presentation box.
5. Click the small down arrow on the New Slide button.

6. Select Blank to add a blank slide.
7. Repeat steps 5 and 6 to add as many slides as you need for your photo slideshow.
8. Then, select a blank slide to add the image to and click Insert .
9. Select Image > Upload from computer on the menu.

10. Select the photo you want to add to the slide and select the Open option.
11. Drag the outlines of the image with the pointer to resize it so that the image fills the entire slide.

12. Repeat steps 6 through 9 to add photos to all blank slides in your slideshow.
13. To add a slideshow transition, click the Transition button. Then, select a transition on the drop-down menu and select the Apply to all slides option.

14. You can also add captions to the slide by clicking the Text box option. Place the box at the bottom or top of the slide and enter a photo description in it.

15. Click the Slideshow button to view the presentation.
16. Your presentation is automatically saved in Slides. However, you can save it to your hard drive by clicking File > Download and choosing the Microsoft PowerPoint file format (or alternative option).
Slides has more audio, formatting, text, shape, and theme options available. You can also include multiple images in one slide by choosing different layout options.
7. How to Set Up Slideshow with Windows Media Player
Windows Media Player is old software with which you can play music, videos, and view pictures. That software still comes with Windows 11, and you can set up a basic image slideshow with WMP as it catalogs the photos in your user folder. Here's how you can create a photo slideshow with Windows Media Player:
1. First, make sure that the user Pictures folder includes the pictures you want in the slideshow. You can move pictures into the Pictures folder by dragging and dropping them from folder to folder in File Explorer.
2. Type Windows Media Player in the Start menu search box.
3. Select Windows Media Player for the software's window to appear.
4. Click the Create playlist button.
5. Enter Image Slideshow in the playlist text box.
6. Then click the little arrow next to Playlist to expand that category.
7. Click Pictures on the left side of the Windows Media Player window.

8. Hold down the Ctrl key and select an image to include in the slideshow.
9. Then hold down the left mouse button to drag the image selection to the title of the playlist in the Windows Media Player sidebar.
10. Release the left mouse button when you see the Add to + tooltip.

Now, select the Image Slideshow playlist in Windows Media Player, which will include the image files you added. Click the Play button to start the slideshow. Then, Windows Media Player will display a basic slideshow playing through the images in it with an interval of about 5 seconds. If WMP doesn't automatically show the slideshow, click the Switch to Now Playing option.

It's almost unnecessary to install third-party slideshow software in Windows 11, as you can show off your favorite photos using the methods above. The built-in slideshow screensaver and desktop features of Windows 11 as well as Google Photos are suitable for displaying basic image collections. You can set up more advanced photo slideshows that incorporate various transitions, background music, audio narration, and text captions using Video Editor and Google Sheets.
Conclusion
Understanding Create Photo Slideshow makes it easier to compare options, avoid common mistakes, and apply the information in this guide more effectively. Review the relevant requirements before making changes or choosing a solution.
FAQ
What is Create Photo Slideshow?
How to Set Up a Desktop Slideshow Windows 11 includes a feature that allows you to set up a slideshow on the desktop.
Why is Create Photo Slideshow important?
Understanding Create Photo Slideshow helps you evaluate features, compatibility, performance, and potential limitations before you choose a product or follow a procedure.
What should you consider when using or choosing Create Photo Slideshow?
Consider your specific goal, compatibility requirements, available features, cost, security, and the practical recommendations described in this guide.
Related Articles
 Instructions for Running Photo Slideshow from File Explorer on4 minutes read
 Software to Create Photo Slideshows (Create Photo Slideshow) Proshow4 minutes read
 How to Create Photo Slideshow in Imovie11 minutes read
 How to Create Slideshow on TikTok5 minutes read
 How to Create a Virtual Drive (Virtual Hard Disk) on Windows 10 Without4 minutes read
 How to Compress and Decompress Files Without Installing Additional Software3 minutes read
Reader Comments 0
Sign in with email or Google to join the discussion.