Instructions for creating tattoos on people in Adobe Photoshop
In the following article, we will show you how to create tattoos on photos using Adobe Photoshop software. As you know, graphics can help us a lot: from sketching ideas, web design, games, beautiful photo editing ... and creating tattoos is one of those things.
Table of Contents
In the following article, we will show you how to create tattoos on photos using Adobe Photoshop software. As you know, graphics can help us a lot: from sketching ideas, web design, games, beautiful photo editing . and creating tattoos is one of those things. Body tattoos can tell the character, character of the character, or just a fun joke. So how do self-made tattoos look real? Please read the tutorial below of TipsMake.com.
- Download Adobe Photoshop CS2 - free copyright
- Download Adobe Photoshop CS6 - new version with many outstanding features
Prepare:
Before we start, we need to have the original character image for tattooing, so choose a photo that contains body parts containing tattoos such as arms, abdomen, chest . Tattoos should be taken as *. PNG for convenience during transplantation does not need to delete the background image. As an example here:
Collage:

Tattoo photos:

Steps to take:
For brevity, I will temporarily call the original image A, tattoo image B. Open photos A and B in Photoshop, then drag and drop photos B into A:

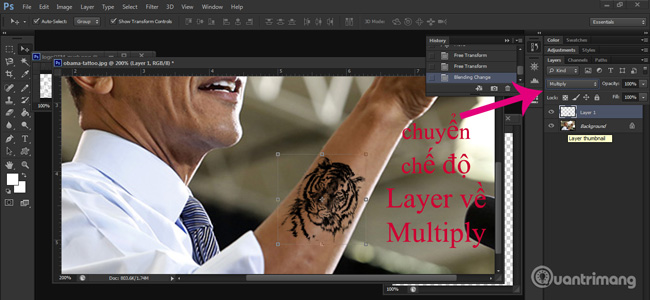
Next, select the Layer of image B and press Ctrl + T to rotate and collapse the tattoo to the required position (note the Shift button to shrink the image to keep the width-to-width ratio), and switch the mode of Image layer B into Multiply. Here I am going to show the tattoo above the character's arm:
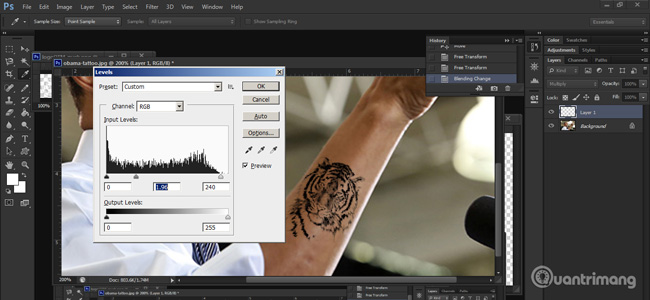
Our temporary result will look like the picture above, but it seems that the color of the tattoo is not very realistic. No need to worry, still select Photo B layer and press Ctrl + L to open the dark, light mode control panel:
This depends on the skill and the aesthetic of each different person. And this is my result:
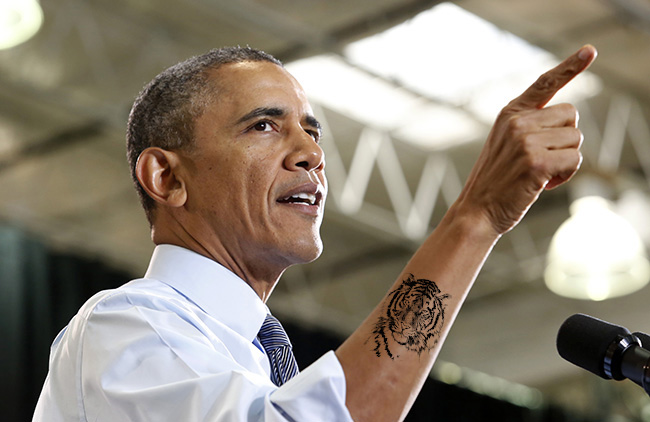
The picture looks cool and cool right?Good luck!
Was this article helpful?
Your feedback helps us improve.
Related Articles
 How to delete tattoos in Photoshop3 minutes read
 Instructions for using Photoshop for newbies18 minutes read
 Link download Adobe Photoshop CC8 minutes read
 How to make realistic tattoo art with Adobe Photoshop2 minutes read
 How to create stunning 3D pop-out effects in Photoshop8 minutes read
 Instructions for using Photoshop CS5 to edit photos in full set4 minutes read
Reader Comments 0
Sign in with email or Google to join the discussion.