Table of Contents
This guide explains how to create an animation on Android using du gif maker using a clear, step-by-step process. It also highlights the settings and checks that can help you avoid common errors.
The need to create animations on today's mobile devices is quite common, especially transferring the video available on the device to an animation. Therefore, it is not too difficult for you to find a GIF creation application on Android or iOS store system.
In the following article, the Network Administrator will introduce you to an Android app for creating an animation, called DU GIF Maker. the app is capable of creating GIF images from videos, images available on the device, or recording actions on the screen to create an animation. Once created, you can select multiple applications that DU GIF Maker supports to share your artwork. Detailed steps for using DU GIF Maker to create animations on Android will be in the article below.
1. Create GIF images on Android with DU GIF Maker
- Download the DU GIF Maker Android app
Step 1
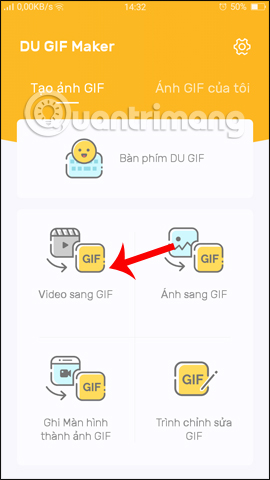
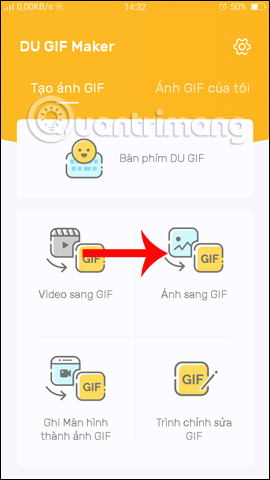
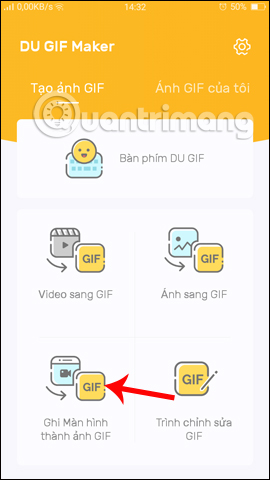
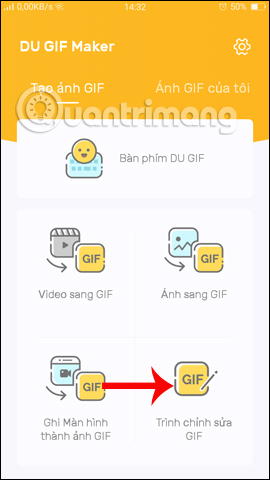
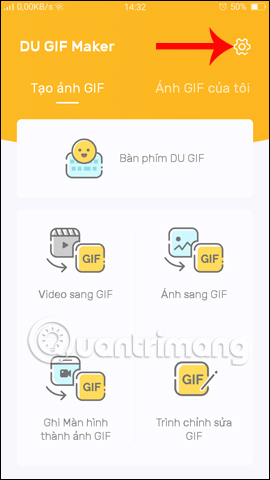
First of all, we will click the link above to then download the app to the device. Soon, you will be transferred to the main interface of the app. In the first interface, Creating gif images, you will find the app supports 3 different ways of making animations, including video to GIF, Image to GIF, Screen Recording to GIF.
Start by click Video to GIF To create animation from the video available on the system. Then, select the video available on the system to create the animation.

Step 2
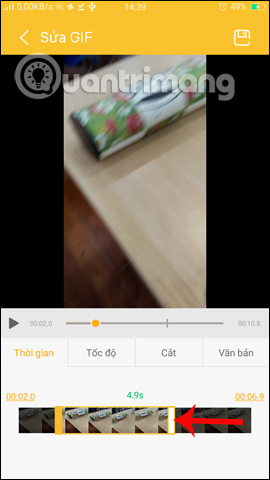
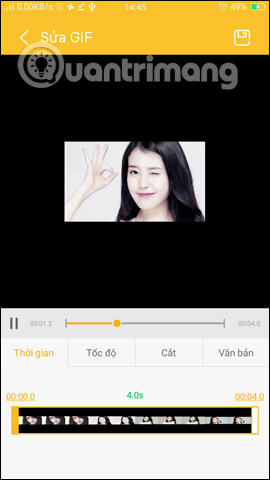
Switch to Edit GIF interface. Here, the app provides users with a number of animation options, including Time, Speed, Frame Cut, Text.
First click Time . We will see The Timeline timeline At the bottom of the interface. To adjust the video you want to create an animation, drag 2 white and yellow vertical bars at the 2 ends of the video to the section you want to select.
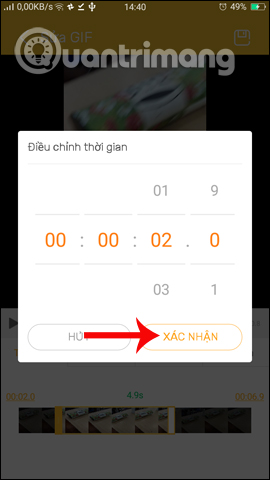
Or you can Click the number of times At the beginning and end of the video to enter the specific start and end time for the animation. On the app, you can create animations about 1 minute. Click Confirm To save the new entry time.
Step 3
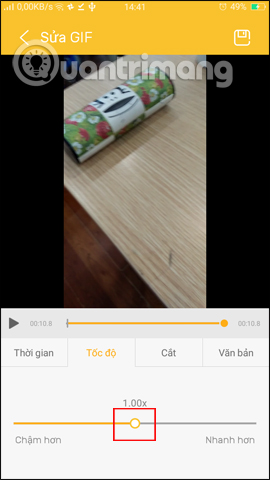
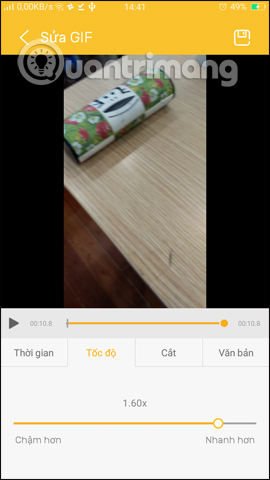
Next click Speed To adjust the motion speed for GIF images. Drag The white circle button in the horizontal bar To the right or left to change the speed faster or slower for the animation.
Step 4
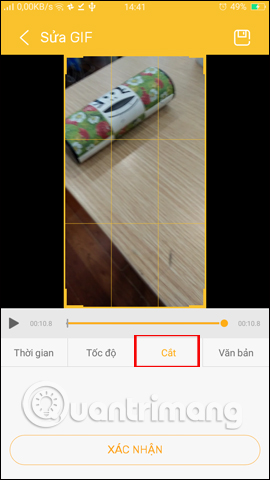
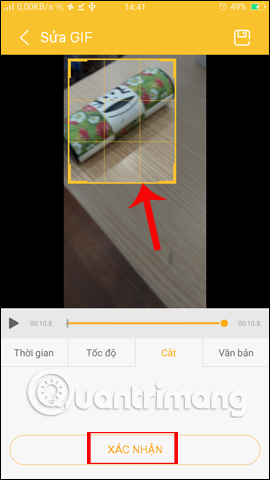
The Cut interface will allow users to crop video frames for animation. After cutting, click Confirm Below to save the new video size.
Step 5
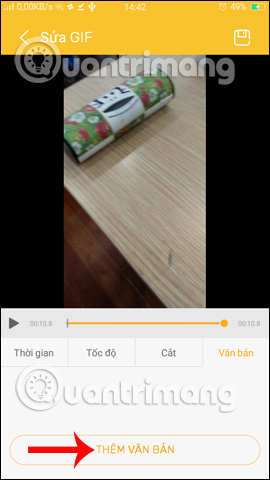
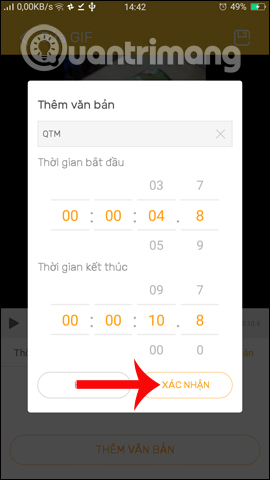
Next, when needed to add content to the GIF image, click Add text At the Text item interface. Switch to the new interface, enter the content at the horizontal bar at the top of the interface. Then enter the time to appear and end the text to insert.
Finally click Confirm To save.
Step 6
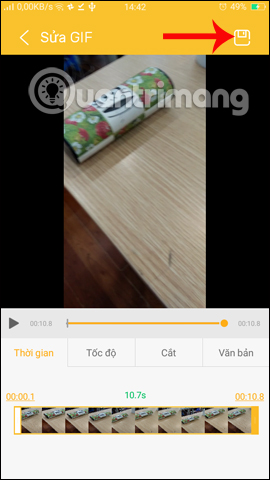
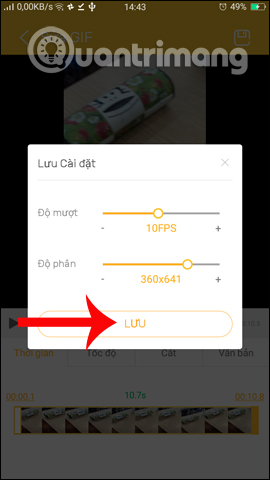
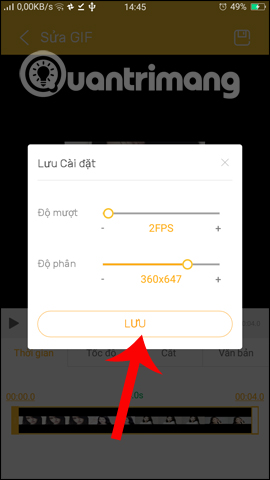
After everything has been set up, press The floppy disk icon In the top right corner of the interface. The Save settings Interface will add the Smoothness (FPS) and Resolution settings for the animation. Click Save Below to then save the settings.
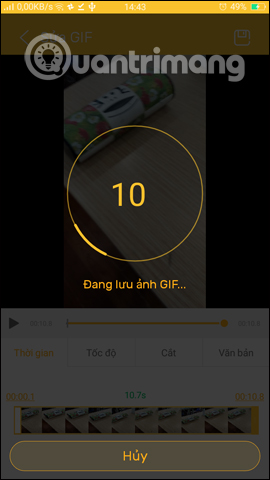
Shortly thereafter, DU GIF Maker will then create and save animation converted from video on the device.
Step 7
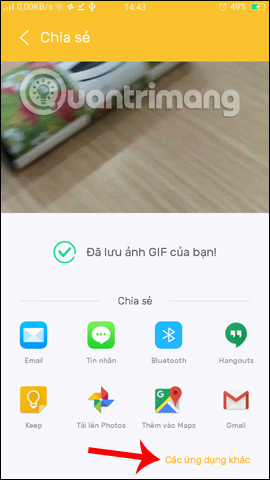
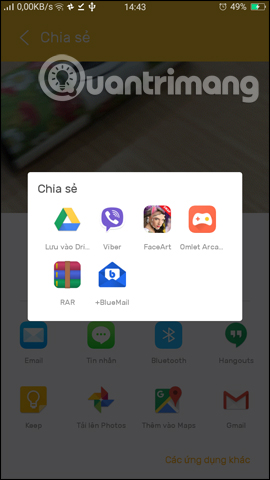
After creating the photo, the sharing interface appears immediately on the social network accounts. Click Other applications To open more applications that want to share animations on the device.
Step 8
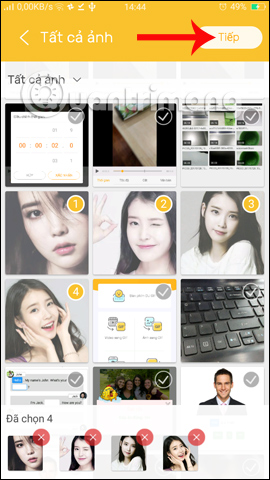
Return to the main interface of DU GIF Maker. As mentioned, the app also supports creating animations from photos or screen recording. click Photo to GIF . Then, Select the image Available on the device to create an animation. Click Next In the top right corner
Step 9
Next you will also be transferred to the animation editing interface, do the same as when making GIF images from videos according to the above instructions. Finally, Click Save To create an animation from the image available.
Step 10
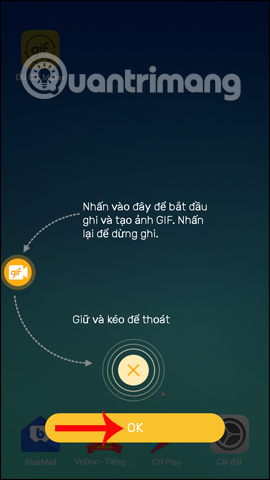
When needed to record the screen operation and create an animation, press Record screen to GIF . This feature is only supported on Android 5.0 and above and the maximum recording time is 30 seconds.
Click OK To use the feature.
Step 11
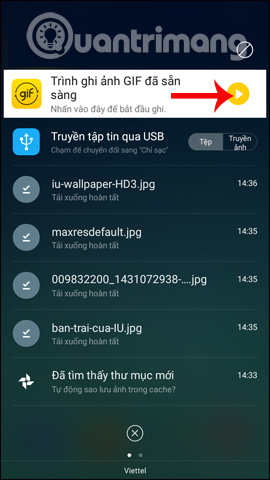
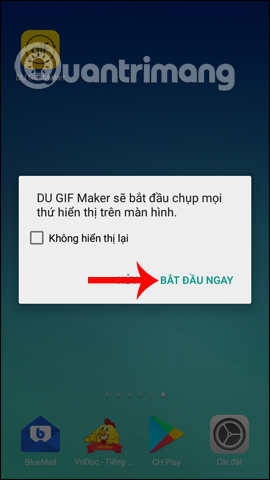
Then, you swipe the notification interface from the top down to see the message That the GIF Recorder Is ready, click it to record the screen. Next, click Start now To return to the screen.
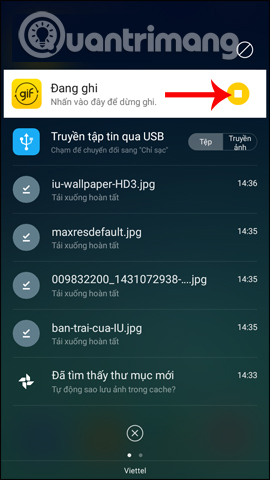
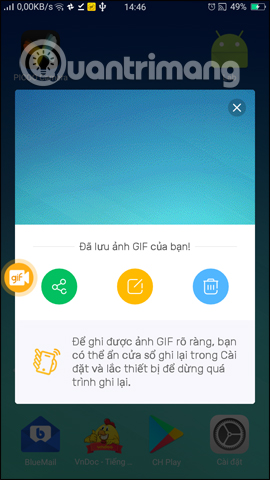
To stop recording, also swipe the notification from the screen down. click Notification To stop recording . The interface will immediately display options including sharing photos, editing images or deleting recorded images.
2. GIF editor and manager
Step 1
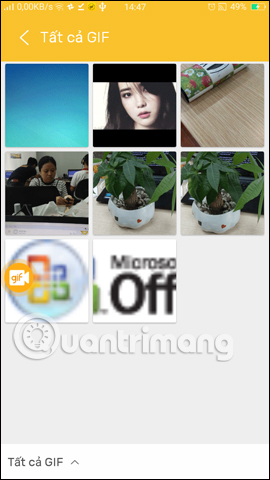
Go back to the app interface, click the GIF Editor Item. Here you will see all GIF images created by the app or device. click an image to edit.
Step 2
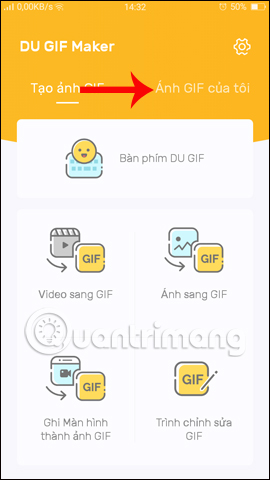
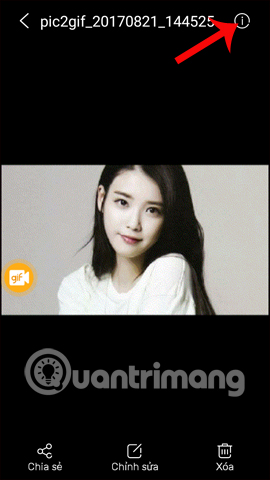
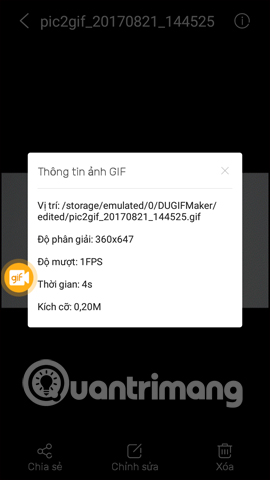
To manage the animation, click the My GIF Item on the main screen. When clicking on any image, the image will be opened in the app's viewer. Here, we can share images, edit or delete photos if desired. click The i icon To view the photo's information.
Step 3
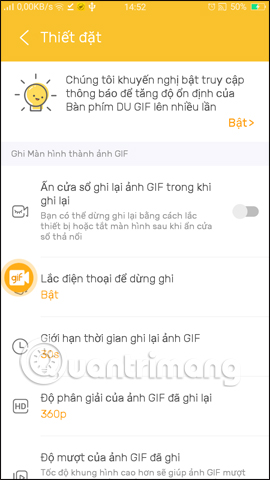
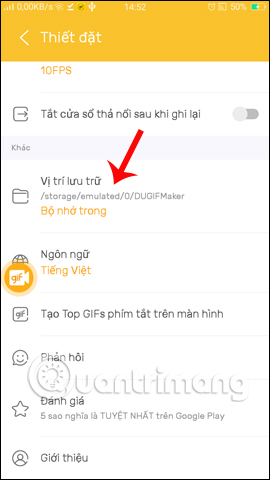
Click the Alias icon To move to the settings interface for the app. Users will see the setting when recording screen including, toggle the stop mode by shaking the phone, the recording time, resolution, smoothness, automatically close the dial button when recording is finished. Especially The location for saving photos Created with DU GIF Maker.
Step 4
When you access the path of the location of the saved image in The DUGIFMaker folder , there will be 4 different folders.
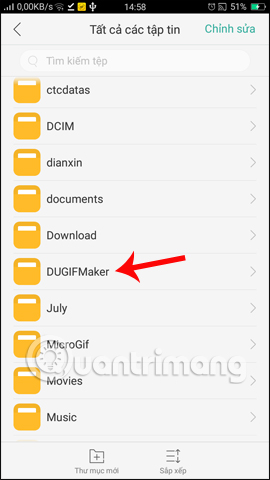
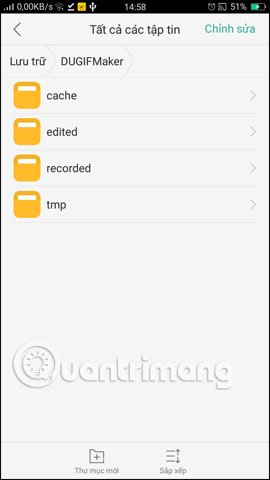
Any animation Created from screen recording Will be saved in The Record folder . New animations From videos and photos Are saved in The Edited folder . We can get animations from these folders.
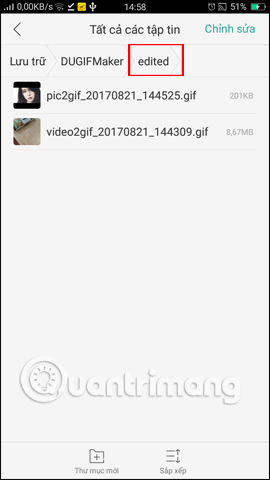
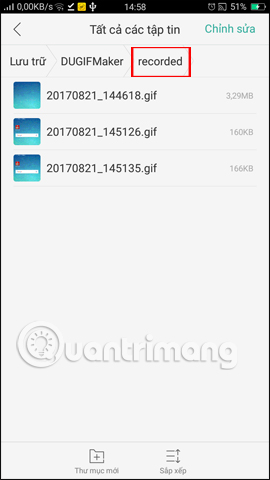
So you get the animation on your Android device using the DU GIF Maker application. We can choose to convert the video into an animation, or record the screen operation to create an animation. Besides, the app also provides many customizations for GIFs. Photos will not be watermarked, which some other applications do not have.
I wish you all success!
FAQ
What should I prepare before I create an animation on Android using du gif maker?
Review the requirements in the guide, confirm that your device or software is compatible, and save important work before changing settings related to create an animation on Android using du gif maker.
Why might create an animation on Android using du gif maker not work as expected?
The most common causes are incompatible versions, missing permissions, incorrect settings, or an interrupted internet connection. Recheck each step and restart the app or device when appropriate.
Can beginners follow these create an animation on Android using du gif maker steps?
Yes. Follow the steps in order, avoid skipping confirmation screens, and compare your interface with the screenshots because labels may differ slightly between versions.
Related Articles
 How to Create GIF Images on Android with Momento - GIF Maker5 minutes read
 How to Create Ringtones on Android as You Like with Ringtone Maker6 minutes read
 What Is Animation: Animation Animation Effects in CSS9 minutes read
 How to Copy and Insert Animated Gifs?: GIF Animation4 minutes read
 Click: How to Make an Animation Using Powerpoint and Movie Maker4 minutes read
 Download the Video Making Software, Create Animiz Animation for $4 minutes read
Reader Comments 0
Sign in with email or Google to join the discussion.