How to combine Motion Paths animation effects in PowerPoint
Motion Paths in PowerPoint are effects that move along a line and we can combine many types of lines together.
Table of Contents
Motion effects in PowerPoint are always essential and important content for each presentation slide, making the content more artistic and professional. And besides the simple motion effects, many people choose to use Motion Paths motion effects in PowerPoint.
Motion Paths are motion effects that follow a drawing line. The user then draws any line in the effect frame of Motion Paths and the object moves along that line. Users can combine multiple Motion Paths for a moving object on a slide, but need to know how to create appropriate moving paths. The following article will show you how to combine Motion Paths motion effects in PowerPoint.
- How to flip, rotate images on PowerPoint
- How to create a countdown timer on PowerPoint
- How to make PowerPoint fireworks effect
- How to create a crossword game on PowerPoint
Guide to combining Motion Paths PowerPoint
Step 1:
Users inserting objects into slides , can insert images into PowerPoint for practice first.

Step 2:
Click Next and tab Animations on the toolbar and select Add Animation below to add motion effects to the object.
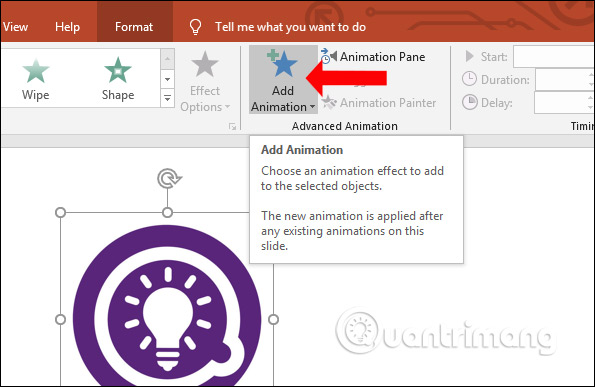
Show list of motion effect types below. Scroll down to find Motion Paths . At this frame, users will see some lines of lines that move like straight lines, arcs (Arcs), . If you want to add other types of lines, click More Motion Paths .

In the Add Motion Path interface, you will see a lot of different lines of motion. Click on the type of motion you want to use and click OK below.

Step 3:
The results in the PowerPoint slide interface will display the motion path exactly to the type of motion effect you have selected. The number 1 at the side shows for an effect being used on the image. You can click Preview to test the object.

In case the motion path doesn't go in the right direction, you can click on the moving frame and stretch or shrink if desired.

Step 4:
Click on the Animations tab and then in the Start menu, click on After Previous .
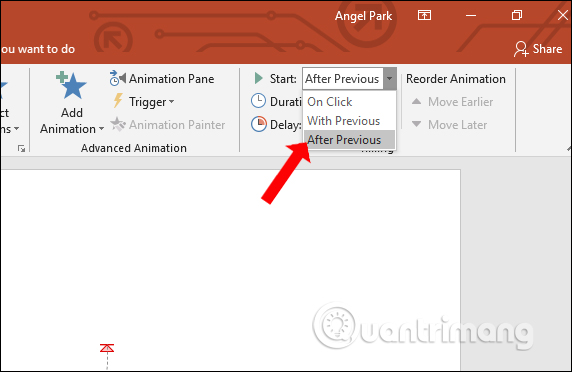
Go back to the Animations tab and then choose another type of motion associated with the first motion you selected.

As a result, users will see the second type of motion added to the image with its moving path.

Step 5:
Next, users need to adjust the motion lines so that the image moves in a successive way without having to go back.
First we need to click on the second motion line , then drag the blue point through the red dot of the first arrow .

Then click on the red dot of the second moving line and pull down the last point of the moving line . This adjustment step users need to do exactly to move the image to the next one.

Finally press the Preview button to check whether the motion of the image is correct or not. The resulting image moves as shown with the gif image below.
Like normal animation effects, with Motion Paths we also easily combine motion patterns with each other. However, adjusting the motion path is very important to create a seamless movement for images or other objects.
I wish you all success!
Was this article helpful?
Your feedback helps us improve.
Related Articles
 Animation animation effects in CSS8 minutes read
 How to create motion effects on PowerPoint4 minutes read
 Save now how to fix hidden Animations in PowerPoint effectively4 minutes read
 Create and use animation effects in PowerPoint2 minutes read
 MS PowerPoint 2007 - Lesson 10: Slide presentation effects7 minutes read
 How to create handwritting PowerPoint effects8 minutes read
Reader Comments 0
Sign in with email or Google to join the discussion.