How to create a crossword game on PowerPoint
Lectures, presentations created on PowerPoin are always added with PowerPoint effects to make it more interesting for viewers. And in addition to creating presentations, users can create crossword right on PowerPoint.
The crossword game will add moves when displaying questions, or when displaying answers. So the game will be more lively, increase the interest for students when participating in the lecture. The following article will guide you how to create a crossword game on PowerPoint.
- How to create motion effects on PowerPoint
- How to insert text into images in PowerPoint
- Demonstrate 3D diagram in PowerPoint
Instructions for creating crossword games on PowerPoint
Step 1:
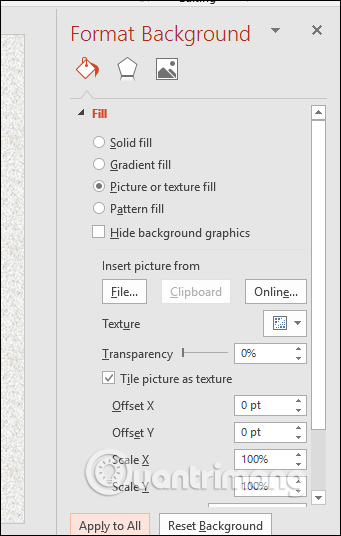
Open PowerPoint and delete all the details displayed on the slide. Right-click on the slide and choose Format Background .

Step 2:
Display the background interface on the right side of the screen. Here we can fill the background for the slide at the Fill section. Click Apply to All to apply the background to all slides.
In case you leave the white background, you can skip this step.

Step 3:
Click Insert to select WordArt to create an artistic font for the slide title, or select Insert and click Text Box to draw the text box on the slide.

Enter text in the frame then select the font, font size, and font style for the subject line.

Step 4:
Next, select the Animation to make the effect of the slide title. In the Emphasis section, select the Underline effect or an effect on this list.

To adjust the running text effect at the end of the slideshow, also at the Animation tab the user clicks on the Animation Pane section.

Looking down at the slide to the right will display the name of the Text box , click the drop-down arrow and select Timing .

A dialog box appears with the effect that the user has selected. Click on the Timing tab and in the Start section we will select With Previous , the Duration section selects the duration of the effect, the Repeat section selects Until End of Slide then press OK to close the dialog box.
If you want to add another Text box under the subject line, also write the text and insert the effect with the above method.

Step 5:
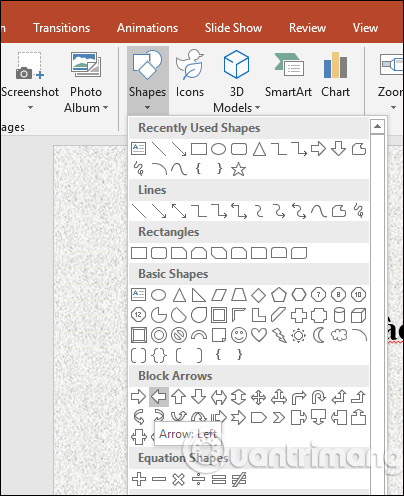
Next we will insert the question order. Click the Insert item to choose Shapes and click on Oval .

We press the Shift key to draw a circle . In addition to the circle, you can also select another image for the order of questions. In the Format section select the style in the Shape Styles section, fill the background with the Shape Fill shape , the border color in the Shape Outline , the effect in the Shape Effects section.

Right-click on the image and click Edit Text . Enter question number 1, 2, 3, .

Then you also edit the font, style, font size for the sequence number.

Step 6:
Next we select the effect for the sequence number , also click on Animations select the effect in the Emphasis section.

Also click on the Animations section, select Animation Pane to display the Animation Pane on the right. Click Timing .
In the Timing tab, click on Trigger, then check the Start effect on click off button . Users click on image 1 and then click OK.

Step 7:
Click on the first order number and choose Copy then Paste down the positions below for the remaining number of sentences. Click Add Text to correct the correct number.
The result will be the same serial number as shown below.

Step 8:
Click on Insert to select the Table and then select the number of cells corresponding to the answer of the 1st question.

Select all the boxes and click the Design tab, choose Pen Color to adjust the border color and choose a light border in the box.

Click on Borders and select All Borders to fill the cells. Background color correction in Shading section.

Step 9:
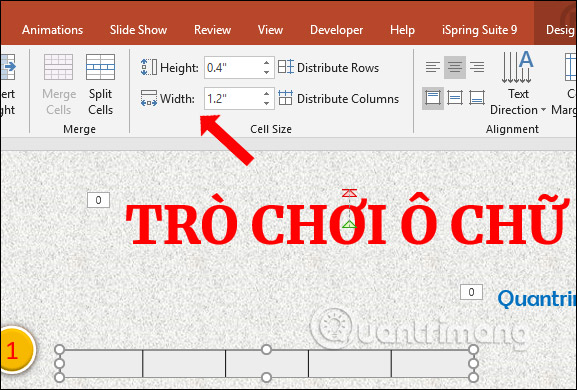
In the Layout section, we adjust the size in Height and Witdth respectively for all cells, and adjust the letter position in the Alignment section.

Enter the answer in each cell and adjust the font, size, and font color as usual.

Step 10:
We copy the first case box down to the remaining answers . If the box is redundant, delete it. If there is no cell, click Layout and then select the commands to add cells in the Row & Columns section.

As a result we will get the answer sheet as shown below. You need to align each line of answer boxes with the same size and alignment.

Step 11:
Click on the Table tab and then create the number of cells equal to the number of the answer to question 1. We also proceed with alignment as with the answer boxes.

Continue to click on the Animations tab and then select the effect in the Exit section .

Click on the Animation Pane and then click Timing to edit the time for the effect.

Display the dialog box with the effect name, also click Triggers and select Start Effect on click of, click the correct table name and click OK.

Step 12:
We continue to create squares over the answers in the slide.
The answer will be concealed as shown below. Remember to insert the Exit effect for the lines that overlap the answer.

Step 13:
Create a new slide and insert the Text box to enter the question content . Continue to create the remaining question slides.

Step 14:
Click again on slide 1 and click on number 1 , click Insert and select Action .

Display Action Setttings dialog box, click Hyperlink to select and select the triangle icon to drop down, select Slide .

In the dialog box displayed click on the slide containing question number 1 and click OK. Continue with the next question, number 2 will link to question number 2 slide.

Step 15:
Go back to the slide containing question number 1, click Insert and select Shapes to select the icon to return to the main interface.

Insert the icon at the position below the slide and click Edit Text if you want.

Click on Insert and select Action to add the action command for the icon. Displaying the Action Settings interface also selects Hyperlink and selects Slides . The user then selects the first slide .

Copy this icon to the remaining question slides. But you need to link this icon button to the first slide to return to the word prediction table. So we have finished the crossword puzzle on PowerPoint.

You can track crossword showing how on PowerPoint in the video below.
So we have created the crossword guess slide game on PowerPoint. The steps are very much done so the reader should follow up carefully and perform step by step steps from top to bottom to get the crossword slide.
See more:
- How to create text effects in PowerPoint
- How to insert text into images in PowerPoint
- Guide font formatting, change stretch and create artistic text in Word
I wish you all success!