5 ways to fix Touchpad/Trackpad not working after updating to Windows 11
One of such problems is that the touchpad or trackpad stops working after a user upgrades his or her operating system. According to the affected users, this issue occurred shortly after they installed Windows 11. If you are experiencing the same issue, refer to some of the troubleshooting methods below to resolve this issue.
Before you troubleshoot.
Before we move on to software-related troubleshooting methods, you should wipe your touchpad to clean it. This may not always be helpful, but there are times when a laptop's hardware components don't function properly just because of dirt and dust on them.
You can also check your keyboard's touchpad as you may have accidentally pressed this key, disabling the touchpad.
Once you are sure that the problem is software related, proceed with the troubleshooting methods below.
1. Update Touchpad driver
If your touchpad stopped working after you upgraded to Windows 11, chances are your current touchpad driver is not compatible with the latest operating system version.
If this is true in your case, you should see a yellow exclamation mark associated with the touchpad driver in Device Manager. It is a signal that there is something wrong with the driver and you should update or reinstall the driver immediately.
2. Run Hardware and Devices troubleshooter
Another way to troubleshoot problems with system hardware components is to run the Hardware and Devices troubleshooter. This utility is specially designed to scan the system and find potential problems that could cause your hardware to fail.
If any problems are identified, you can apply the fixes suggested by the troubleshooter in one click. You can use this troubleshooter to fix problems with your keyboard, touchpad (trackpad), mouse, and other similar components.
Here's what you need to do:
- Press the Win + R key combination to open Run.
- Type cmd in the text field of Run and press Ctrl + Shift + Enter to open Command Prompt with admin rights.
- Click Yes in the UAC prompt.
- In Command Prompt, type the command mentioned below and press Enter to execute it.
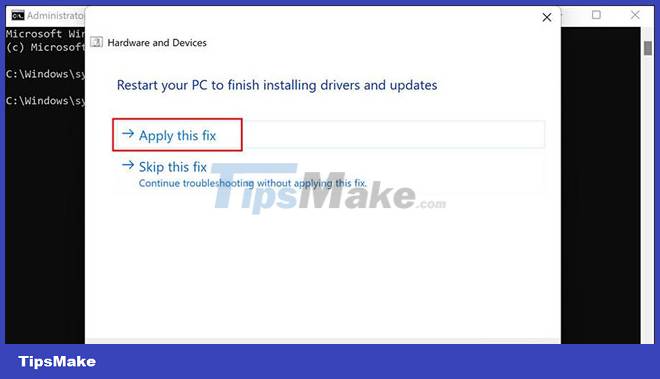
msdt.exe -id DeviceDiagnostic- You should now see the Hardware and Devices troubleshooter dialog box on the screen. Click the Next button in it to start scanning.
- If the troubleshooter identifies any issues, click Apply this fix to resolve the issue. If no problem is identified, click on the Close the troubleshooter option and move on to the next method below.

3. Enable Touchpad through Settings of Windows 11
You may also encounter this problem because the touchpad on the system is configured to turn off automatically when the mouse is connected. In this case, the solution is simple - you just need to enable the touchpad through Windows Settings.
Follow these steps to continue:
- Press Win + I to open Windows Settings.
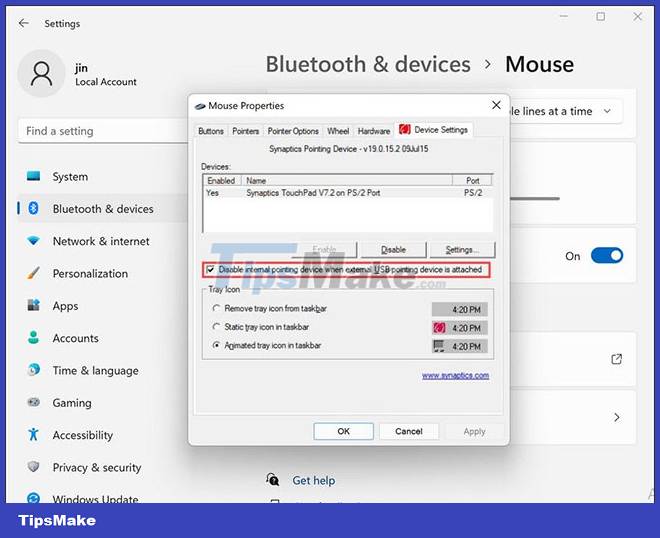
- Navigate to Bluetooth & devices > Mouse .
- In the following window, go to the Related settings section and click Additional mouse settings .
- Now uncheck the box associated with Disable internal pointing device when external USB pointing device is attached and check if that works in your case.

Alternatively, you can also try resetting the touchpad settings to their default state and see if that helps. Here's what you need to do:
- In the Bluetooth & devices section of Windows Settings , click Touchpad.
- Find the Reset button in the following window and click it to revert the settings.
- After the settings are reset to the default state, try using the touchpad or trackpad again to check.

4. Enable Microsoft Keyboard Filter Service
All programs and processes on the Windows operating system are connected to a related service to help them work as they should. These services can be found in the Windows Services utility.
If any related service is inactive, the process associated with it will also stop working. In the case under review, some users noticed that the problem was occurring because of two disabled services: Microsoft Keyboard Filter Service and Tablet PC Input Service .
In this method, the article will check if these services are working properly and activate if they are not.
- Press Win + R to open Run.
- Type services.msc in the text field of Run and press Enter.
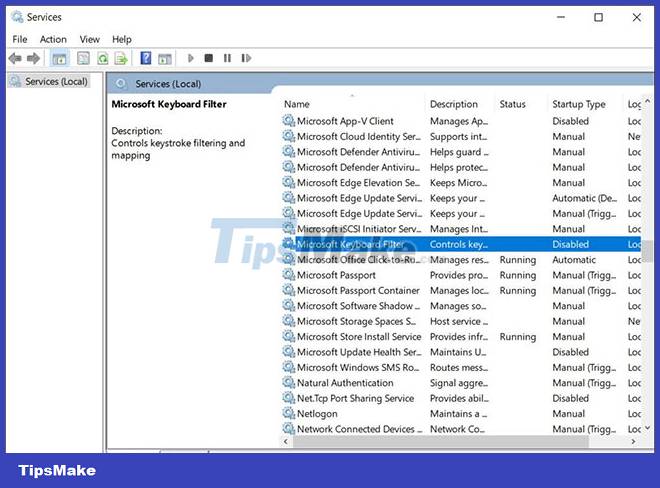
- In the Services window , find the Microsoft Keyboard Filter and right-click it.
- Select Properties.
- If the service is disabled, click the Start button.
- Follow the same steps for Tablet PC Input Service .

Once done, check if you can use your touchpad or trackpad without any problems now.
5. Downgrade to Windows 10
If the above methods don't help you and the touchpad is still not working, then you can try downgrading to Windows 10 and then upgrading again to Windows 11. Hopefully this will fix the problem once and for all. forever.
Hopefully the above troubleshooting methods will get you back to using your touchpad or trackpad without any problems. To prevent any problems like this in the future, you need to make sure of two things; Always keep your touchpad clean and remember to update drivers.