What's new in Ubuntu 18.04 LTS just released?
Ubuntu 18.04 LTS code-named Bionic Beaver has just been officially launched on April 26th. This version is Canonical's up to 5 year support period..
Ubuntu 18.04 LTS codenamed "Bionic Beaver" has just been officially launched on April 26th. This version is Canonical's up to 5 year support period.
So what are the new changes and features for Ubuntu 18.04 LTS, let's find out.
1. Photo wallpaper Wallpaper
The most noticeable change is the new background image of Ubuntu Desktop.
2. Speed up boot (Boot speed boost)
Ubuntu 18.04 boots faster using systemd features to remove bottlenecks.
3. GNOME 3.28
 Gnome Desktop interface.
GNOME has become the default environment on Ubuntu 17.10 to replace Unity. And in Ubuntu 18.04 this trend remains the same. GNOME on Ubuntu 18.04 LTS marks the first appearance of GNOME 3.0 customization on a long-term support release.
4. Linux Kernel 4.15
The kernel is considered to be the center of Linux-based operating systems. Initially, Linux Kernel 4.14 LTS will be added to Ubuntu 18.04 but eventually Kernel 4.15 has been uploaded for the BIONIC Beaver 18.04 LTS version.
5. Minimum installation options (Minimal Installation)
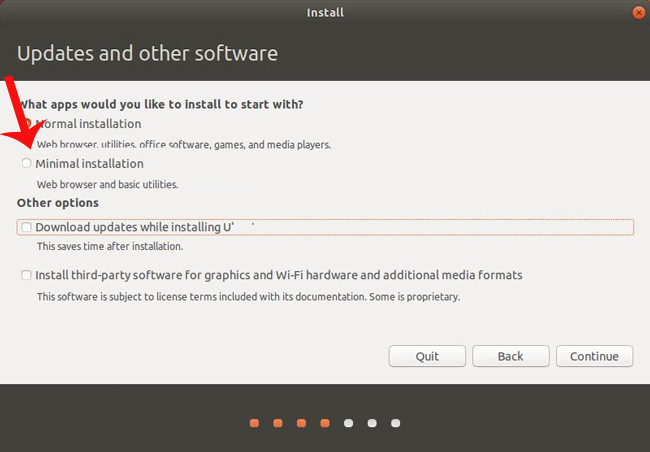
A new option, Minimal Installation, has just been added to the installation process of Ubuntu 18.04 so users can choose a web browser and a few utilities instead of having all the usual software like before. . This will help eliminate unnecessary applications, help the operating system boot faster, fewer applications run in the background .
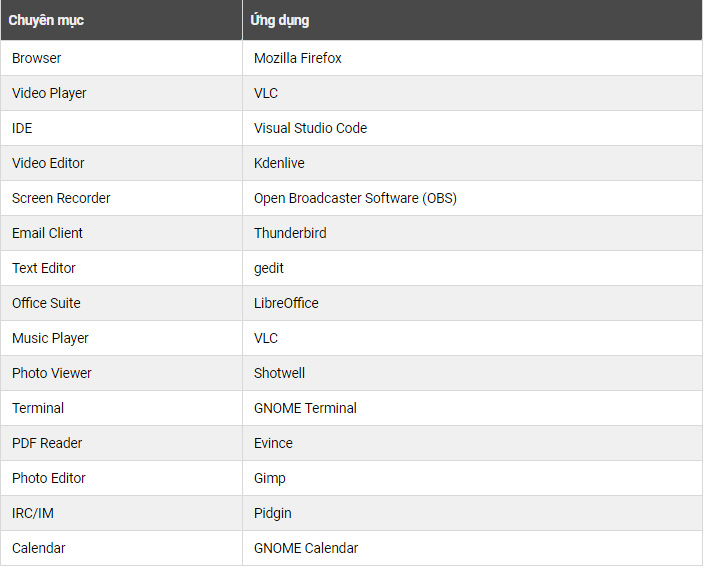
6. List of new user-nominated default applications in Canonical's latest survey
7. Change the look of the file manager 'Nautilus File Manager'
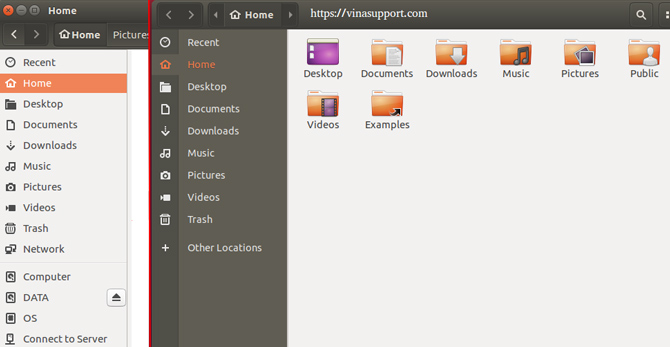
The interface of Nautilus File Manager in Ubuntu 18.04 is changed to be more user-friendly: the left pane has a dark background while the icons are placed separately in the leftmost column.
8. Ubuntu will collect system usage data (users can optionally stop it)
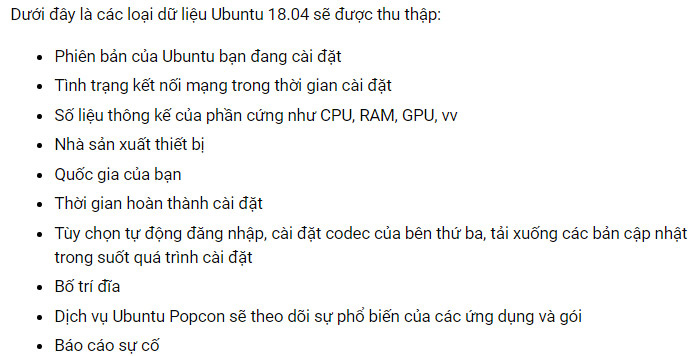
The data Ubuntu 18.04 collected will be served for data analysis purposes.
9. Use Xorg instead of Wayland
Wayland graphics mode is defaulted in Ubuntu 17.10 but to Ubuntu 18.04 it has been replaced by Xorg to be compatible with services like Skype, Google Hangouts, WebRTC, VNC and RDP services. But users can still switch to the Wayland display if they like using the jagged icon on the login screen.
10. New desktop layout
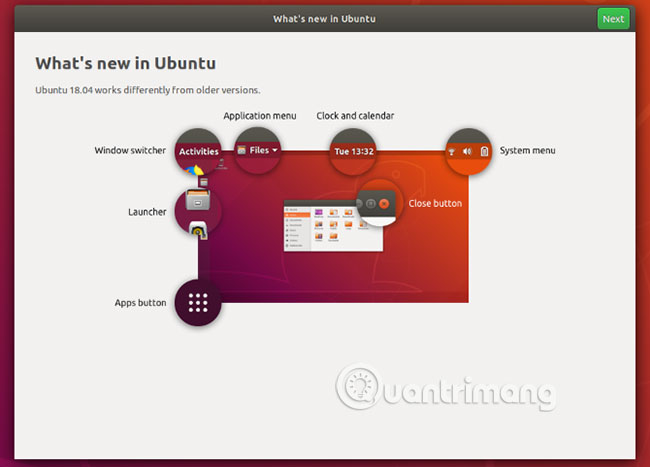
A host of new features available on the Ubuntu desktop based on GNOME 3.0, explained in the new welcome screen.
The 'What's new in Ubuntu' section shows how Ubuntu 18.04 works differently from older versions.
- Activities: This is a window converter, there are several hidden options, which will be reviewed below.
- Application menu : Menu for the currently open window or application.
- Clock and calendar : Display the current date and time. Click to see more detailed calendar.
- System menu : Here you will find the connection status, volume control, battery indicator, etc.
- Launcher: By default it is located on the left side of the screen, but can be moved to different locations on the desktop. Favorite applications can be pinned and launched from here.
- Apps button : Click here to see a list of installed applications. Two view modes are available: A mode that displays all installed applications, while the other displays only the applications you use regularly.
Depending on the version of Ubuntu you upgrade, these developments seem a bit embarrassing. Fortunately, you will soon be able to use these new features without thinking.
11. Middle click
On a mouse with a roller, you can press this roll and that action is called a middle mouse click. Sometimes manipulating left and right mouse clicks for the same effect.
Most touchpads now also have a middle button and a modern touchpad that can even accept gestures like three-finger touch, equivalent to a middle click.
Ubuntu 18.04 LTS features mid-click support, providing some useful shortcuts through the user interface, including:
- Open a new application window by clicking on the application icon.
- Open a link in a new browser tab.
- View the contents of a folder in a new tab. You can also launch a program with just a middle mouse click.
Individual applications may have (and support) other options for the middle mouse button.
12. Install the application more easily with PPA
PPA settings always require the use of 3 commands:
sudo apt-get-repository ppa:[ppa url]
sudo apt update
sudo apt install [app]
The first command adds a new repository, the second command updates the repository list and the third command installs the application. To streamline the process, Ubuntu 18.04 LTS automatically runs the update command, so now all you need to enter is:
sudo apt-get-repository ppa:[ppa url]
sudo apt install [app]
Reducing the need to enter an update command will save you some time.
13. Use Activities Overview
Activities Overview can be opened via manipulation by clicking on Activities link , by moving the mouse to the top left corner or by pressing the Super key (or Windows key).
You can do some things with Activities, such as viewing open tasks or system information.
For example, although the entire Ubuntu family has been upgraded to Ubuntu 18.04 LTS, the default desktop is still based on GNOME 3.0. To check which system is running the GNOME version, click Activities (in the top left corner) and enter 'about'.
Click the About option to open and display information about the system, including the distribution name and GNOME version.
14. Shooting and recording screens are easier
GNOME screen capture feature has been upgraded, which means that Ubuntu 18.04 LTS has the easiest screen capture and recording options on all operating systems!
To take a screenshot, just press the Print Screen button to completely capture the desktop. However, to capture the active application window, press Alt + Print Screen . You can also take a screenshot of a selected area with Shift + Print Screen .
Screen capture options can be found in Activities Overview. Here, you can find the above options, so choose before clicking Take Screenshot. The Save Screenshot screen will appear, allowing you to choose where to save the image. By default, this is the Pictures folder (this is where the screenshot is saved with the saved shortcut).
In addition, recording a desktop is much easier. All you need to do is hold Ctrl + Alt + Shift + Print Screen to start recording. A small red circle will appear in the upper right corner of the screen when recording takes place. When you have recorded the desired operation, press the keyboard combination again to stop the recording operation.
Video after recording is saved to Video folder , with file name in screencast format [date] [time] . The recorded video is saved as a WEBM file for easy sharing, but can be converted to MP4 or some other format using a converter.
Upgrading to the new LTS release for Ubuntu is always valuable. In version 18.04, you will experience all the new features mentioned above.
Just backup files and folders, then perform a full installation of Ubuntu 18.04 LTS version.
Link Ubuntu 18.04 LTS installer:
- Ubuntu 18.04 LTS
Hope you are succesful.
See more:
- Instructions on how to install Ubuntu on VirtualBox virtual machine
- How to install Ubuntu in parallel with Windows using USB
- How to install Skye on Ubuntu
- How to install Steam in Ubuntu