How to use the Fading Tool in Photoshop
The Fading Tool in Adobe Photoshop allows you to make subtle color changes to improve images. This tutorial will explain how to take advantage of the Fading Tool for your photos.
Part 1: Fading an image with gradients
This section assumes that you want to gradually move this image to another image with a gradient effect.
1. Select "Open" from the File menu . Browse for the first image on your hard drive. Open it to load into Photoshop.
2. Load the second image into its own layer separately from the first one. Click the "New Layer" button in the "Layers" tab on the right to create a new layer.
3. Select the second image you want to use. Use Ctrl + A to select the entire image. For Mac, use ⌘ + A Copy it to the clipboard and paste it into a new layer.
To add a layer mask, click the Add Layer Mask button in the "Layers" tab . This button looks like a small square with a circle in the middle.

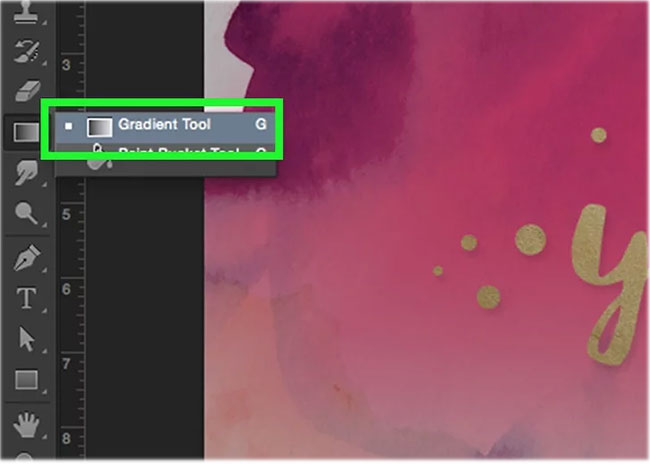
4. Search for the symbol in the Tool panel . It is on the left by default, and is like a colored square that changes from light to darker. If you can't find it, click and hold the Paint Bucket tool, then use the Gradient Tool when it appears.

5. Hold down the Shift key and click a point on the second image, where you want to start the transition. Drag in the direction you want to create the effect. Release the mouse button. You will see your two images "blended" together smoothly.
Part 2: Making a transparent image on another image
If you want to make an image more transparent on the second image, use the way in this section.
1. Select the layer you want to fade out.
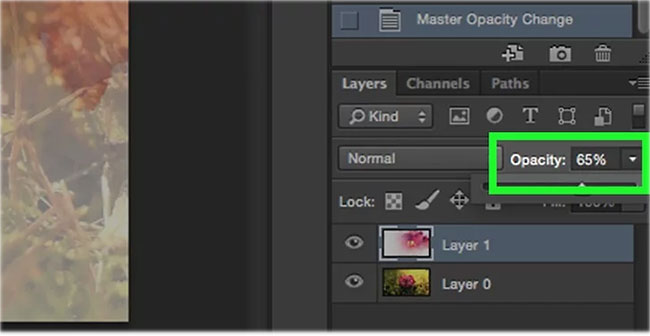
2. Change the value in the "Opacity" box of the "Layer" tab to fade it.

3. Once you have a good idea of moving one image to another, try moving both images in their layers until they are positioned for maximum effect. Repeat the steps from part 1 to reapply the gradient as needed.
