Table of Contents
This guide provides a practical overview of Bulk Photo Stamp with XnConvert, including its main features, benefits, limitations, and important considerations.
XnConvert software will help you do that, completely free software also offers great features. To understand more about using and features of XnConvert, you can refer to the article below.

XnConvert supports currently used image formats: JPG, PNG, TIFF, GIF, JPEG. With a simple, easy-to-use interface that lets you add one or a series of image files and folders, rotate, crop, resize photos in batch quickly.
Instruction for using XnConvert software:
Step 1: First you need to download and install the software.
You can download it on the homepage: http://www. xnview. com/en/xnconvert/#downloads.
Step 2: Add photos or the entire folder containing images.
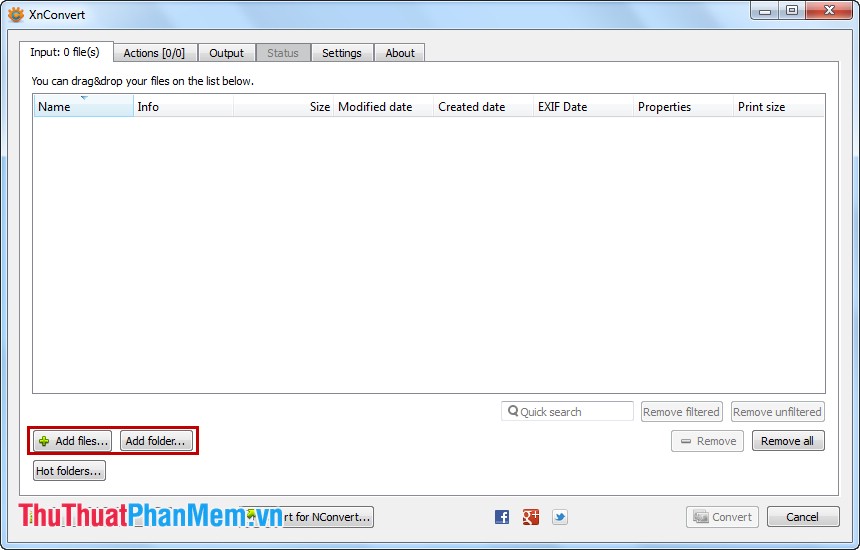
At the interface of the program you choose Add files to add images or select Add folder to add image folders.
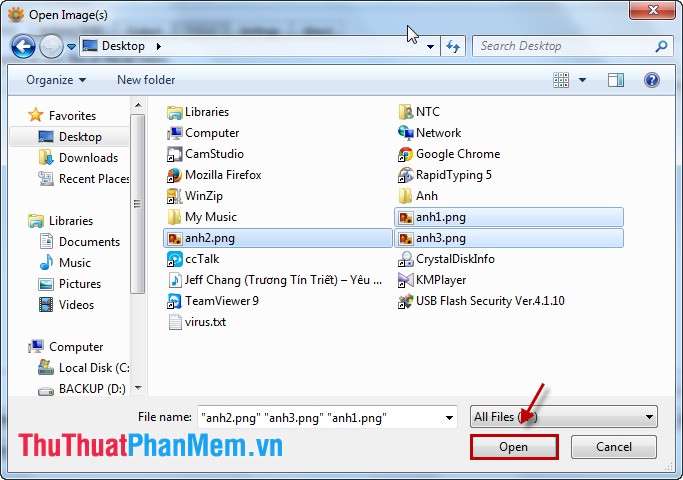
Then you find the files or folders containing images and click Open .
Step 3: Choose photo stamp activities.
Go to the Actions tab -> Add Action -> Images -> Text .
Or you can choose other features in Actions according to your requirements and uses.
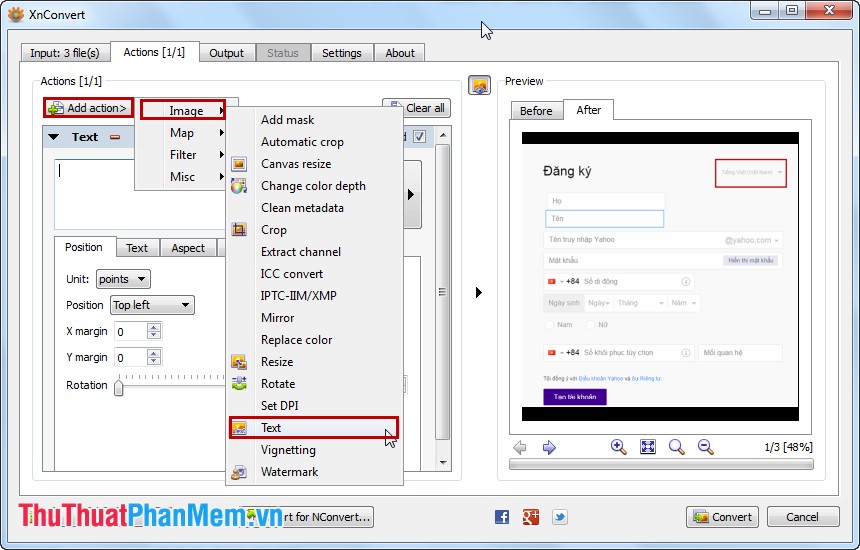
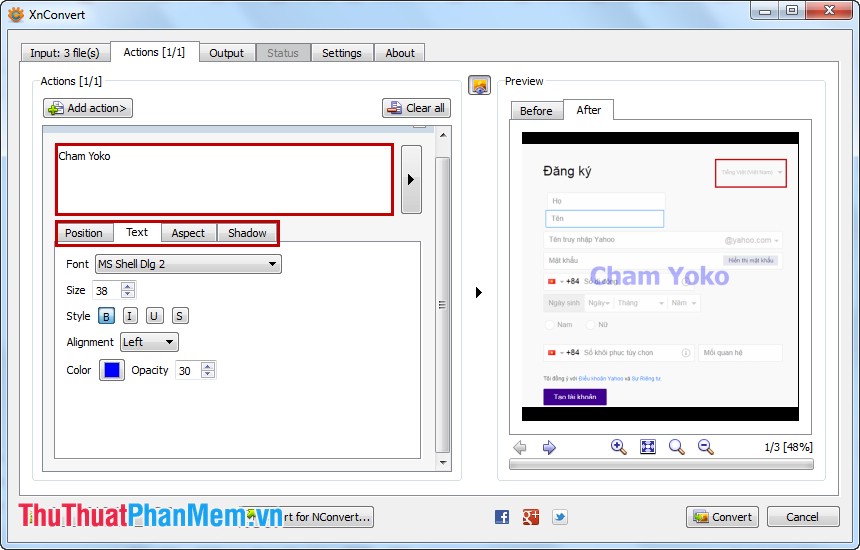
Then you enter the text you want to insert on all the images selected in the Text box.
You can customize as you like at the tabs Position (position inserted on the image), Text (font style, font size, font style, alignment, font color), Aspect (border, fill color background text), Shadow (shadow text).
Step 4: Set the output for photos after stamped photos.
In the Output tab, select the path to save the image in the Folder and click the Browser button icon  .
.
You can choose the output format and image quality settings in the Format section. Also you can customize some settings in the Output tab.
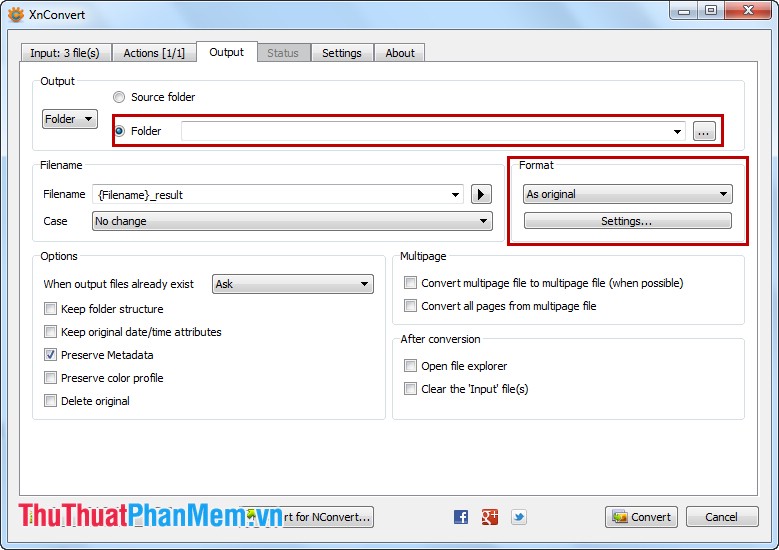
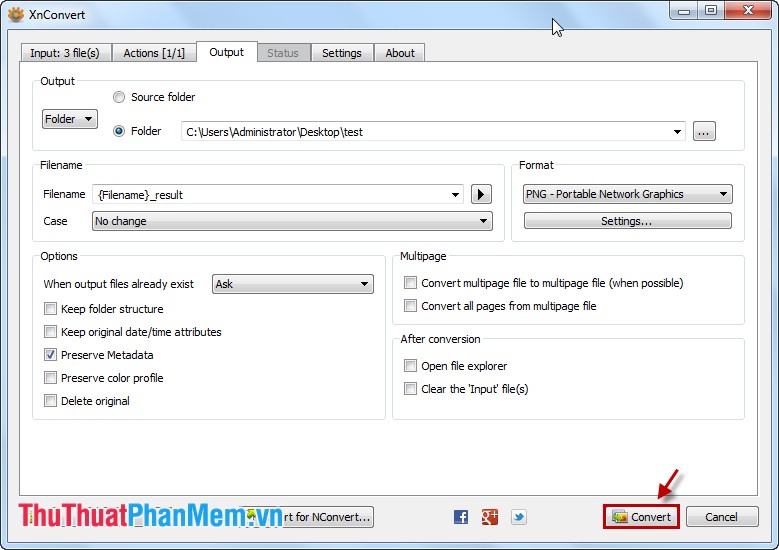
Step 5: Make stamps for photos.
After you have installed, you select Convert to start the program.
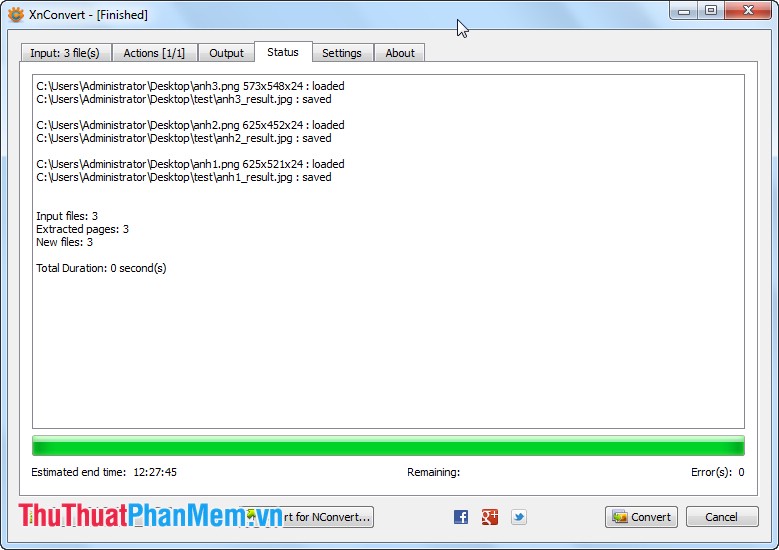
After the program has finished, you can close the program.
With the simple steps together with XnConvert, you can now stamp a series of photos in your own style.
FAQ
What should I know about Bulk Photo Stamp with XnConvert?
Focus on the key features, requirements, limitations, and practical use cases explained in this guide.
How do I get the best results with Bulk Photo Stamp with XnConvert?
Follow the recommended steps, use current software or information, confirm compatibility, and review settings before major changes.
Are there any risks or limitations?
Potential limitations depend on compatibility, data quality, cost, privacy, support, and how the product or method is used.
Related Articles
 How to Batch Resize Photos with Xnconvert6 minutes read
 How to Rotate Images Backwards, Horizontally on Computers Without4 minutes read
 How to Stamp Photos, Add Watermark to Images on Android Phones5 minutes read
 4 Ways to Use the Clone Stamp Tool in Photoshop7 minutes read
 Adobe Launches Tool to Edit 10,000 Photos With Just One Click5 minutes read
 Instructions on How to Use Clone Stamp in Photoshop4 minutes read
Reader Comments 0
Sign in with email or Google to join the discussion.