Table of Contents
How to Back Up Automatically on Windows 10 is easier to understand when the core ideas are paired with practical examples. The sections below explain the topic clearly, highlight useful steps, and point out details that can prevent common errors.
Data backup is a necessary operation to be able to recover data, in case of computer problems. When creating a backup, all important data in the computer will be retained. And when necessary, users only need to use that backup to finish.
Currently there are many tools to support users to backup and restore data. For instance,, the File History tool to backup data is available on the computer, OneDrive backs up data on Windows 10, or System Image,. In addition, we can back up computers automatically on Windows 10 by computer The Windows Backup feature is available, which the Network Administrator wants to introduce to the user in the article below.
- Configure the System Restore feature in Windows 10
- 2 ways to back up Product Key on Windows 10, 8 and 8.1
- Complete how to use all backup and restore tools on Windows 10
Instructions for scheduling backup and recovery on Windows 10
Step 1:
First we open the Control Panel on the computer. Then, in this interface in the System and Security section, select Backup and Restore (Windows 7) .

Step 2:
Switch to the new interface and click on Set up backup .

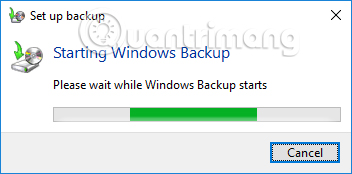
You wait for Windows Backups to work on your computer.
Step 3:
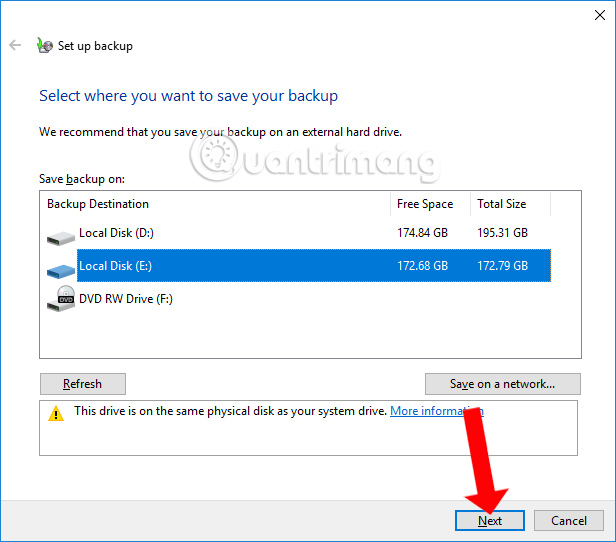
The Set up backup interface appears. Here we will select the external drive we want to use to store the backup and then click Next .
Step 4:
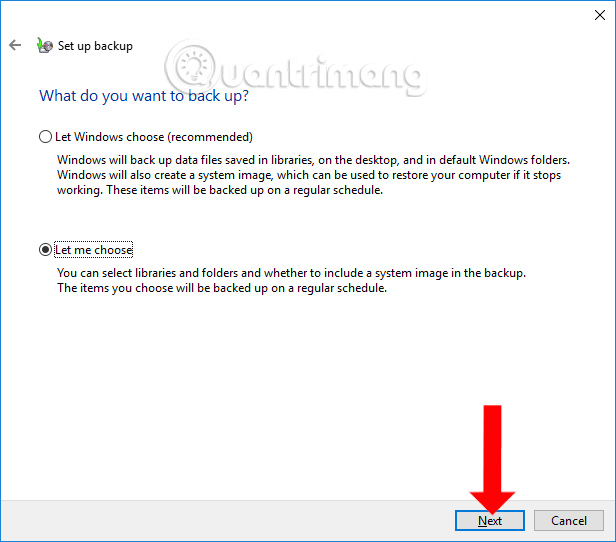
In the interface What do you want to backup?, Check in Let me choose to make sure all data is backed up according to the user.
Step 5:
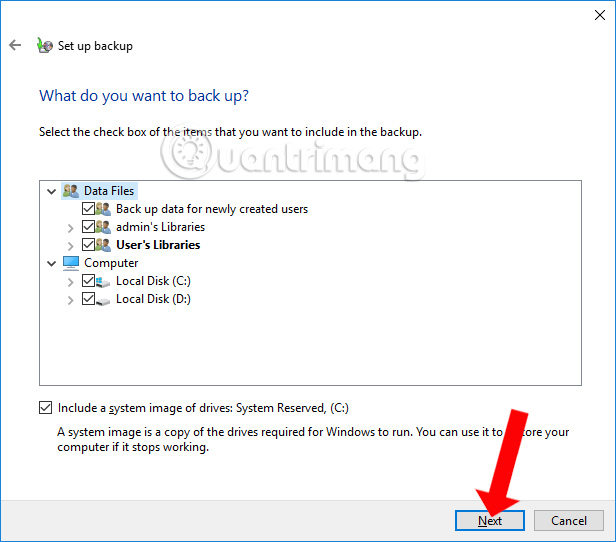
Next to the user check and check the information you want to back up. You should select the full Data Files and Computer section. Click Options Include a system of drives: System Reserved, (C:) and then click Next .
Step 6:
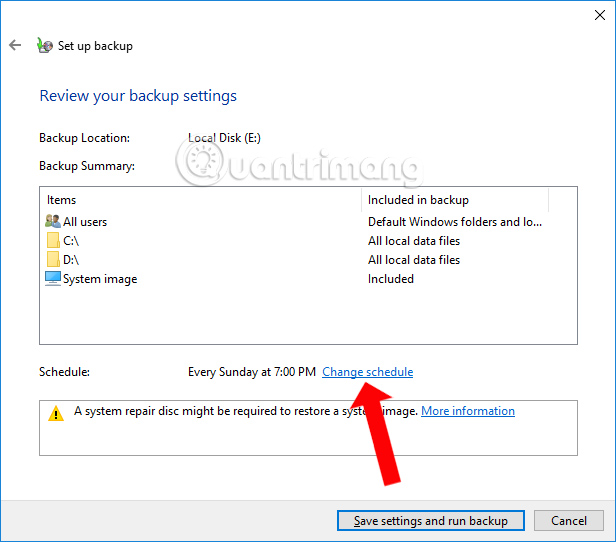
Users review all selected data backup information. Next, in the Schedule section, click Change schedule to change the time the system starts the automatic backup process.
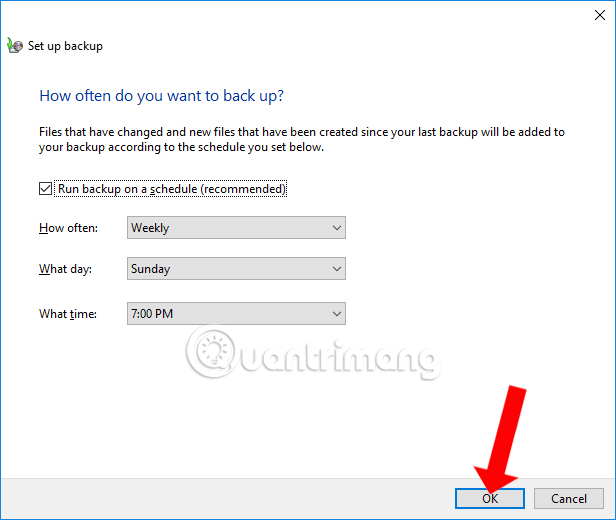
Select the time you want to perform the backup and click OK .
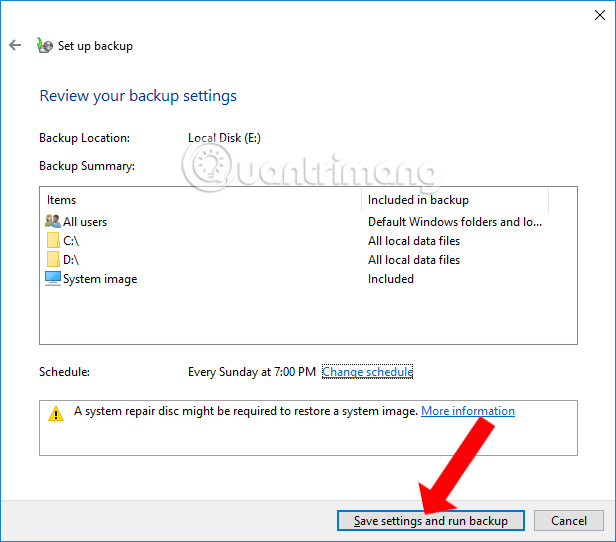
Finally Save settings and exit to proceed to create backups.
- Things to know about backing up your iPhone and iPad
- How to backup all email on Gmail to your computer
- Instructions for creating backup and restore points (Restore Point) on Windows 10
I wish you all success!
FAQ
What is How to Back Up Automatically on Windows 10?
Data backup is a necessary operation to be able to recover data, in case of computer problems.
Why is How to Back Up Automatically on Windows 10 important?
A clear understanding of How to Back Up Automatically on Windows 10 helps you make informed decisions, avoid common mistakes, and use the relevant tools or techniques more effectively.
How should beginners approach How to Back Up Automatically on Windows 10?
Start with the fundamental concepts, follow the examples step by step, and test each change in a safe environment before applying it to important systems or data.
Related Articles
 How to Set Windows 10 to Automatically Reopen Running4 minutes read
 How to Re-enable Registry Backup on Windows 103 minutes read
 Automatically Backup the System Using Back in Time5 minutes read
 How to Login Automatically to Windows 84 minutes read
 How to Enable Back Tap on iOS 14, How to Use Back Tap4 minutes read
 How to Prevent Windows 10 from Automatically Restarting4 minutes read
Reader Comments 0
Sign in with email or Google to join the discussion.