Instructions for backing up and storing data on your Android device securely
The data on devices such as phones or computers, . are extremely important data for users. You will not be able to anticipate possible situations that will make all your data 'blank' in seconds. Therefore data backup is one of the most important solutions to ensure all your data is always in a safe state and not worry about being lost.
In the previous posts, Network Administrator introduced and showed you how to back up data and applications on iOS devices. In the article below, Network Administrator will introduce and guide you how to back up data and applications on Android device.
1. Use MobiKin Assistant for Android
The data on devices such as phones or computers, . are extremely important data for users. You will not be able to anticipate possible situations that will make all your data 'blank' in seconds. Therefore data backup is one of the most important solutions to ensure all your data is always in a safe state and not worry about being lost.
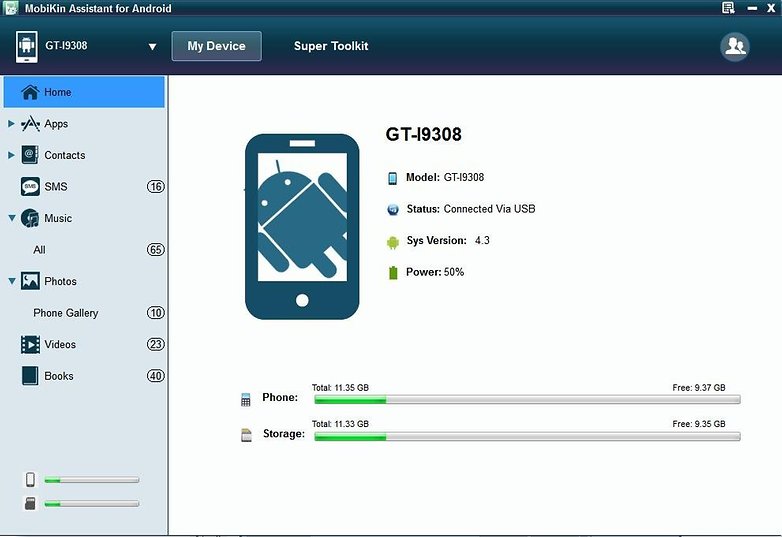
With MobiKin Assistant for Android, the data backup process becomes simpler than ever. You no longer have to fear losing data such as contacts, messages, apps, photos, videos, . on your Android device.
To store all your data safely and quickly with MobiKin, the first step you need to do is download the application to your computer and install.
- If you use Windows, you can download MobiKin and install it here.
- If using Mac, you can download MobiKin and install it here.
After downloading and installing MobiKin, follow the instructions on the screen to backup the data and free the memory of your Android device.
2. Google Backup
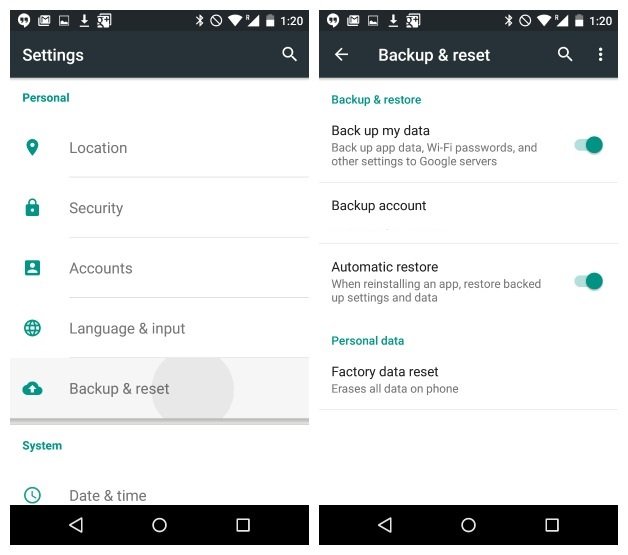
On your Android device visit Settings => Backup & Reset . Here you can find the option to backup your data, including Wifi password, application data . All of these options are "attached" to a Google account, so you You can set up automatic data recovery when reinstalling the application.
3. Backup application (for devices that do not root: non-root)
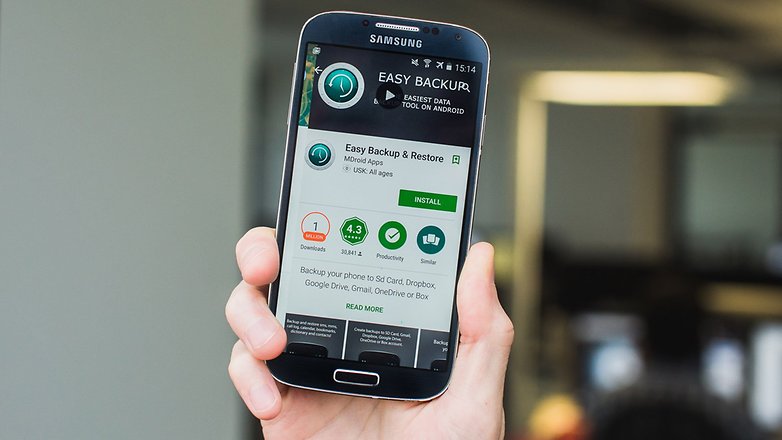
Just go to the Google Play Store search, you can find dozens of data backup applications for Android devices. It is important to choose which applications are best suited for some applications that only allow message backups, others that allow users to back up all data.
One of the free data backup applications that Network Administrator wants to introduce to you is Easy Backup & Restore. Easy Backup & Restore allows you to backup all data such as contacts, call logs, messages, calendar and bookmarks.
The drawback of Easy Backup is that users cannot back up photos, music, videos and documents.
Instructions for backing up everything on your Android device using Easy Backup & Restore:
1. Download and install Easy Backup to your Android device.
Download and install Easy Backup to your Android device here.
2. When opening the application, on the device screen you will be asked if you want to create a backup. Click Yes .
3. Now on the device screen will display a variety of options you can backup such as: SMS, MMS, call log, calendar, bookmarks, contacts, dictionaries.
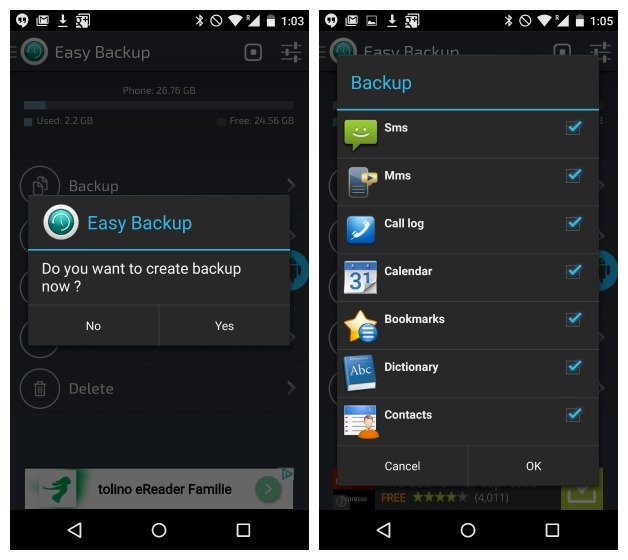
After selecting the options you want to back up, click OK .
4. You will be asked to continue the backup location. Select the location where you want to store the backup data.
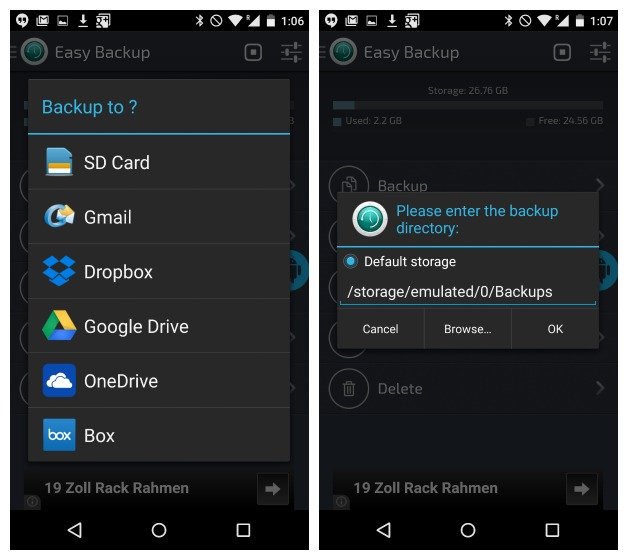
5. If you choose one of the cloud storage services, you will have to log in to your account. If you select SD memory card, you must confirm the directory.
6. Next you will be asked to name the backup file. The date and time are set by default.
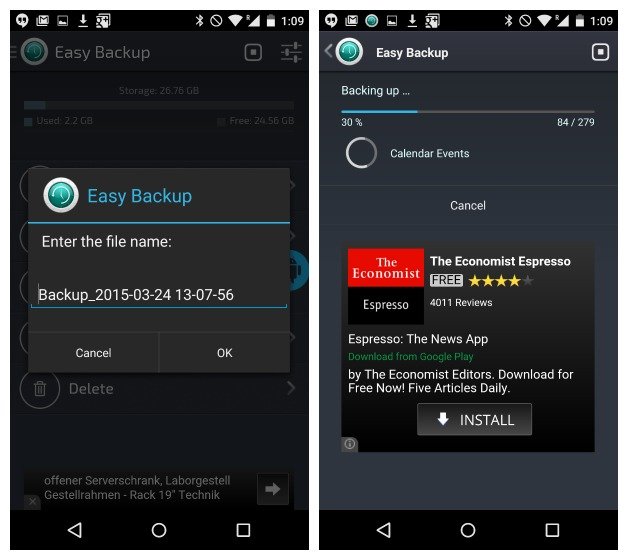
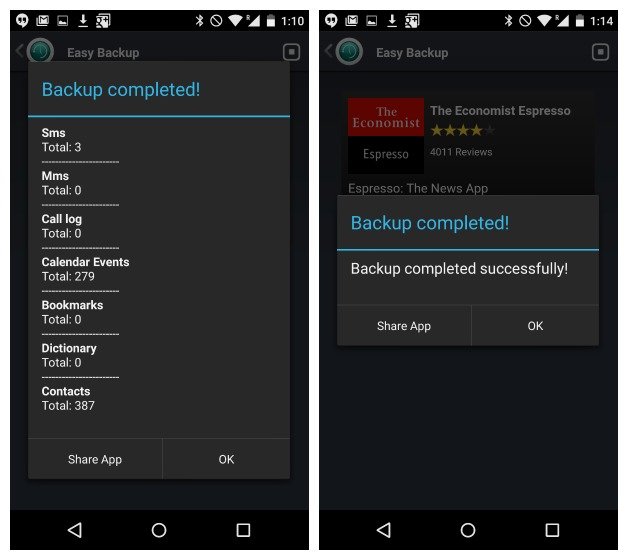
7. At this time on the device screen you will see the data being backed up. After the process has finished you will receive a general popup window of the backed up files.
8. If your device is rooted, you can back up applications and application data. If not, you can click the Apps Tools tab on the Main Menu and create an APKs backup file on your device.
APKs is like .exe on a computer, it is a program or an application package. If your Google settings are enabled to back up data and install apps, you can use this option to back up your Google apps and backups to store settings and data on the app.
9. Just tick the box next to the application you want to save and click Backup .
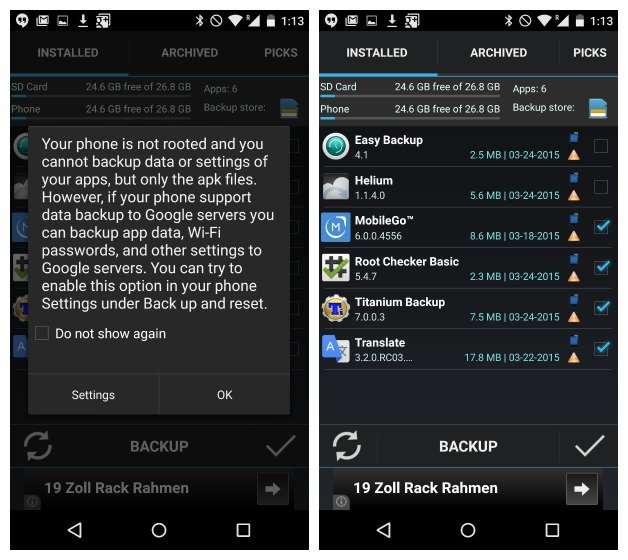
10. When you want to restore the application or data, simply click the Restore tab. You will be prompted for Easy backup settings like the default SMS application.
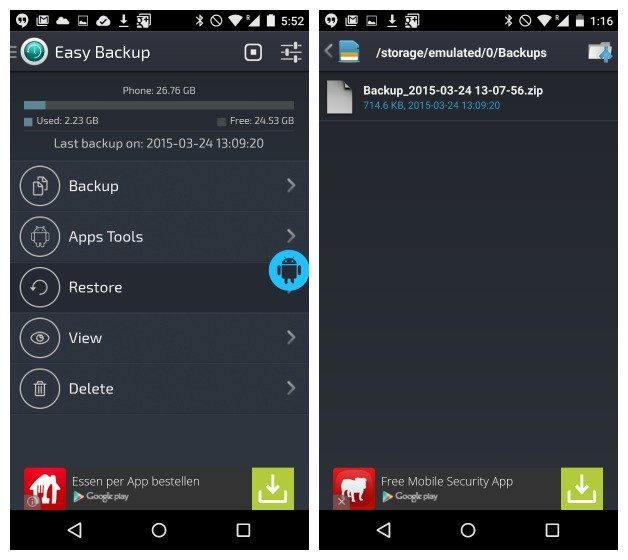
11. Select the backup you want to restore. On the device screen, Android will display a popup window containing detailed information of the recovered data. Your task is to click OK to finish.
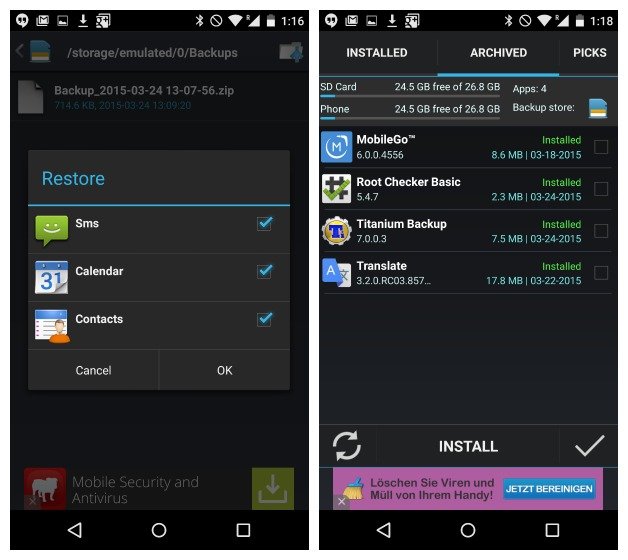
12. The application recovery process will be slightly different. Access Apps Tools on the Main Menu and click on Archived tab .
13. Check the APKs you want to restore, then click Install at the bottom of the screen.
14. At this point you will see the permissions window that allows each application to look like any new application you install.
4. Backup application (for root device)
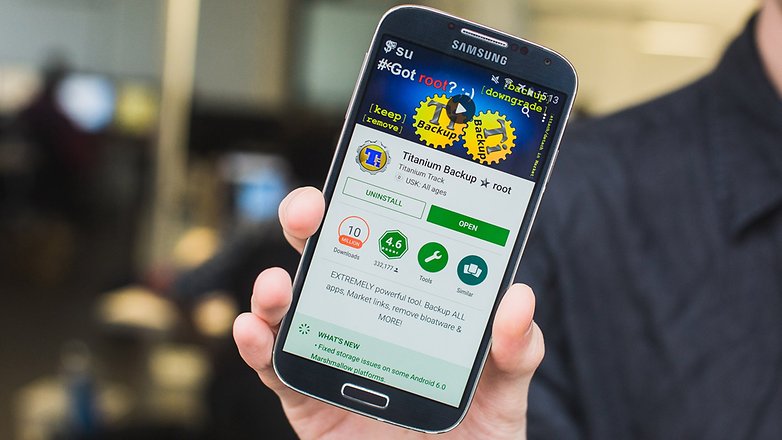
If your Android device is rooted, there is no better backup solution than using Titanium Backup. Titanium Backup allows you to backup everything on your phone.
Instructions for backing up everything on your Android device with Titanium Backup:
To backup everything on your Android device with Titanium Backup, you can consult the steps here.
5. Backup your computer (PC backup)
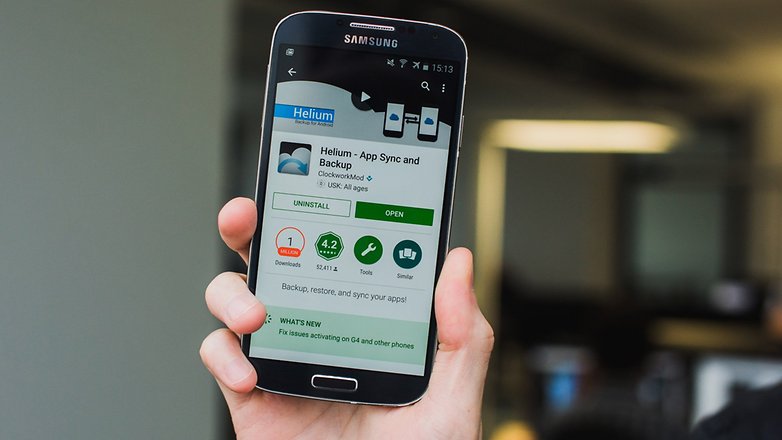
Helium is one of the great tools for creating a backup that doesn't require root access. All you need is to install the Helium application on your Android device, using the Desktop version as the best for pairing devices.
Once connected, you can back up data like Titanium without having root access. Just 'say' with Helium application and the data you want to backup and the application will perform the process. The Pro version also allows you to create an automatic backup schedule and store your backup data on the cloud service.
Install Helium on Android devices and on computers:
1. Download the Helium app to your Android device and install.
Download the Helium app to your Android device and install it here.
2. Download Helium to your computer and install it.
Download Helium to your computer and install it here.
3. Use a USB cable to connect your Android device to your computer.
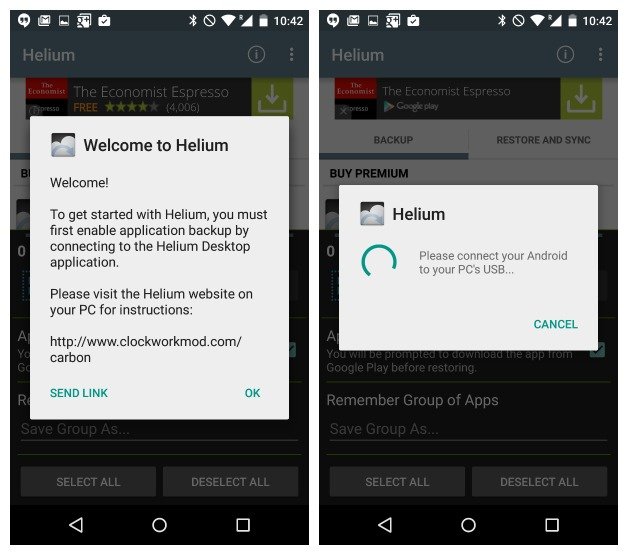
4. Activate USB Debugging on your Android device.
5. You will be asked to convert the USB connection to PTP (camera mode).
6. You will be notified to accept the computer's RSA key.

7. At this time on the Helium window on the computer will appear a blue traces informing you of a successful connection and Helium backup has been activated.
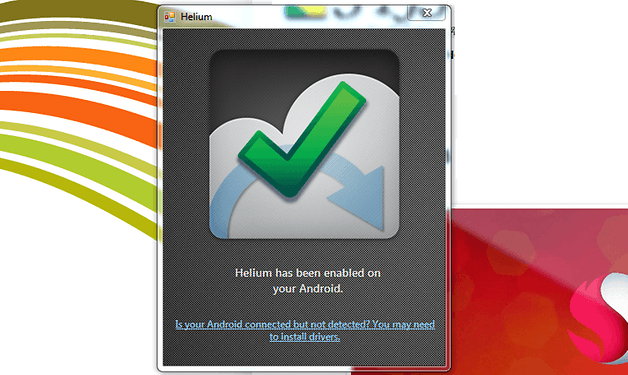
8. On the Android device screen you will receive the same notification. You can now disconnect the Android device on your computer.
9. Note that before removing the USB cable you need to establish a Helium connection between your Android device and the computer.
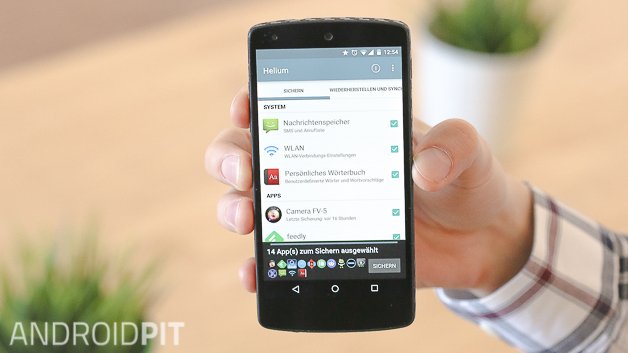
Backup Android with Helium:
1. On Helium's screen on your Android device you will see two cards, Backup & Restore and Sync. The first card allows you to select the applications you want to back up by checking the box next to the application.
2. If you want to store all applications, swipe down below the screen. Find and select the Select All option .
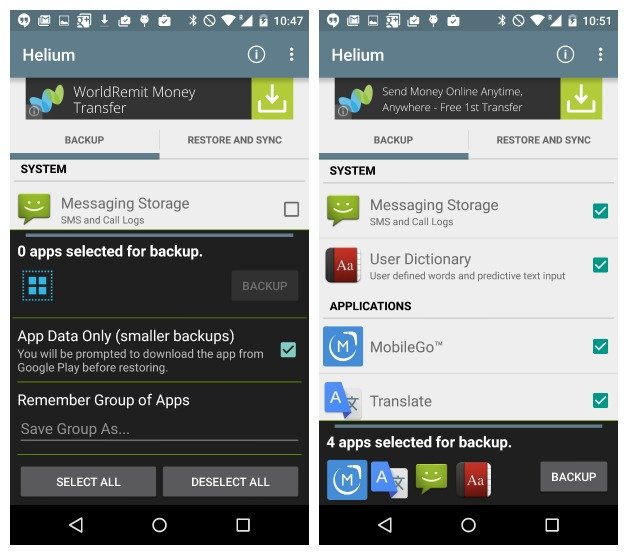
3. You can choose to back up everything (apps and data) or just back up data.
Note that there are some applications that Helium cannot backup.
4. On the next window when you click Backup , you will be asked where you want to store the backups: Internal memory, external storage or cloud services (Pro only) .
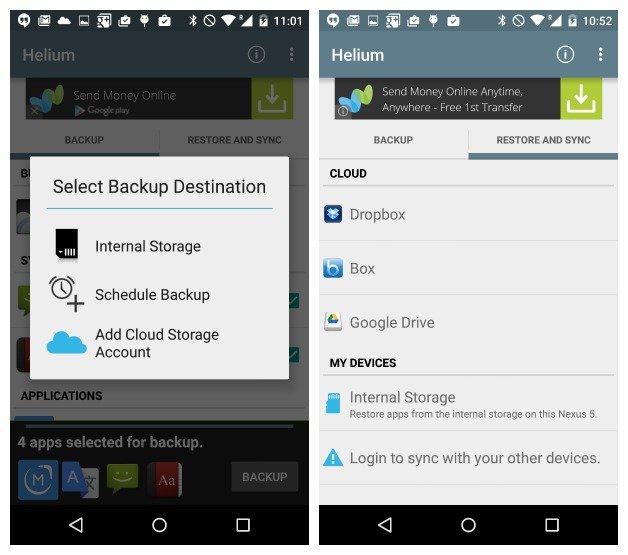
5. At Restore and Sync tab, you can connect to a cloud service to store and access your backups. Also you can access backups in internal memory or connect to your other devices.
6. During execution you will be prompted to enter your device password or PIN if you set a password or PIN for your device. Once done, the backup process will end.

7. If you want to restore backups, simply open the Restore & Sync tab and find the backup location. In addition, you can connect Helium Server to download to your computer.
6. Use a USB cable to connect the computer to the Android device
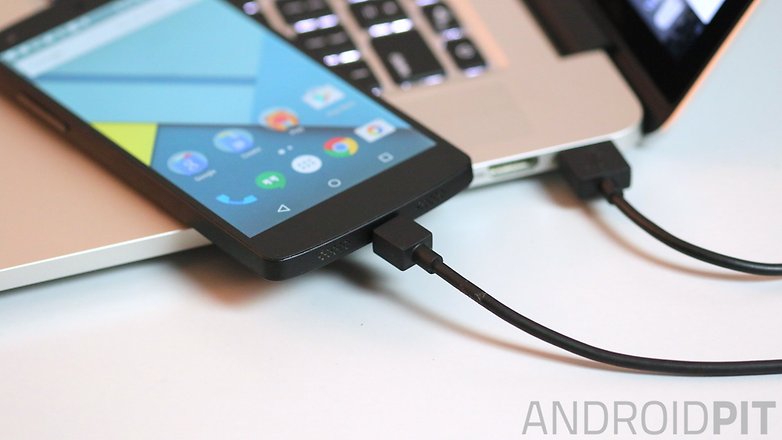
All you need to do is use a USB cable to connect your computer to your Android device, then open the Windows Explorer window and navigate to your Android device. Here you will see folders like photos, videos, music and documents.
Just open each folder and copy and paste the data you want to store on your computer.
Refer to some of the following articles:
- 9 tips to protect your computer safely from virus attacks
- Collection of the best free online data storage websites today
- Instructions for basic steps to backup Outlook data
Good luck!