How to assemble a floppy drive for a computer
How to assemble a floppy drive for a computer.
Floppy disk drive (FDD) is a device that reads (or writes) floppy disks, helping to transfer programs or data from outside to the computer and vice versa. Nowadays, with the appearance of many types of storage devices, FDD is not used much. Here are the steps to assemble a floppy drive for a computer:
Location of the pins on the floppy drive
 Check the positions of the pins
- You will see 2 sockets located on the back of the floppy drive. In the figure above, the right pin base is used to connect to the power cord and the right pin base is connected to the mainboard via a data cable.
Assemble the floppy drive into the computer
Remove the cover and plastic piece from the front of the case, and insert the external floppy drive into its place in the case, which is usually below the CD drive.
Fasten the screws located on the sides to position the floppy drive to the case.
 Fasten the screws located on the sides to position the floppy drive to the case
Plug the power supply cord into the floppy drive.
 Plug the power supply cord into the floppy drive
Plug One end of the data cable into the socket on the floppy drive.
 Plug One end of the data cable into the socket on the floppy drive
The other end of the data cable plugs into the slot on the motherboard.
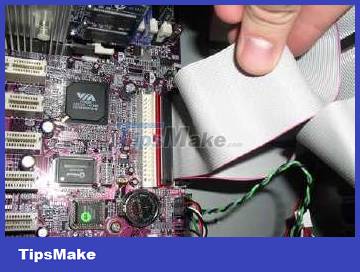 The other end of the data cable plugs into the slot on the motherboard
- The floppy drive's data cable is the same as the ATA hard drive's data cable, but with fewer wires and smaller headers.
- The plug and slot both have joints to avoid mis-inserting, and the red wire corresponds to pin 1.