Table of Contents
This practical guide explains how to assemble a hard drive for a computer with clear steps and useful context. It also covers common requirements, potential problems, and the details that can help you get better results.
Locate the Pins and Set Up Master/Slave (Main/Slave)
http://www.buaxua.vn | See more at: http://www.buaxua.vn/Phan-cung/Cach-rap-o-dia-quang-cho-may-vi-tinh.html
- First of all, it is necessary to determine how many hard drives are attached to the computer and which will be the main drive (Master) and which will be the slave drive (Slaver) to adjust the pins (Jumper) located at the back. hard drive. The way to insert these Jumpers is usually indicated on the surface of the Hard Drive.
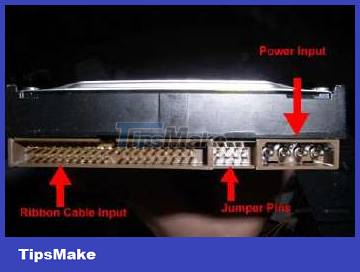 Locate the pins and set up Master/Slave (Main/Slave)
Setting Master/Slave is only necessary when two drives share the same data cable, even when attached to an optical drive. If each drive uses its own data cable, there may be no need to set up a Master/Slave.
http://www.buaxua.vn | See more at: http://www.buaxua.vn/Phan-cung/Cach-rap-o-dia-quang-cho-may-vi-tinh.html
Assemble the Optical Drive to the Computer
http://www.buaxua.vn | See more at: http://www.buaxua.vn/Phan-cung/Cach-rap-o-dia-quang-cho-may-vi-tinh.html
Open the lid of the case, you will see a compartment located just below the optical drive, this is where the hard drive is assembled. Usually, one compartment can fit 2 hard drives, some cases can allow more.
Insert the hard drive into an empty slot, you can choose any slot as long as it can fit the drive and it is convenient to connect the wires.
 Insert the hard drive into an empty slot
Fasten the hard drive locating screws to the case.
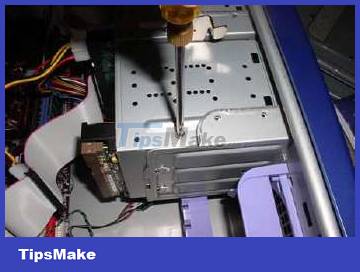 Fasten the hard drive locating screws to the case.
Plug in the power supply cord for the hard drive.
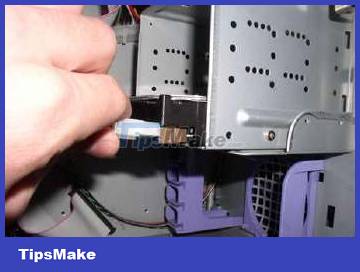 Plug in the power supply cord for the hard drive
Plug the end of the data cable (the ATA standard has 80 leads) into the Hard Drive.
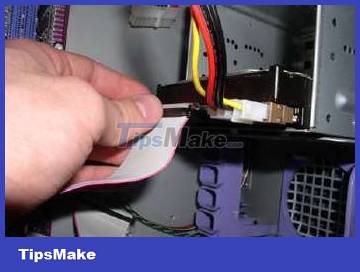 Plug the end of the data cable into the Hard Drive
Note that the connector and slot both have a joint to avoid incorrect plugging and the red wire corresponds to pin 1. An ATA standard drive's data cable usually has 3 ends and can be attached to 2 common hard drives. one wire.
Plug the other end of the data cable into the slot on the mainboard.
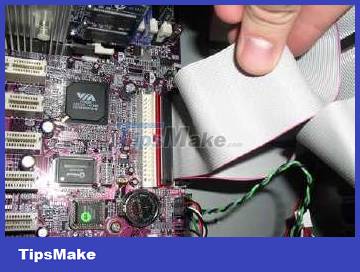 Plug the other end of the data cable into the slot on the mainboard.
Notes When Installing a New SATA Hard Drive
- The SATA standard does not require a Master/Slaver setup, as each drive uses a separate data cable.
- Newer hard drives (SATA standard) will use a different standard than ATA, so if you want to attach this drive to a Mainboard that does not support this plug standard, you can install a device called a SATA Card.
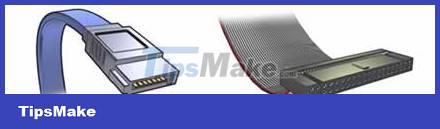 SATA data cable is smaller than ATA
-
In addition, the connector of the standard SATA power supply cord is also different from the normal standard. If the power supply does not have this terminal, an additional conversion cord can be used.
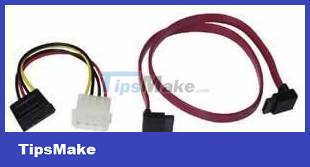 Standard SATA power cord
- Normally the computer will automatically recognize the hard drive when booting, otherwise it is necessary to review how to attach the Jumpers to set up the Master/Slaver correctly and check the plugs. You can reset the BIOS if necessary.
- It is recommended to use separate data cables for each hard drive to optimize data access speed.
Conclusion
Understanding Disk Drive makes it easier to compare options, avoid common mistakes, and apply the information in this guide more effectively. Review the relevant requirements before making changes or choosing a solution.
FAQ
How do you assemble a hard drive for a computer?
Follow the steps in this guide in order, confirm the required settings or tools, and verify the result before making additional changes.
Is it safe to assemble a hard drive for a computer?
It is generally safe when you follow the recommended instructions, use trusted tools, and avoid changing settings you do not understand.
What should you do if the process does not work?
Recheck the requirements, restart the device or application when appropriate, and review each step for missed settings or compatibility issues.
Related Articles
 How to Identify Hard Drive Failure, Hard Drive Failure, Bad Hard Drive7 minutes read
 Computer Hard Drive Is Fast, Why?6 minutes read
 5 Hard Drives with the Best Reliability6 minutes read
 5 Ways to Check Hard Drive Effectively to Help Periodically Check11 minutes read
 What Is a Hard Drive? There Are Several Types?7 minutes read
 Know About Bad Sectors on Your Hard Drive8 minutes read
Reader Comments 0
Sign in with email or Google to join the discussion.