Table of Contents
This practical guide explains how to Adjust Windows 11 Screen Off Time through clear, ordered steps. It also covers useful settings, common mistakes, and checks that can improve the final result.
Adjusting the screen off time on Windows 11 helps users with minimal effort control the screen off time in a way that suits their work. Let Software Tips share with you how to adjust the screen off time, disable the automatic screen off feature on Windows 11!
How to Adjust Windows 11 Screen Off Time in Settings
Settings on Windows 11 allows users to set up and adjust almost all features on Windows computers. When you need to adjust the screen off time, the computer sleep time when not in use, Simply set up as follows:
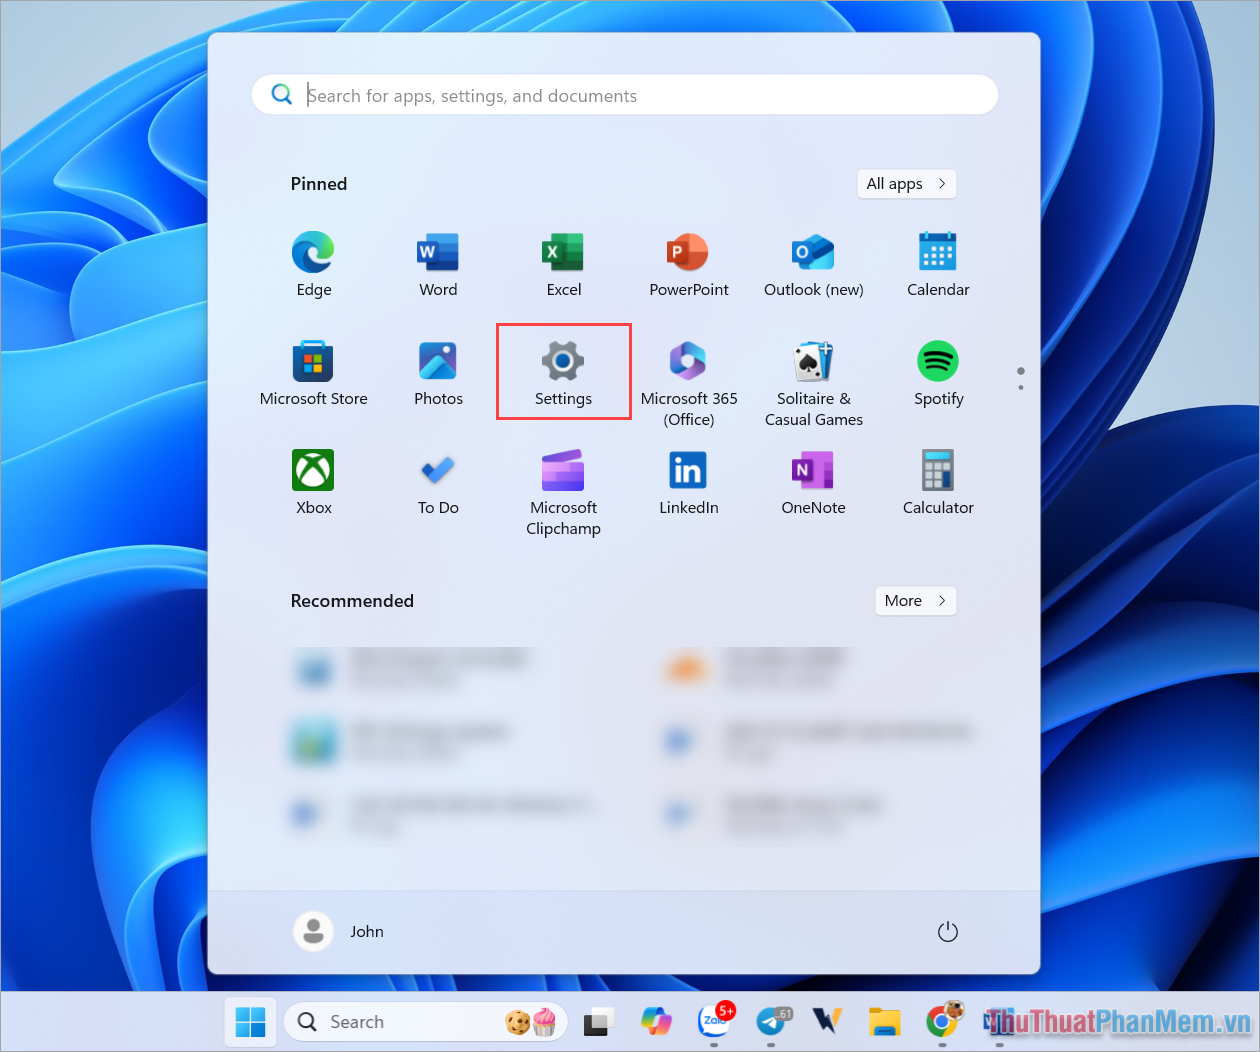
Step 1 : Press the Windows + I Key combination to open Settings on your Win 11 computer. Or you can also open Settings Via the Start Menu.
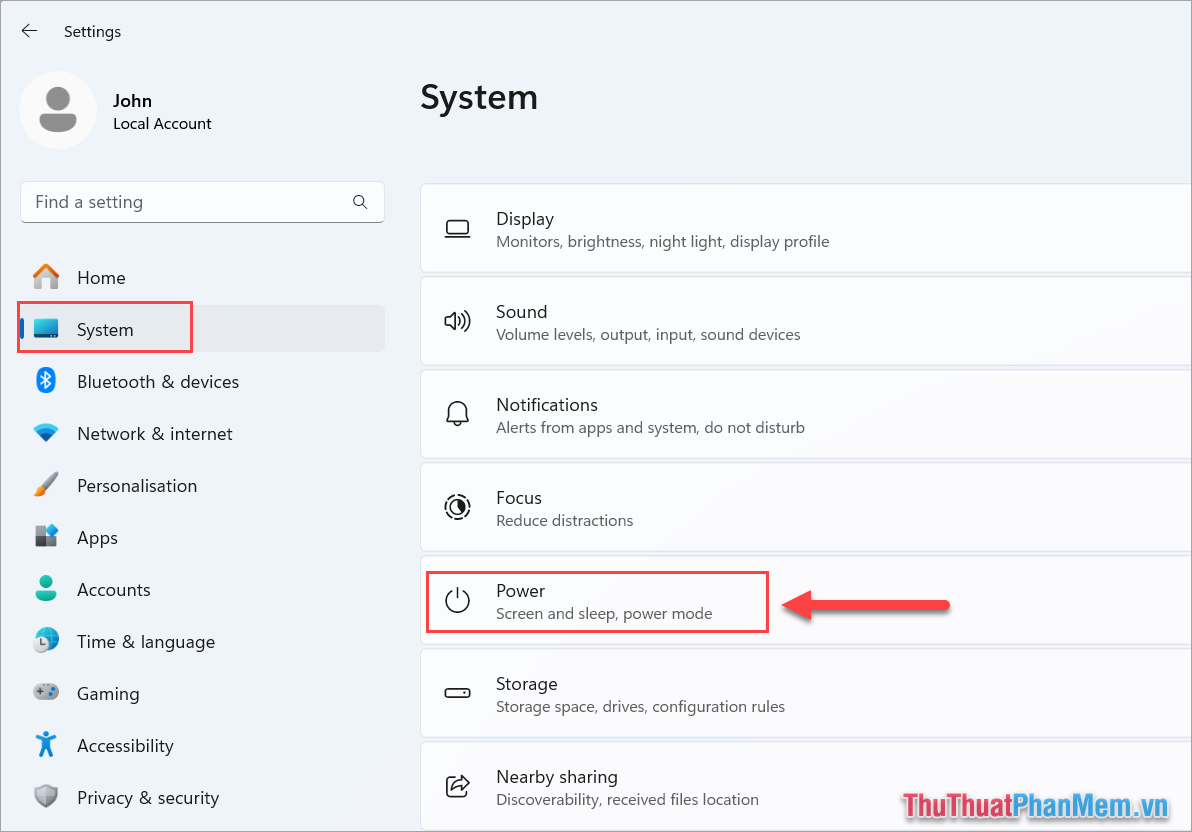
Step 2 : Then, select System And select Power To set the power consumption mode on the computer.
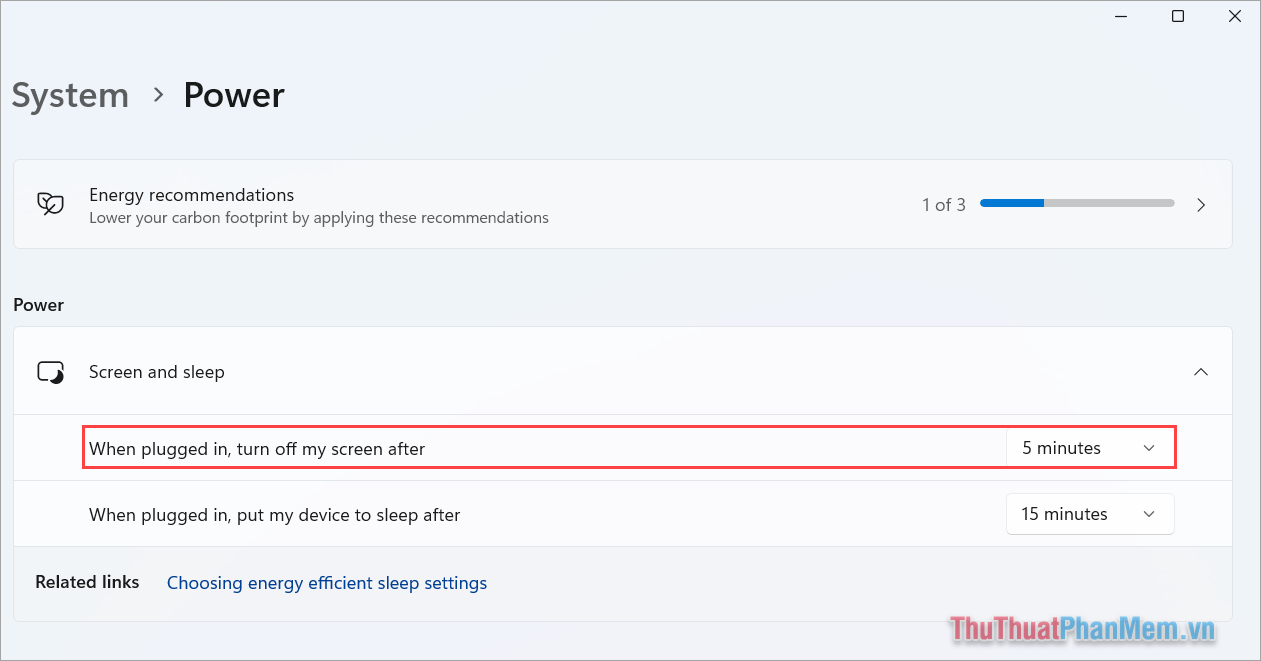
Step 3 : In the Power section, you will see the Screen and Sleep tab and this is the part to set the time to turn off the Windows 11 computer screen. To change the time to turn off the computer screen when not in use on Win 11, you change the value in the ' When plugged in, turn off my screen after' Section.
In addition, you also have another setting called ' On battery power, turn off my screen after' (Only available on Laptop/tablet/Tablet). This is also a mode to adjust the screen off time on Windows 11 but is applied to computer devices that use batteries such as Laptops. If you use a Laptop, you need to set up this section to change the screen off time when using the battery.+
How to Change Win 11 Screen Off Time Using Control Panel
Setting the screen off time after not using it on Windows 11 using Control Panel is one of the most basic and easy ways. With the settings in Control Panel, you can with minimal effort change the screen off time simply, efficiently and accurately. Changing the Win 11 screen off time on Control Panel will help you save a lot of battery when using your Laptop.
Step 1 : Type Control Panel Into The Start Menu And open it to use.
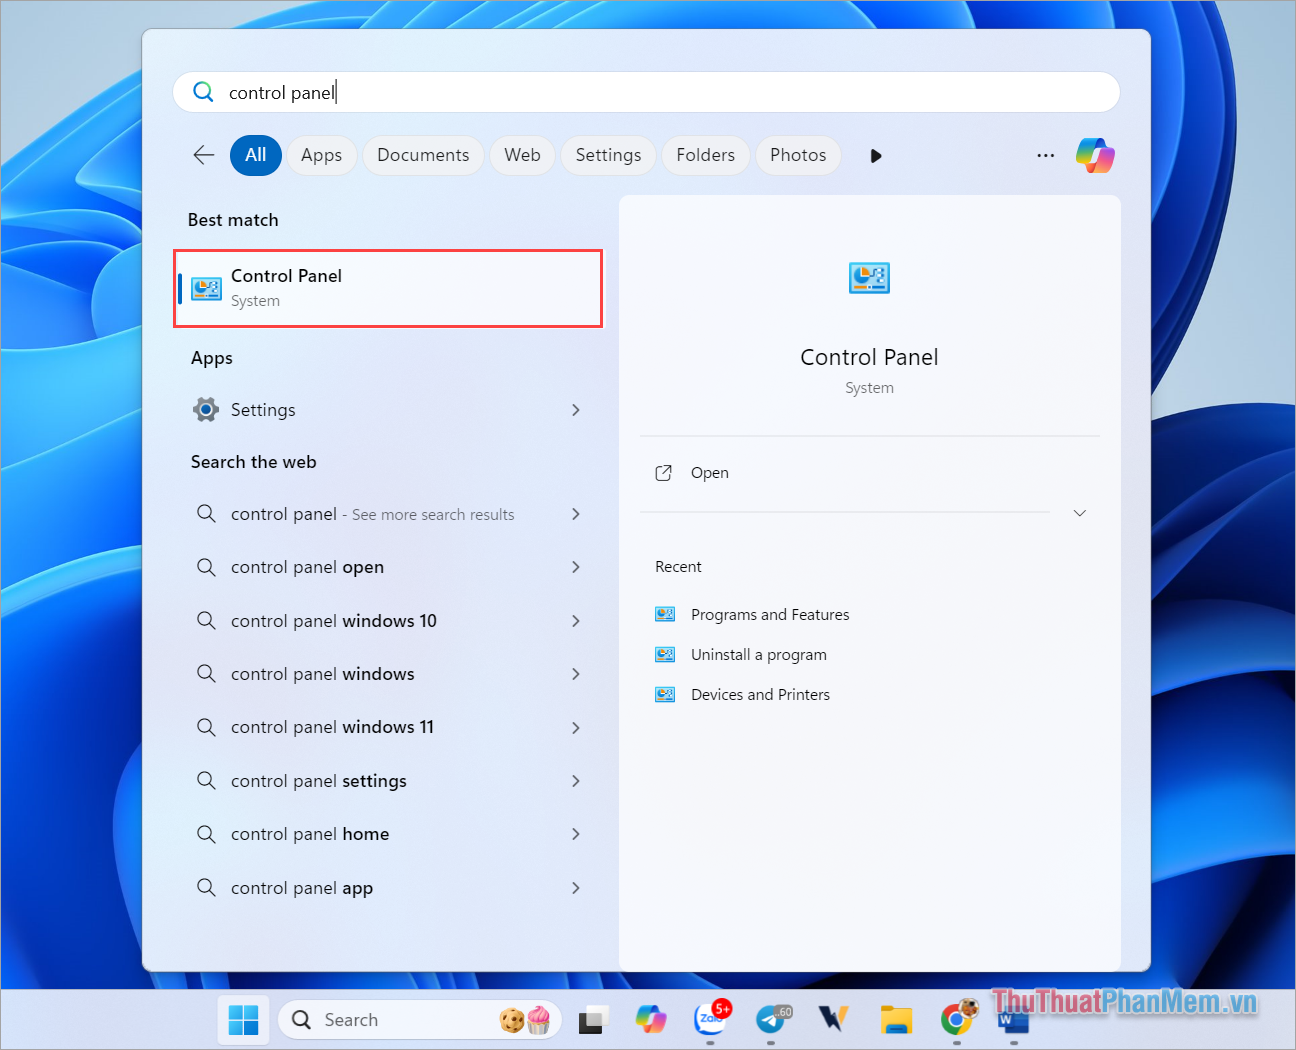
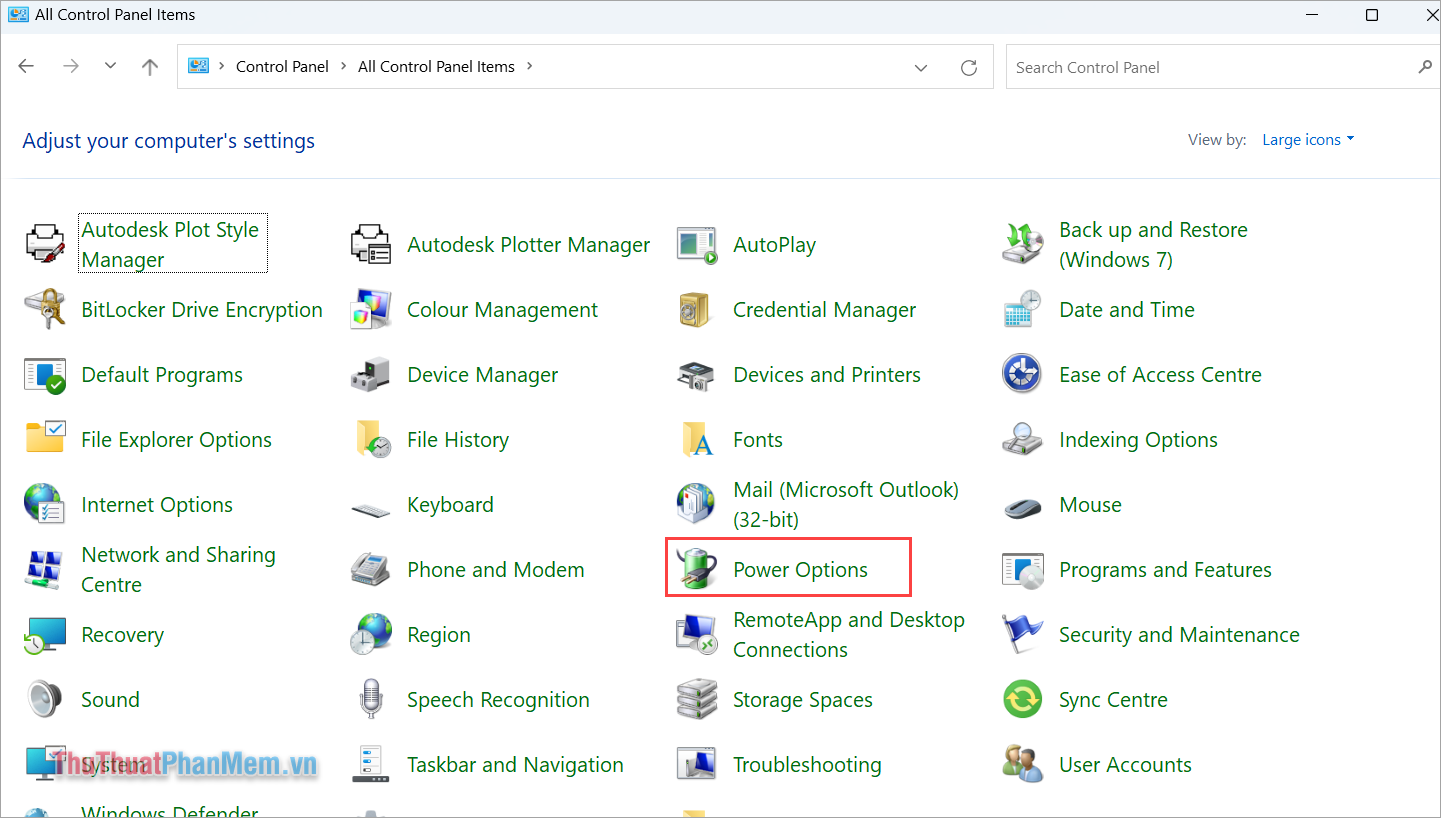
Step 2 : In Control Panel, select Power Options To set up power on your Win 11 computer . If you can't find Power Options, change View by to Large Icons.
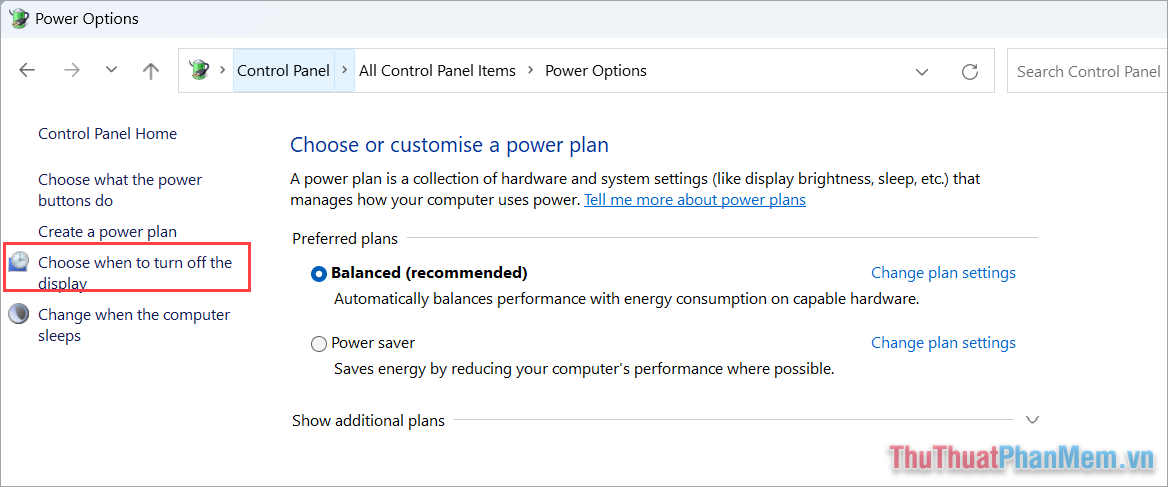
Step 3 : In the Power Options window, select Choose when to turn off the display To adjust the time to turn off the screen after not using it.
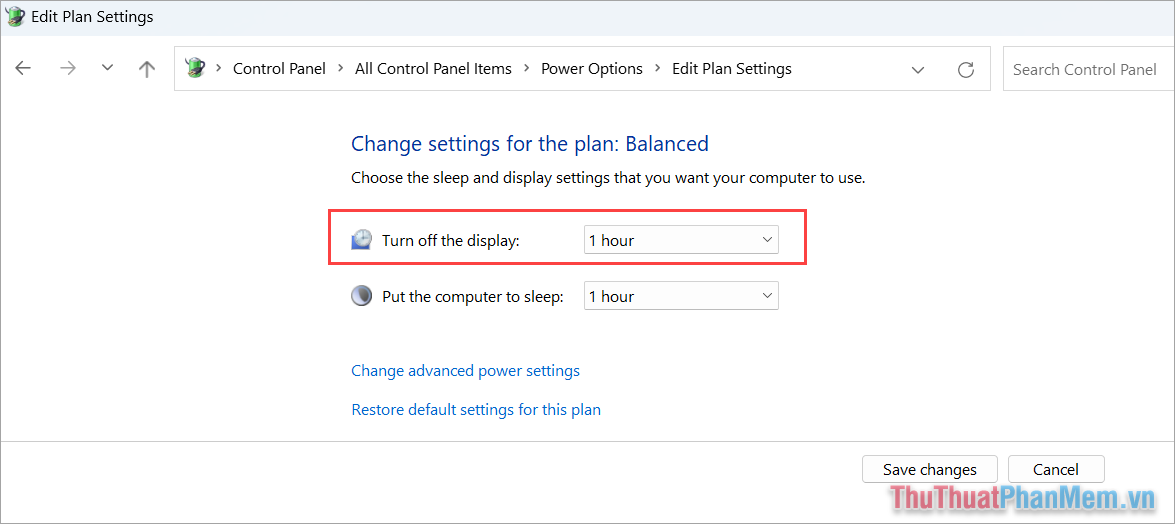
Step 4 : Here, you set the value Turn off the display To change the screen off time on Windows 11. Besides, you can also set the time to put the computer into sleep mode in Put the computer to sleep .
Note: In case you want to restore the screen off time, the time to put the computer into sleep mode, Simply select Restore default settings for this plan to return to default mode.
In this article, Software Tips has shared with you how to adjust the screen off time on Windows 11 efficiently and simply. Have a nice day!
FAQ
How do I Adjust Windows 11 Screen Off Time?
Follow the steps in this guide in order, verify each setting before continuing, and check the result after every major change.
What should I prepare before I Adjust Windows 11 Screen Off Time?
Confirm compatibility, install current updates, save important work, and back up data before changing system or application settings.
What can I do if adjust Windows 11 Screen Off Time does not work?
Review permissions and requirements, restart the relevant device or app, repeat the steps carefully, and use official support resources when the issue continues.
Related Articles
 The Fastest Way to Adjust Screen Off Time in Windows5 minutes read
 How to Adjust the Time to Turn Off the Screen Win 102 minutes read
 How to Adjust the Time to Turn Off the Screen Win 72 minutes read
 Adjust Screen Brightness of Windows 7 on PC, Laptop7 minutes read
 How to Adjust the Time to Turn Off the Screen of Windows 73 minutes read
 Top Software to Adjust the Best Computer Screen Brightness4 minutes read
Reader Comments 0
Sign in with email or Google to join the discussion.