How to add and change keyboard layouts in Windows 11
Windows offers more keyboard layouts besides QWERTY. With a few clicks, you can add a new keyboard layout, such as DVORAK and AZERTY, and then switch to that keyboard layout instead. Here's what you need to know.
How to add keyboard layout in Windows 11
Multiple keyboard layouts already installed for your preferred language. To add them to Windows 11, follow the steps below:
1. Press Win + I to open Settings, then go to Time & language > Language & Region.
2. Click the three-dot icon next to your preferred language (icon at the top) and select Language Options.
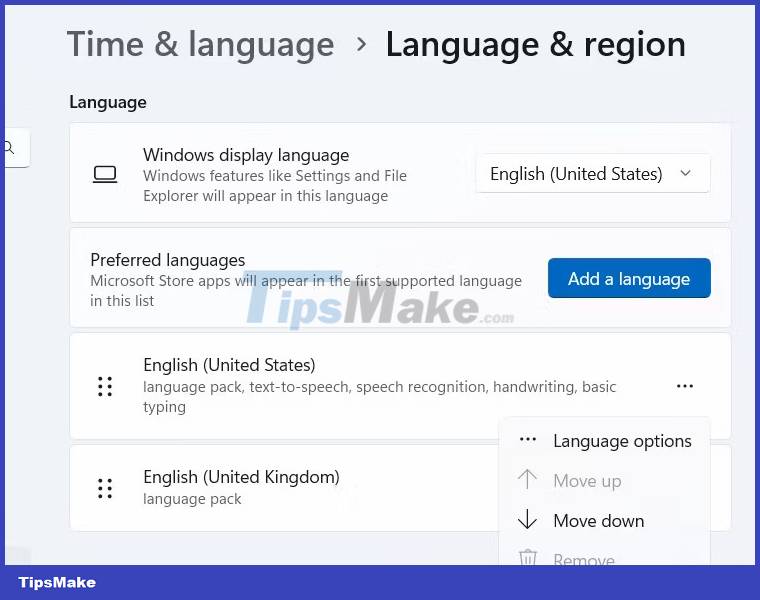
3. In the Keyboards section, click Add a Keyboard and choose a different keyboard key layout from the available options.

You can get more keyboard layouts by adding new languages. However, this requires an Internet connection to download the new language. So, make sure you are connected to the Internet and follow the steps below:
1. On the Language & Region page in Settings (step 1 above), click Add a Language.
2. In the pop-up window, select the language you want to install and click Next.

3. Click Install for Windows 11 to download and install the new language.
4. Follow steps 2 and 3 above to add a new keyboard layout for the language you just installed.
If you still can't find a keyboard layout you like, you should consider creating a custom keyboard layout.
How to change keyboard layout in Windows 11
To change the keyboard layout, click on the language switcher in the system tray section and choose a different layout from there.
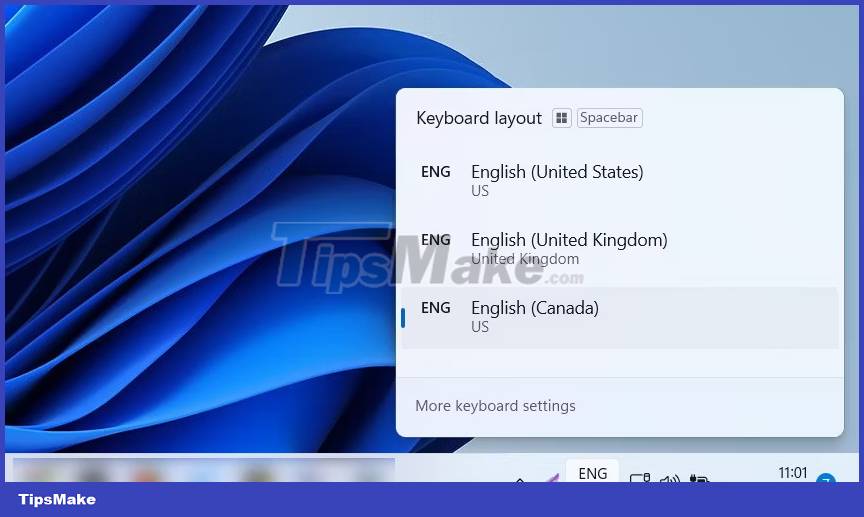
Alternatively, you can press and hold Win and then continue pressing the Space key to switch between different keyboard layouts. You can do the same by holding down the Shift key and pressing Alt.
How to change keyboard layout order
Keyboard layouts appear in the list based on when you added them to Windows. But now, you can change their order. Here's how:
Press Win + I to launch the Settings application. Navigate to the Time & language option. Click the Keyboard option.
Now, click on the three horizontal dots next to the keyboard in the list. To move the keyboard layout up in the list, select the Move up button. Similarly, click the Move down button to move the layout down one level in the list.
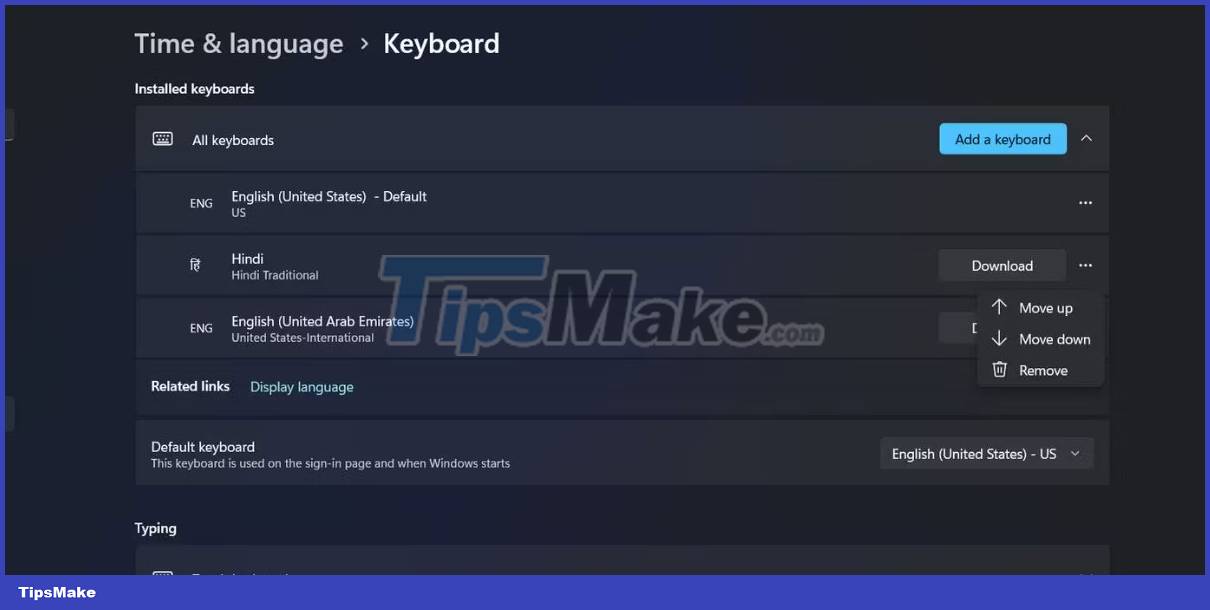
You can also click a keyboard in the list, then hold and drag the layout up or down in the list. Close Settings after you finish editing the order.
Now, press Windows + D to open the Keyboard Layout menu on the Taskbar. You'll notice that the order appears exactly as you configured it in the Settings app.
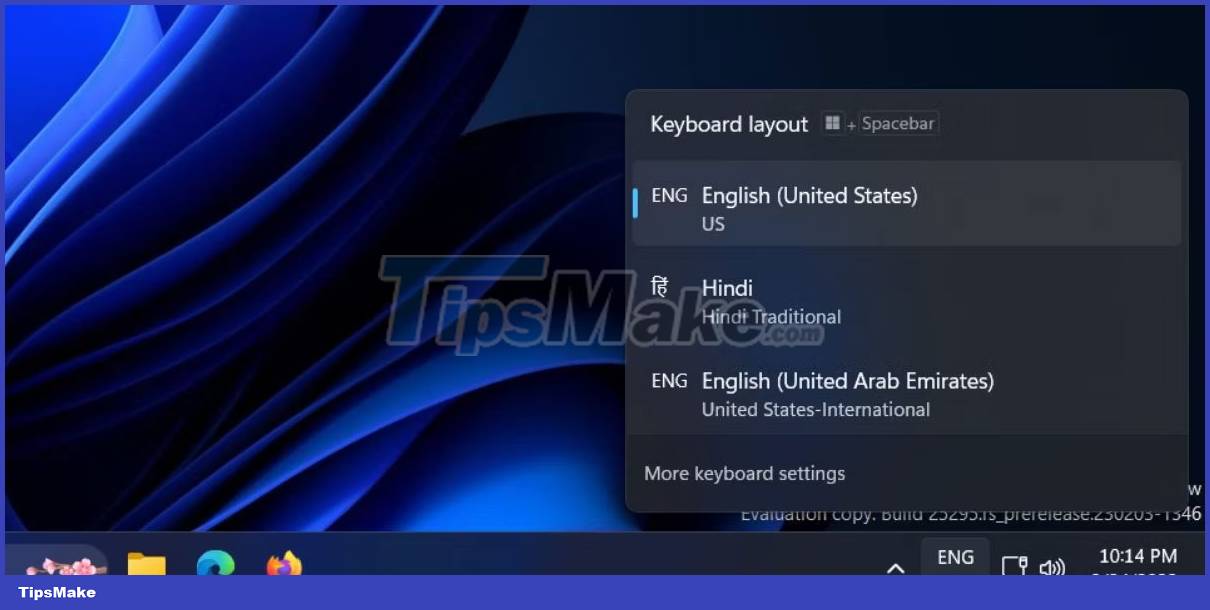
The list of keyboard layouts can get long, especially if you type in multiple languages or have multiple users each with their own language preferences accessing the system. Now you can move your most-liked keyboard layouts to the top or second position and bring less-used ones to the bottom with ease.
How to remove keyboard layout in Windows 11
If you don't need a keyboard layout, you can easily remove it. To do that, follow the steps below:
- Press Win + I to open Settings, then go to Time & language > Language & Region.
- Click the three-dot icon next to the keyboard layout you want to remove and select Language Options.
- In the Keyboards section, click the three-dot icon next to the keyboard layout and select Remove.
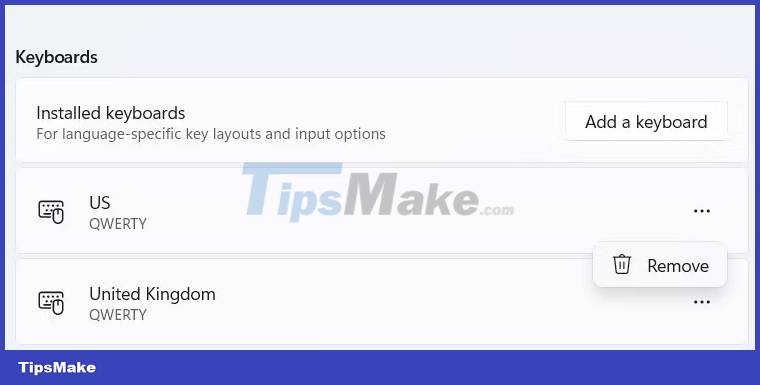
You can also delete a language if you don't need it anymore. To do that, follow the steps below:
- Go back to Language & Region in Settings.
- Click the three-dot icon next to the language you want to remove and click Remove.
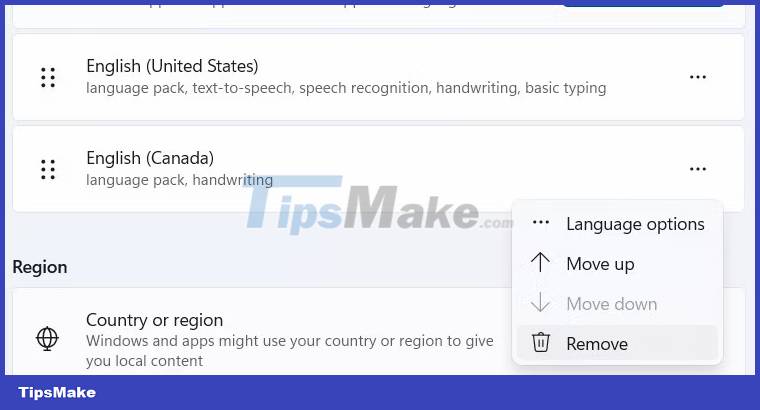
The language and its associated keyboard layout will now be removed from your computer.
If you want to quickly rearrange your Windows keyboard, just change its layout. You don't have to stick with the default layout if it doesn't meet your needs. Furthermore, the layout is flexible and can be used on a physical keyboard or an on-screen touch keyboard.