Flash - Simulation of Windows boot process (P2)
This article shows you how to create a flash file that describes the boot process into Windows graphical interface.
1. Create a file with the parameters shown in Figure 1:

Figure 1
2. Rename the layer to the background and create a new layer named square

Figure 2
3 Using the Rectangle Tool , adjust the fill color to green, remove the border color and draw a square
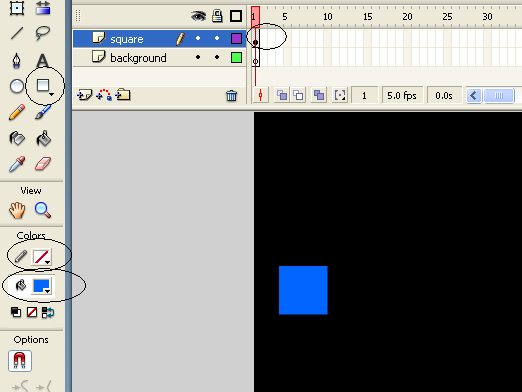
Figure 3
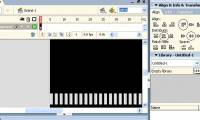
4 Using the Selection Tool, drag the rectangles that are right above the blue rectangle and press the Delete key
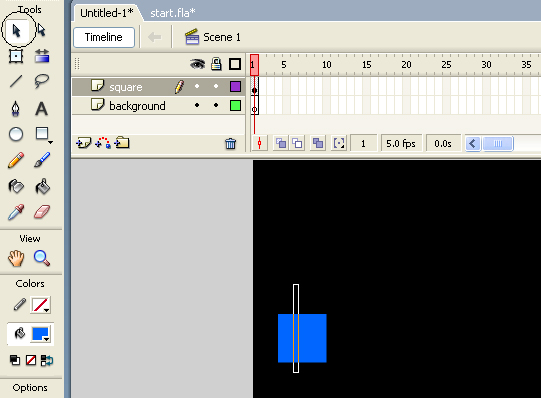
Figure 4a
(Results obtained after pressing Delete)

Figure 4b
5. Right-click Frame 15 (of the square layer) and select Insert KeyFrame
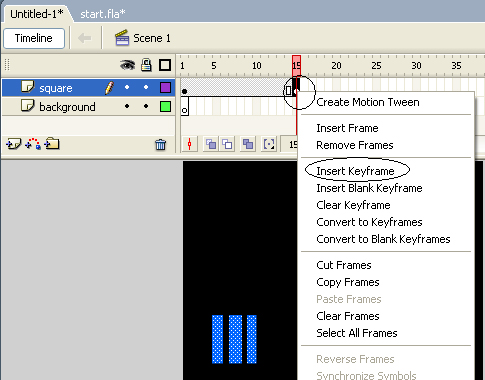
Figure 5
6. Use the mouse to drag the square to the right
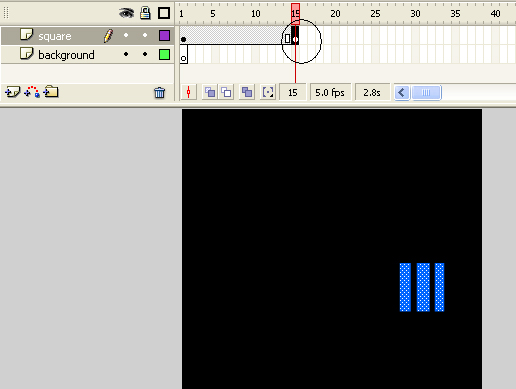
Figure 6
7. Right-click any location between Frame 1 and Frame 15 and select Create Motion Tween
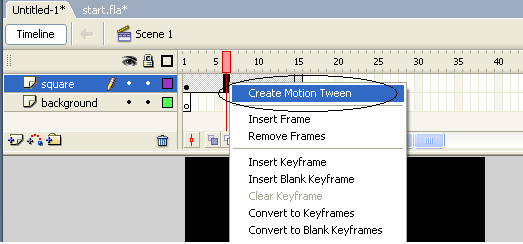
Figure 7
8. Lock 2 available layers again and create a new layer called rectangle (see Figure 8).
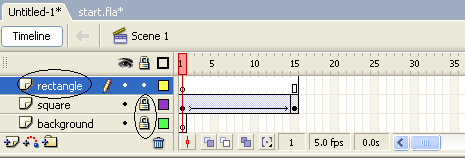
Figure 8
9. Click Frame 1 of this layer and use the RectangleTool tool (adjust the fill color to white, remove the border color) to draw a rectangle.
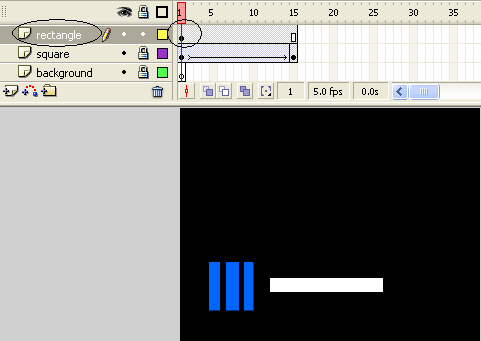
Figure 9
10 Lock the rectangle layer and create a new layer named frame
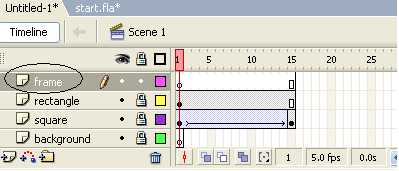
Figure 10
11 Using the Rectangle Tool (remove the fill color, set the border to white, adjust the Stroke height to 3 ) draw a rectangular frame around the rectangle of the rectangle (see Figure 11 temporarily hiding the rectangle for you. see results)
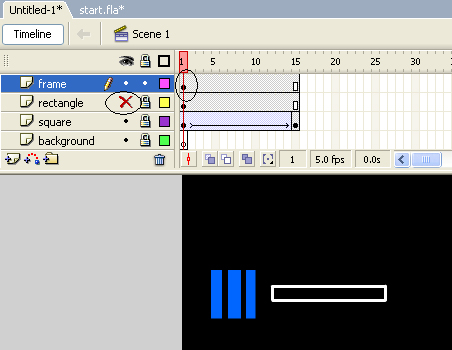
Figure 11
12. Lock the frame layer again and create a new layer named text . At Frame 1 of the text layer, select the Text Tool to create the text
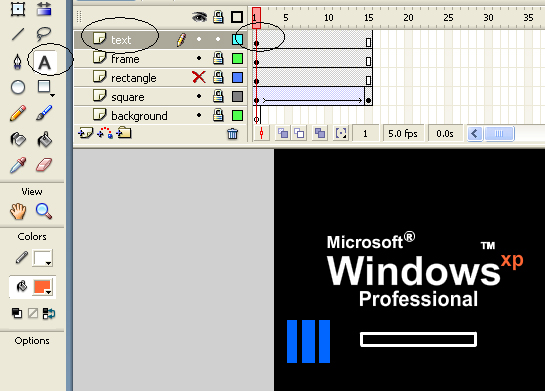
Figure 12
13. Lock the text layer and create a new layer called flag , use the Rectangle Tool to draw the flag
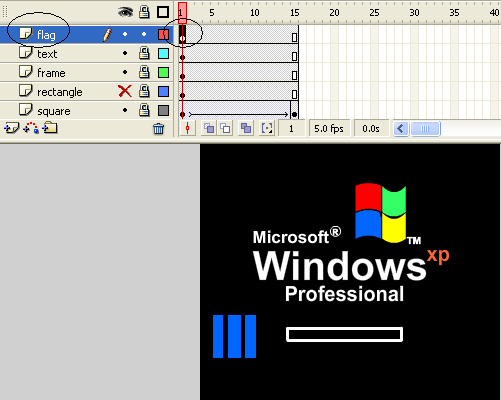
Figure 13
14. Right-click on rectangle layer and select Mask
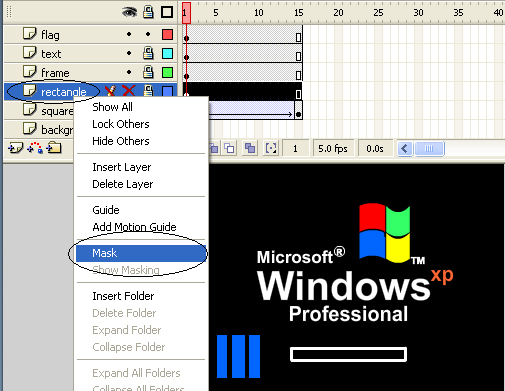
Figure 14
15. Press Ctrl + Enter to see the result and download the source file here .
Was this article helpful?
Your feedback helps us improve.
Related Articles
 Flash - Simulates the Windows boot process2 minutes read
 Flash - Simulating the windows startup process (P3)4 minutes read
 WinSetupFromUSB - a simple way to install Windows XP from a USB flash drive3 minutes read
 How does Windows 10 start up?3 minutes read
 How to Boot Linux from USB on Windows 108 minutes read
 How to Boot from USB on Windows 77 minutes read
Reader Comments 0
Sign in with email or Google to join the discussion.