Table of Contents
Understanding Flash requires more than a headline. The overview below breaks down the key facts, changes, and user impact.
Flash Overview
1. Create a file with the parameters shown in Figure 1
 Figure 1
2. Rename the existing layer to a background and create a new layer named square
 Figure 2
3. Using the Rectangle Tool set the fill color to green, remove the border color and draw a square that covers the background
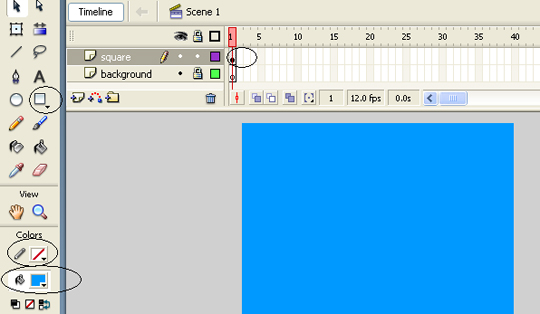 Figure 3
4. Lock the existing layer and create a new layer named lines
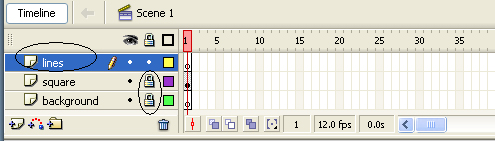 Figure 4
5 Using the Rectangle Tool, remove the border color, set the fill color to white and draw two straight lines
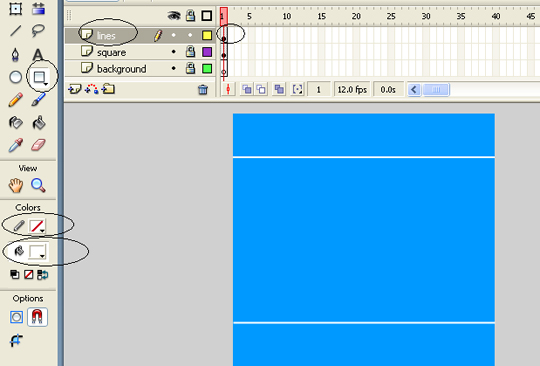 Figure 5
6. Lock the lines layer and create a new layer named text
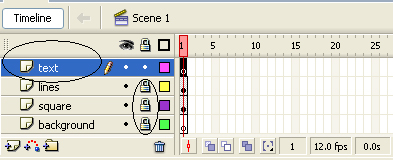 Figure 6
7 Select the Text Tool and type the words ' Windows is startting up. ' and adjust the size accordingly
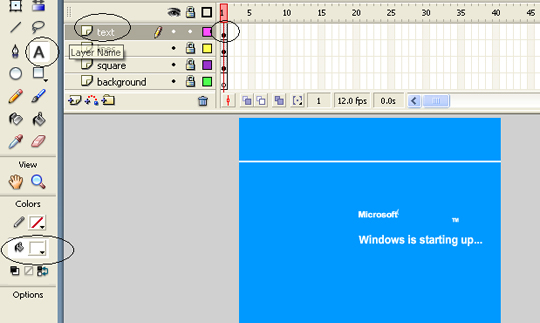 Figure 7
8. Lock the text layer and create a new layer named flag
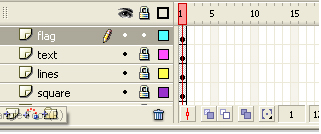 Figure 8
9. Use the Rectangle Tool, adjust the colors accordingly and draw the Windows flag image (you can also copy from lesson 2).
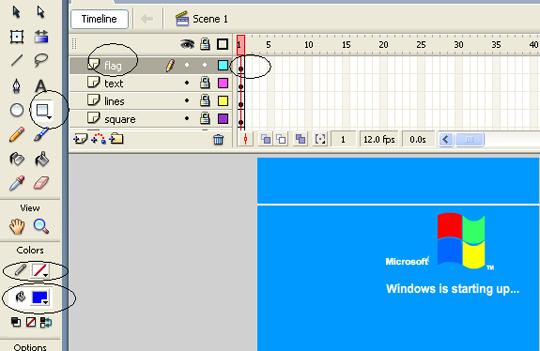 Figure 9
10. Lock the flag again, unlock the text layer, right-click Frame 15 of the text layer and select Insert KeyFrame
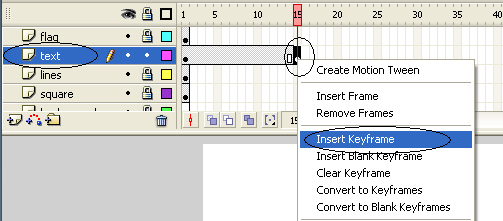 Figure 10
11. Unlock the background layer, right-click on its Frame 15 and select Insert Frame
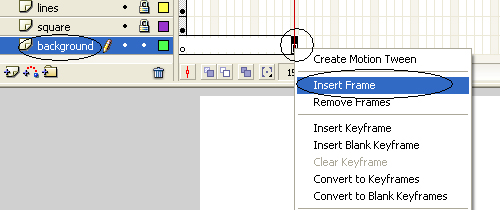 Figure 11
12. Do the same step 11 for the square layer
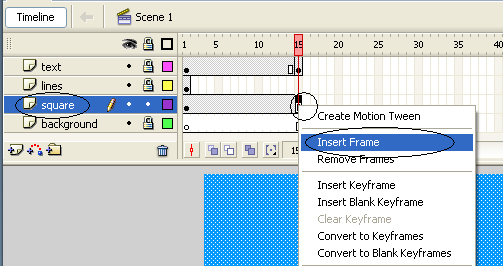 Figure 12
13. Do the same step 10 for the lines layer
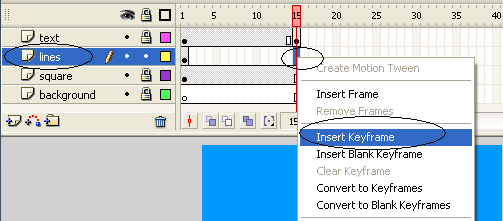 Figure 13
14. Do the same step 10 for the flag layer
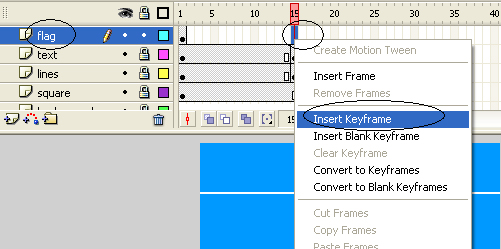 Figure 14
15. Unlock the text layer, click its Frame 1 to select the text box. Select Windows > Color Mixer to open the color palette, in Alpha, set to 50%.
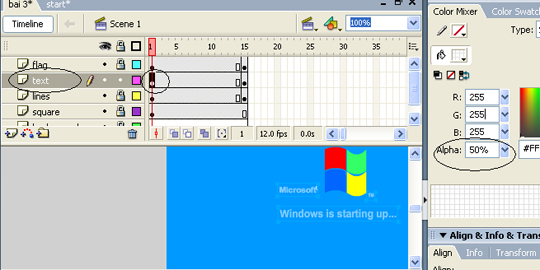 Figure 15
16. Do the same step Step 15 for the lines layer
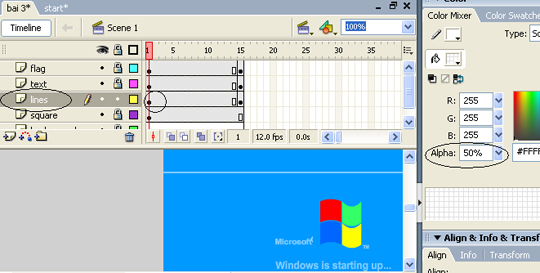 Figure 16
17. Unlock the flag layer, click Frame 1, right-click on the flag on the canvas and select Convert to Symbol., in the pop-up panel select Movie Clip
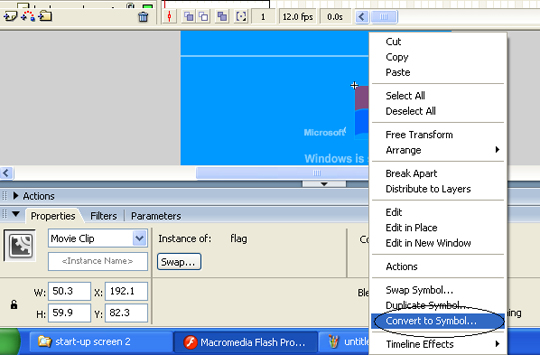 Figure 17
18. Open the Properties panel, in the Color section, select Alpha and set it to 50%.
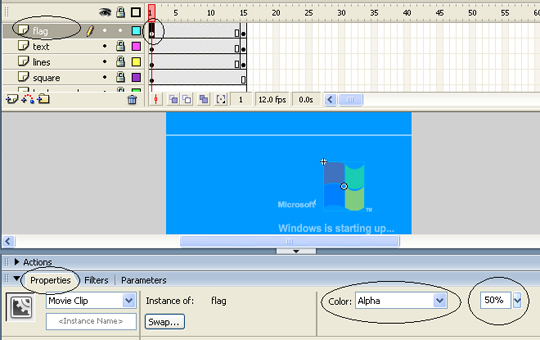 Figure 18
19. Right-click Frame 7 of the flag layer and select Insert KeyFrame, then adjust Alpha parameter to 75%.
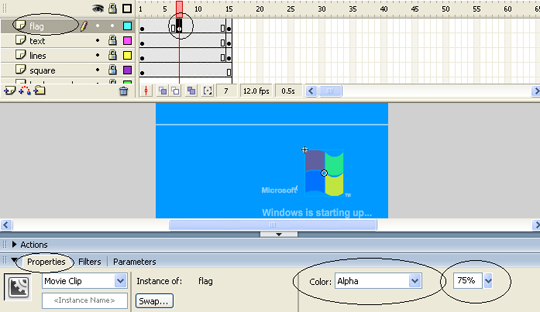 Figure 19
20. Do the same step 19 for the lines layer, and the text layer
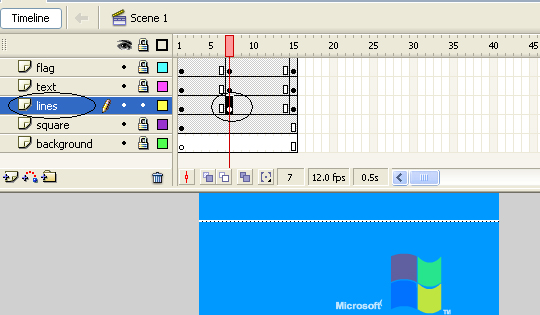 Figure 20
21. Click on the flag layer and create a welcome class right on it
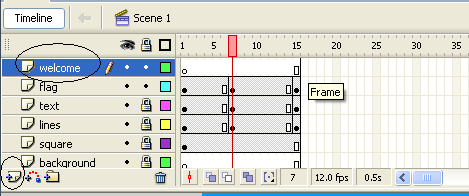 Figure 21
22. Right-click Frame 16 of the welcome class and select Insert KeyFrame
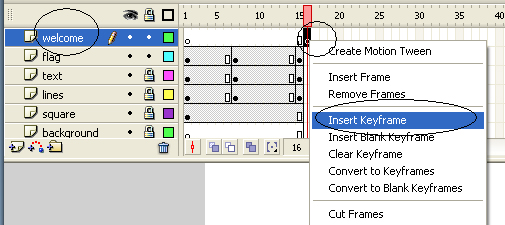 Figure 22
23. Copy pictures on square and lines layer and select Edit > Paste in place to create the same image, right on Frame 16 of welcome layer.
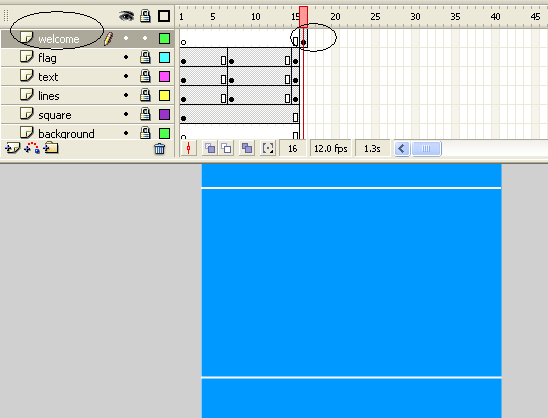 Figure 23
24. Use the Text Tool to create a welcome text
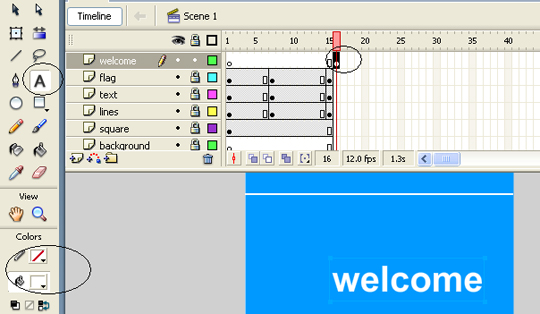 Figure 24
25. Right-click Frame 30 of the welcome class and select Insert KeyFrame
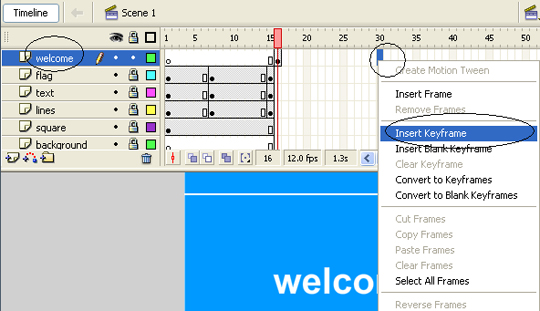 Figure 25
26. Click again Frame 16 of the welcome layer, click on the welcome text on the canvas and set its Alpha parameter to 0%.
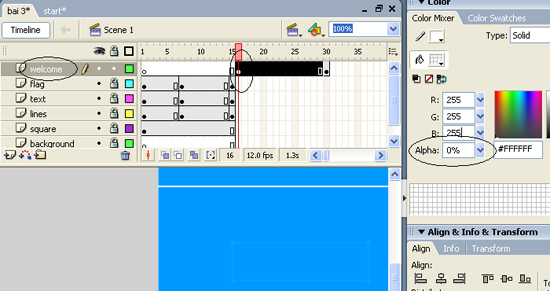 Figure 26
27. Create an action class right above the welcome class
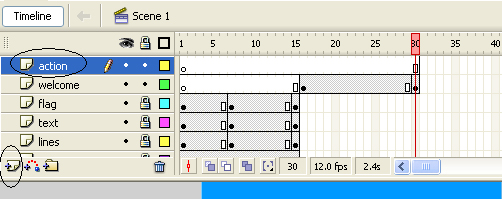 Figure 27
28. Right-click Frame 30 of the action class and select Insert KeyFrame
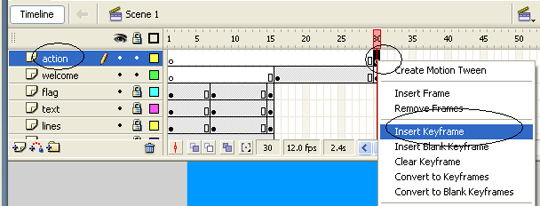 Figure 28
29. Select Windows > Actions to open the Actions panel, in this panel enter the command LINE
Stop ();
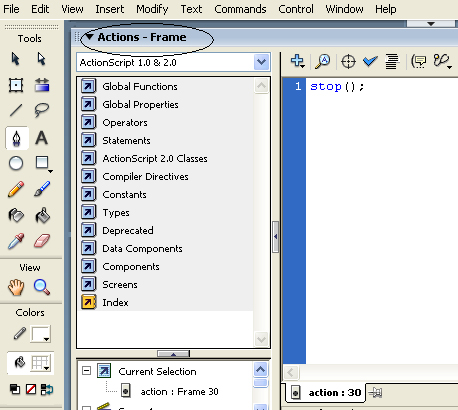 Figure 29
30. Press Ctrl + Enter to check the result. Download the source file here.
FAQ
What happened in Flash - Simulating the Windows Startup Process (P3)?
Understanding Flash requires more than a headline.
What factors influenced Flash?
The overview below breaks down the key facts, changes, and user impact.
What was the practical impact on users?
Create a file with the parameters shown in Figure 1 Figure 1 2.
Related Articles
 Flash - Simulation of Windows Boot Process (P2)3 minutes read
 Program: How to Automatically Close Open Windows on Startup5 minutes read
 Boost Windows 10 Startup Speed by Enabling Fast Startup3 minutes read
 Flash - Simulates the Windows Boot Process: Macromedia Flash3 minutes read
 Fix Windows Startup Errors with Startup Repair6 minutes read
 How to Disable Hibernation Without Disabling the Fast Startup5 minutes read
Reader Comments 0
Sign in with email or Google to join the discussion.