Table of Contents
This article provides a clear overview of Extract Excel Content Into Image Format, with the main facts, useful context, and practical details organized for easy reading.
The article shows how to extract Excel 2007, Excel 2010, Excel 2013 content into images.
1. Microsoft Excel 2007.
Step 1: Open Excel file and select (highlight) the content to be extracted to image, then in the Home tab, select Paste -> As Picture -> Copy as Picture.
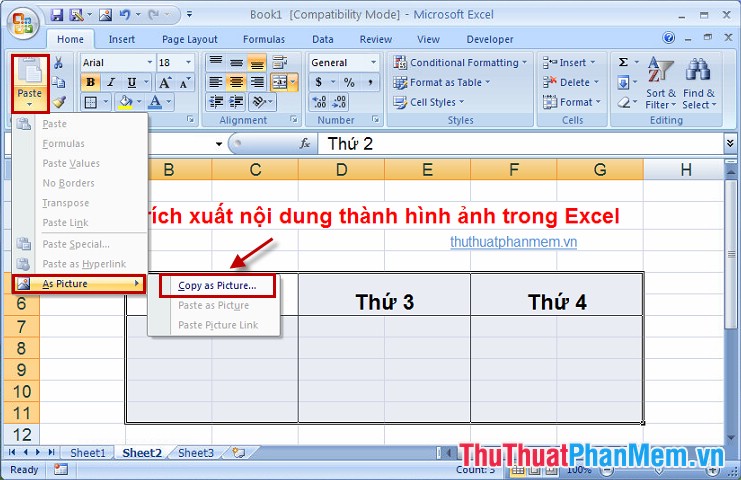
Step 2: A dialog box appears, select As shown on screen and click OK .

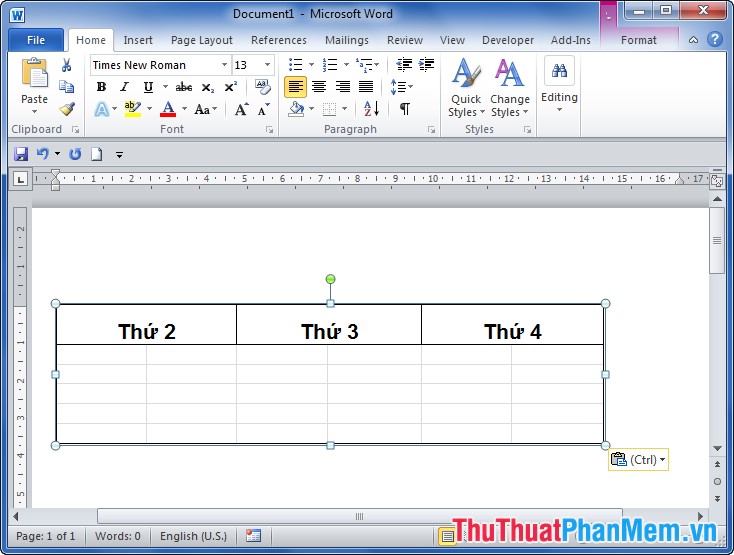
Step 3: Open the Word or Paint document to paste the image into. For example, paste images into Word.

2. Microsoft Excel 2010.
Step 1: Open Excel file and select (highlight) the content to be extracted to image, in the Home tab, click the arrow next to the Word Copy and choose Copy as Picture .

Step 2: A dialog box appears, select As shown on screen and click OK .
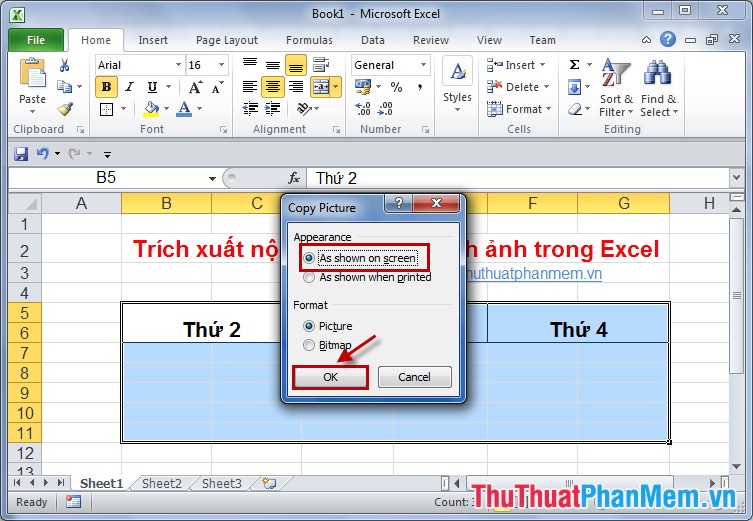
Step 3: Then you paste the image into Paint or Word. For example paste into Word.
3. Microsoft Excel 2013.
With Excel 2013 you work the same as on Excel 2010.
With very simple steps, you have quickly extracted the content in Excel spreadsheet into an image format to use. Good luck!
FAQ
What is the main focus of Extract Excel Content Into Image Format?
The article explains the most important facts, context, and practical details related to Extract Excel Content Into Image Format.
Who may find this information useful?
It is useful for readers who want a clear overview, practical context, and a better understanding of the subject.
What should readers verify before taking action?
Check current product versions, official requirements, regional availability, and any details that may have changed since the original publication.
Related Articles
 How to Convert Images into Text Using Google Drive, Onenote4 minutes read
 How to Extract Numbers or Text from Excel6 minutes read
 Instructions to Change DMG File to ISO File3 minutes read
 How to Convert PDF to JPG, PNG Images: Convert Format14 minutes read
 How to Format Dates in Excel: How to Format Excel Dates5 minutes read
 Methods for Converting PDF to JPG or PNG Images15 minutes read
Reader Comments 0
Sign in with email or Google to join the discussion.