Error Could not create the Java Virtual Machine when running Minecraft
How to fix Could not create the Java Virtual Machine error on Windows? Instructions to fix Error: A fatalexception has occurred. Program will exit.
Table of Contents
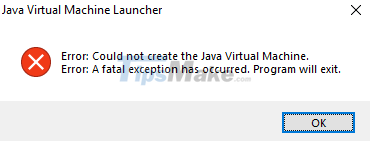
Have you ever encountered an error message like this? (this error occurs when I run the game Minecraft).
Error: Could not create the Java Virtual Machine.
Error: A fatalexception has occurred. Program will exit.
I think this error must have been many of you. That's why today I will show you how to fix this error in the most effective way.
1. Create a System Variable for Java
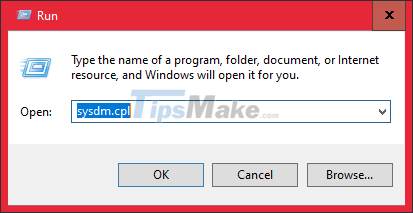
First, press the Windows + R key combination to open the Run dialog box => then enter sysdm.cpl => and click OK.
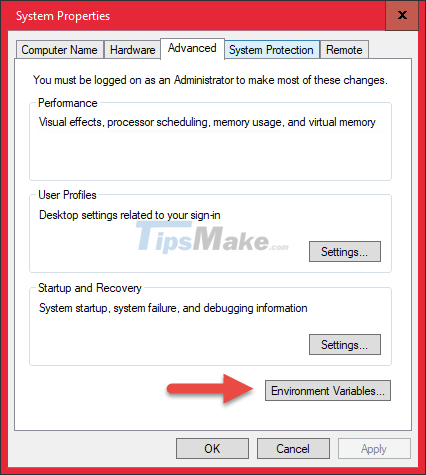
Next, go to the Advanced tab => and click on Environment Variables in the Startup and Recovery section.
Then you continue to click New in the System Variables section.
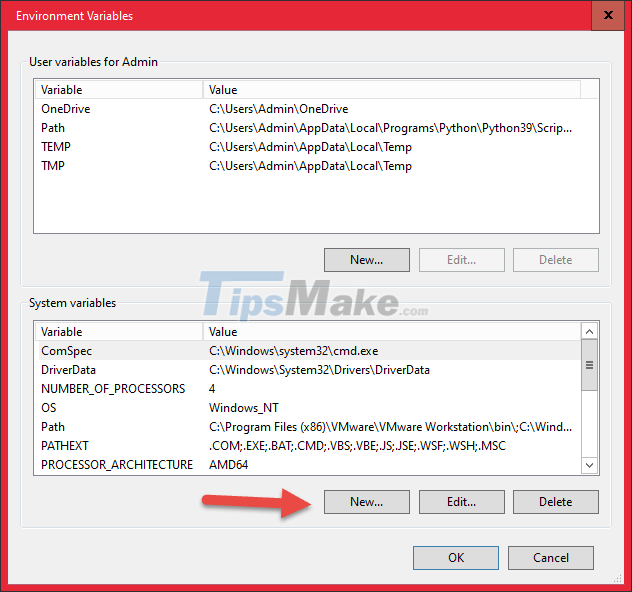
Then you set the following:
- Variable name you enter JAVA_OPTIONS
- The variable value you enter is –Xmx512M to determine the maximum amount of RAM that Minecraft can use, in this example I let it be 512MB. You can change it to –Xmx1024M or –Xmx2048M.
=> Finally you click OK to execute.

2. Run Java with Admin rights
To do this, press the Windows + S key combination to open Windows Search => then enter the search keyword Java.
If there is a Java shortcut available on the Desktop, right-click the shortcut.
Right-click on the result it finds => then click Open file location to access the Java installation directory.
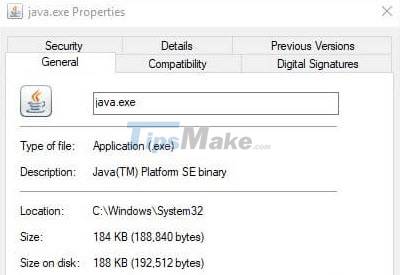
=> Next you right-click on the java.exe file => and select Properties.
You switch to the Compatibility tab => then you tick the Run this program as an administrator section. Finally click Apply => OK to finish.

3. Reinstall Java
Reinstalling Java is also sometimes a way to fix this. Maybe your Java failed to install. You should also download the Java Offline version to avoid errors when installing.
4. Conclusion
Ok, so I have finished showing you how to fix Could not create the Java Virtual Machine error on Windows operating system. Good luck.
Was this article helpful?
Your feedback helps us improve.
Related Articles
 How to Tune a Java Virtual Machine (JVM)3 minutes read
 Fix the error of not running VMware virtual machine, VirtualBox on Windows 103 minutes read
 Summary of shortcuts in Minecraft Java Edition4 minutes read
 How to fix the error does not install Java13 minutes read
 How to create a Windows 10 virtual machine with VMware Player and VirtualBox10 minutes read
 How to Create a Minecraft Server Using Hamachi11 minutes read
Reader Comments 0
Sign in with email or Google to join the discussion.