How to Create an ARM-Based Linux Virtual Machine with Azure
The number of ARM computers is increasing. If you want solid proof, look no further than the new ARM-based MacBook or the pocket-sized Raspberry Pi..
Azure is one of the cloud providers that has started offering ARM-based virtual machines (VMs) in its portfolio. ARM architecture has been widely used in smartphones and is entering the PC market because of the advantages it offers.
The following article will show you how to set up an ARM-based Linux virtual machine with Azure.
Step 1: Sign in to Azure and create a resource
Go to portal.azure.com and log in. If you don't have an Azure account, create a free trial account.
Once logged in, click the Create a resource button under the Azure services heading .
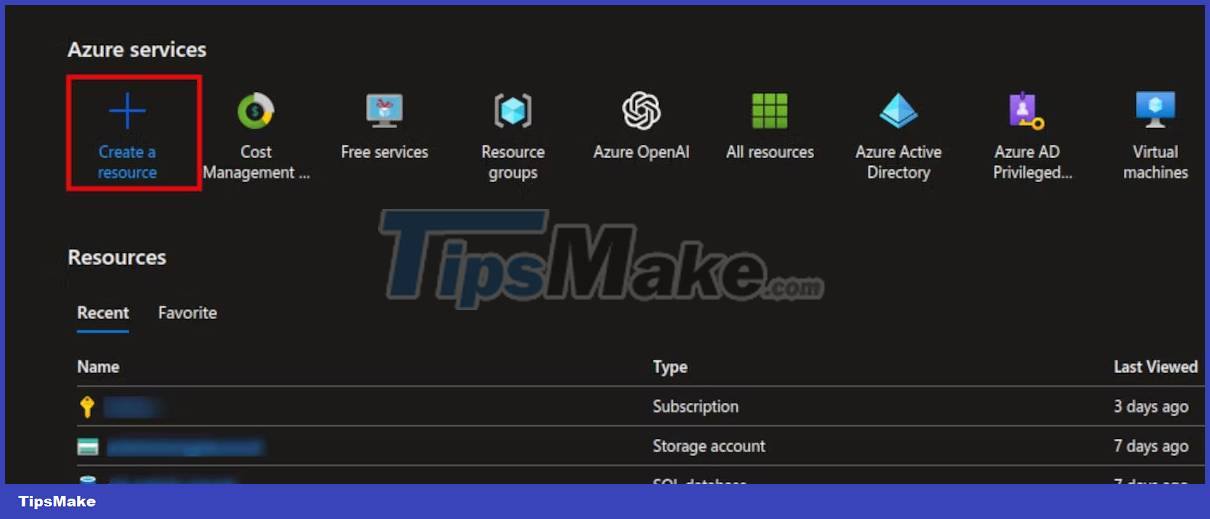
Next, you will see a list of popular Azure services. Select the Virtual Machine service . Alternatively, just search for Virtual machine in the search box.
Step 2: Create an ARM-based virtual machine
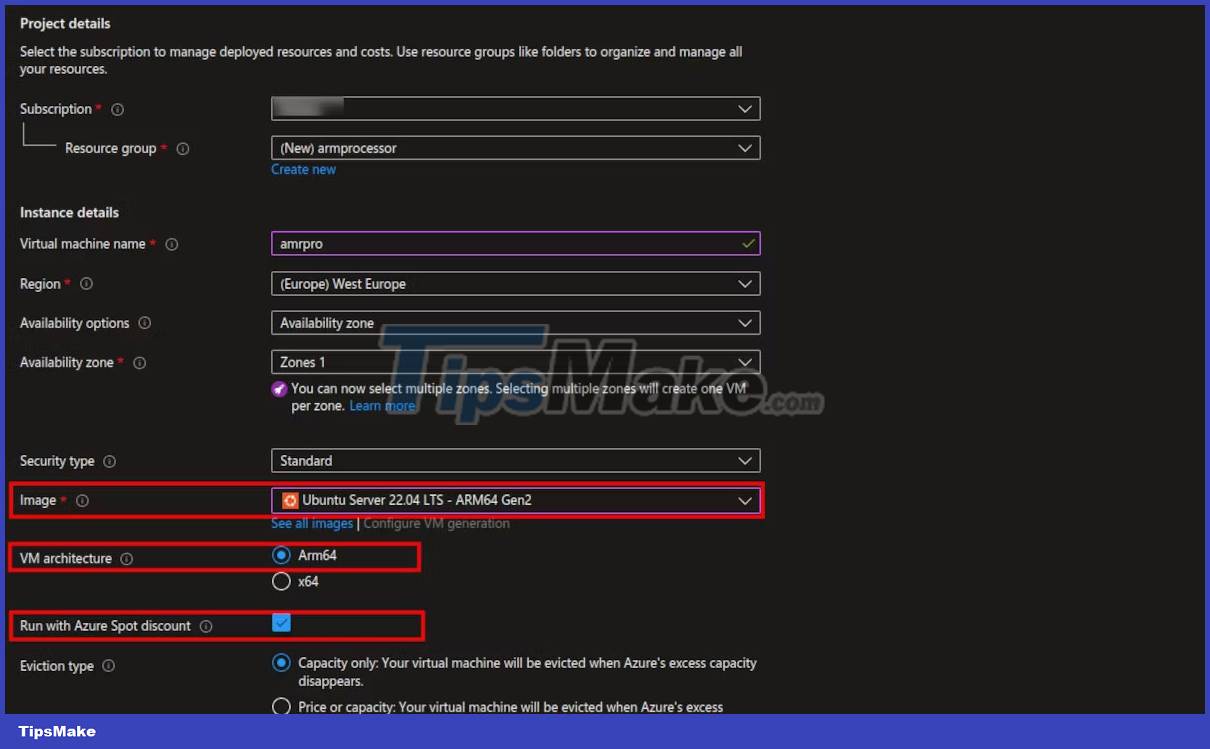
On the Create Virtual Machine page , you need to fill in all the fields marked with an asterisk (*) as required.
Pay special attention to the following fields:
- Image : Select the Linux distribution image of your choice. It should be ARM64. In addition, choose the appropriate VM image according to your computer needs. Image VMs with high computational specifications will cost more.
- VM architecture : Make sure to select ARM64 to use ARM based processor.
- Run with Azure spot discount : Check this box to easily find ARM-based VMs. Due to the limited availability of ARM-based virtual machines, Azure allocates space to you on an unused resource.
- Authentication type : Select the Password option , and then enter your preferred username and password.
Azure may reclaim space for services with a Spot discount, so this option is not recommended for mission-critical systems.
Step 3: Verify virtual machine details

Once you have filled in all the required information, click the Review + create button located in the bottom left corner.
Azure will validate the virtual machine details you provided and notify if the authentication is successful or failed.
See a summary of the virtual machine resources you're about to create. At this stage, you can still make changes to your virtual machine by clicking Previous and modifying the configuration option you want to change.
If the validation fails, you'll be given instructions on what to fix. Otherwise, if everything is fine, click the Create button .
Step 4: Access the ARM-based virtual machine
Once created, click the Go to resource button and note down the public IP address of the virtual machine. You will use this IP address to access the VM via SSH from your PC using the following command format:
ssh username@địa_chỉ_ip_publicFor example:
ssh muo@108.143.208.20You can run and use the old Linux commands you are familiar with. The only difference is that the packages you install will be targeted towards ARM-based processors.
To confirm the architecture of the virtual machine, use the uname command as follows:
uname -m
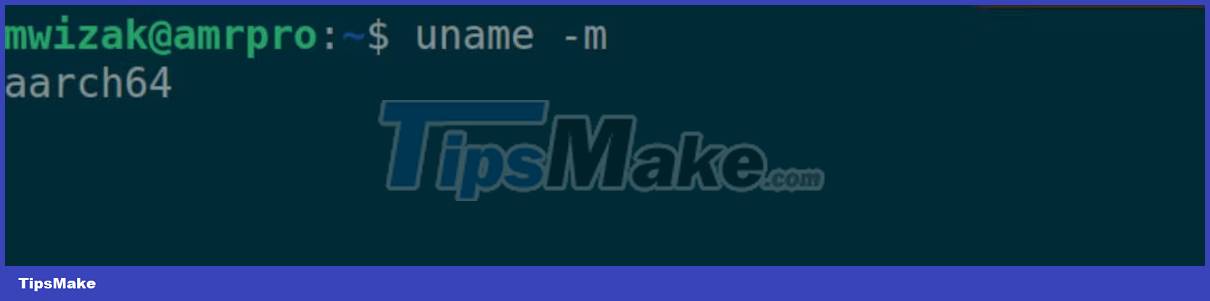
Output aarch64 stands for ARM architecture 64-bit processing.
ARM-based PCs are powerful, energy-efficient, and generate less heat. Most of the major Linux distributions can run on ARM-based processors.
In addition to using ARM-based virtual machines in the cloud, you can purchase a dedicated ARM-based Linux desktop or laptop.