Instructions for creating a Domain Controller - DC on Windows Server 2012
In the tutorial article below, TipsMake.com will introduce you how to create Domain Controller - DC on Microsoft Windows Server 2012 platform. The installation of Windows Server, we please ignore because it is quite simple, the graphical interface is already available, you just need to click Next> Next> Finish to be ...
- 1. Overview of Windows Server 2012:
- 2. Create Domain Controller - DC on Windows Server 2012:
- 3. Video tutorial for installing Active Directory, DNS and DHCP to create Windows Server 2012 Domain Controller:
- To change the name displayed on the computer, please refer to the article:
- You can refer to Microsoft documentation about the Active Directory Domain Services (Level 100) installation process.
In the tutorial article below, TipsMake.com will introduce you how to create Domain Controller - DC on Microsoft Windows Server 2012 platform. The installation of Windows Server, we please ignore because it is quite simple, the graphical interface is already available, you just need to click Next> Next> Finish is okay.
1. Overview of Windows Server 2012:
As you know, in a Windows Server 2012 environment, the dcpromo command is disabled, so if you want to create DC, you need ADDS (Active Directory Domain Services) from the management interface - Server Manager. Let's get started!
First, we will change the server name and IP address to a certain address (please note that you should not get the address 192.168.0.1, then configure it to avoid trouble). Install AD DS role, in Server Manager interface, click Add roles and features as shown below:

Note that you are with the server, we should not leave the Server name arbitrarily, but should change to something that is easy to remember. For example, in this article, I renamed the Windows Server 2012 computer to server2k12dc .
To change the name displayed on the computer, please refer to the article:
- How to rename the computer on Windows XP.
- Change the computer name with Windows 7 or later.
The next screen is displayed, select the Server Roles> Active Directory Domain Services section and click Add Features :

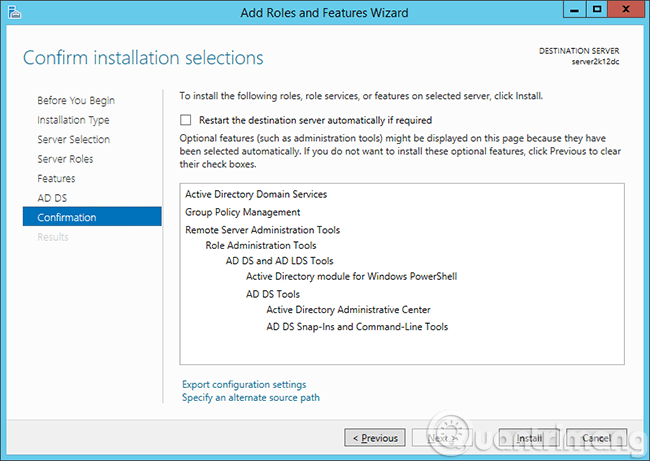
After that, click Next and keep the default options. Go to this Confirmation window, click Install to start installing and creating the necessary domain controller service :
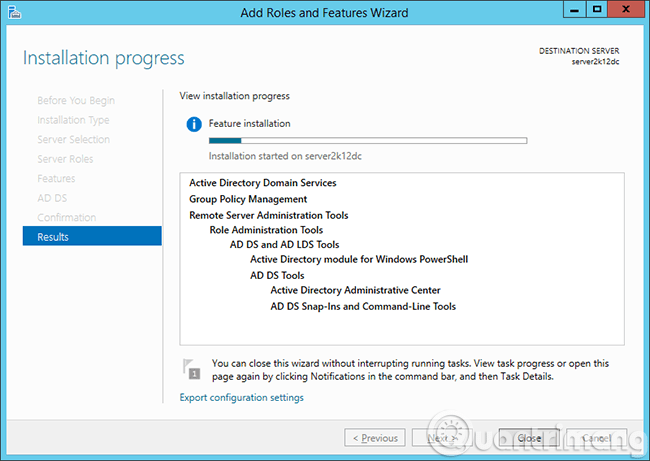
The Install process is ongoing, now you can sit and relax, surf Facebook, drink coffee or do something:
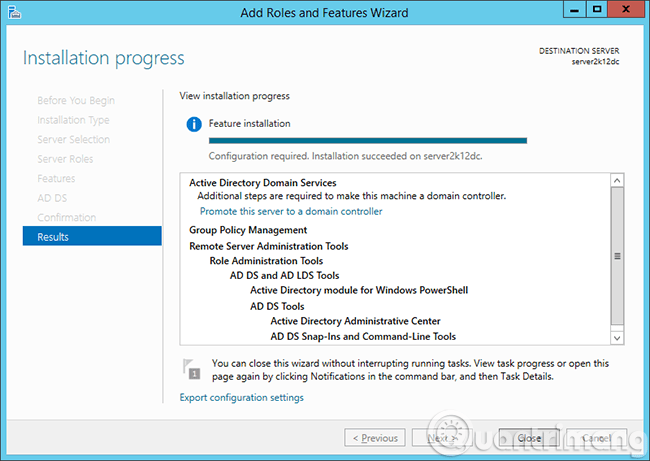
After installing the Role Domain Controller, we will now move on to the next step:
You can refer to Microsoft documentation about the Active Directory Domain Services (Level 100) installation process.
2. Create Domain Controller - DC on Windows Server 2012:
To start creating a Domain Controller , click on the link Promote this server to a domain controller at the Role installation end screen above, or outside the Server Manager interface click Deployment Configuration as shown:
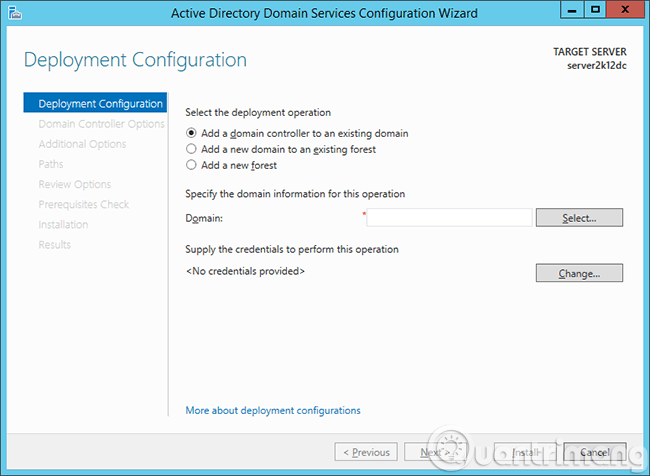
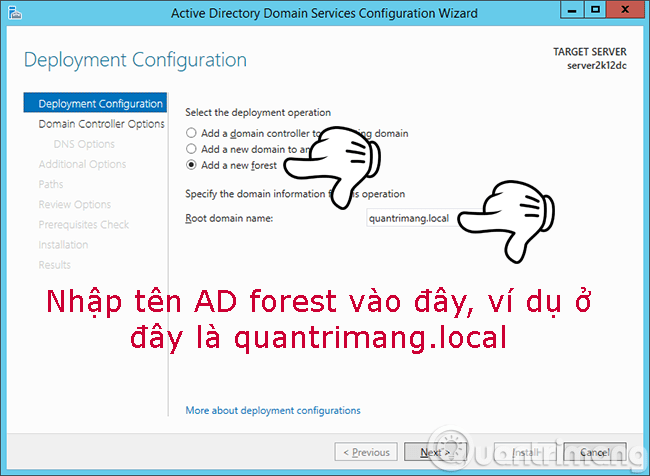
Create a new AD forest with the name quantrimang.local , click Next :
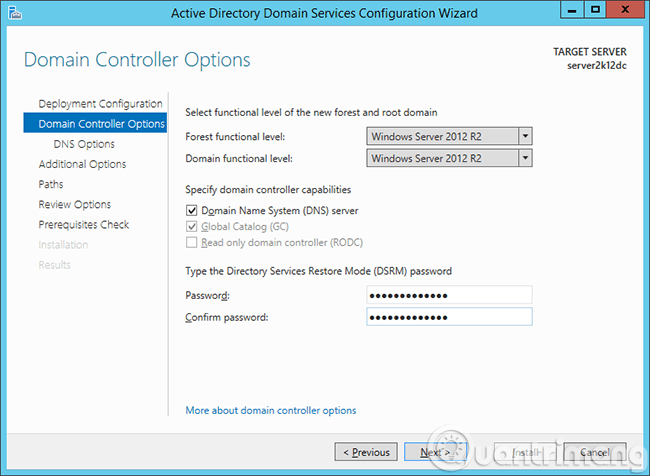
Next to the Domain Controller Options, select Forest Functional Level - FFL and Domain Controller Level - DCL at the default option, and enter the DSRM password. Besides, this is the first DC of the system, so Windows Server 2012 will identify itself as Global Catalog - GC , and we cannot change this option. Click Next:
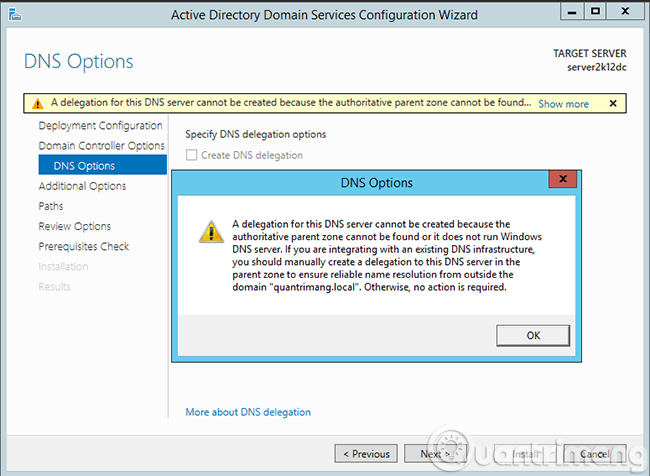
DNS alerts displayed, ignored:
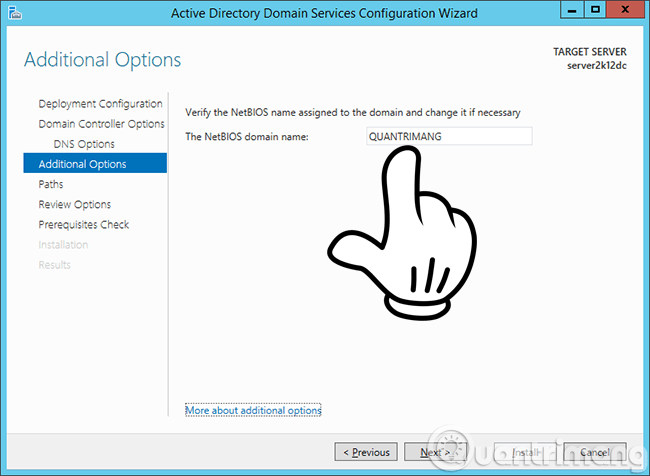
Check the NetBIOS name section. In the above step, you name AD Forest as quantrimang.local, then the NetBIOS Name part will be quantrimang :
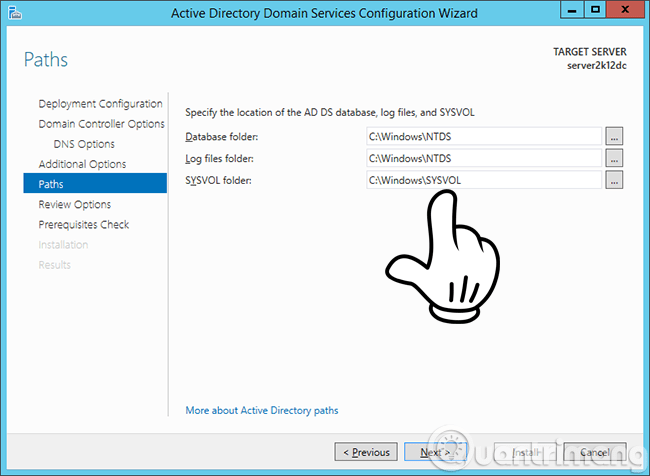
Next, keep the Active Directory related directories and directories (including Database, Logs and Sysvol files) and click Next:
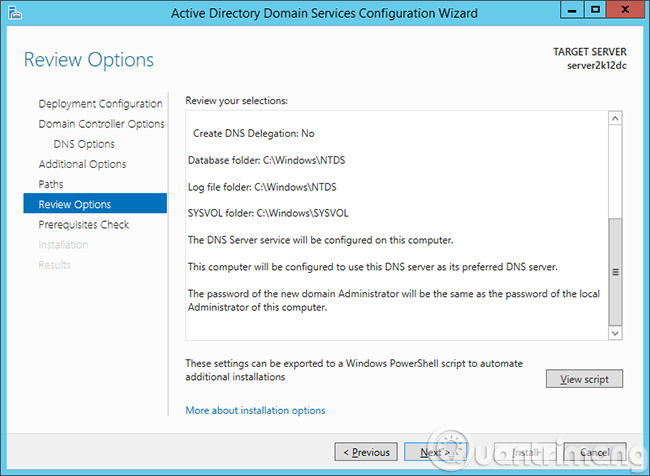
Check all the information, options at Review Options, or you can Export it to a script file to run with PowerShell if you click the View Script button:
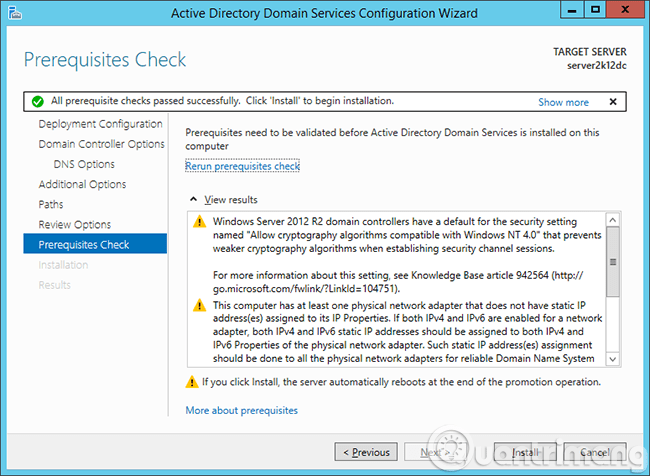
Once OK, then go to Prerequisites Check section to officially go down - create DC:
After installing and creating DC successfully, Windows Server will restart automatically. It is important to note that during this reboot, the login account will have the domain / username form rather than the simple username as before. At the same time, in Server Manager interface, in the Tools section, you also see more services such as:
- Active Directory Administrative Center
- Active Directory Domains and Trusts
- Active Directory Module for Windows PowerShell
- Active Directory Sites and Services
- Active Directory Users and Computers
- ADSI Edit
- DNS
- Group Policy Management

So we have completed the step of creating and installing Domain Controller - DC on Windows Server 2012 systems.
3. Video tutorial for installing Active Directory, DNS and DHCP to create Windows Server 2012 Domain Controller:
Good luck!
- Use eBox as Windows Primary Domain Controller
- Run Windows Server 2008 R2 - Install and create a Lab Domain Controller (Part 1)
- Instructions for installing Active Directory on Windows Server 2008
- Working with the Domain Controller Diagnostic Utility - Part 6
- Windows Server January Update causes Netlogon error
- How to Create a Windows Server 2012 R2 Domain
- Working with the Domain Controller Diagnostic Utility - Part 3
- Working with the Domain Controller Diagnostic Utility - Part 1
- What is Windows Active Directory?
- How to install Active Directory in Windows Server 2012
- Prepare Active Directory for Exchange 2007 (Part 3)
- Transfer Exchange 2003 to Exchange 2007 (P.5)
- Prepare Active Directory for Exchange 2007 (P.4)
- Prepare Active Directory for Exchange 2007 (Part 1)
- Prepare Active Directory for Exchange 2007 (Part 2)
- Theory - What is Active Directory?
- Prevent deleting data in Windows Server 2003 Active Directory
- Change the 'life cycle' of tombstone objects in Active Directory


 How to play Meccha Chameleon with friends
 Compilation of private server links for Grow A Garden
 TOP free Minecraft server creation tools
 The latest Free Fire Advanced Server, Free Fire OB51
 How to reset a lost SA password on SQL Server
 How to deploy SQL Server via PowerShell DSC