Create virtual cloud with Hyper-V (Part 6)
In the previous articles, we have created some image files for the virtual machine and also successfully installed SCVMM but still have a missing piece. At this time, users do not have an interface to build the virtual machine so we will need to set up Self Service Portal to allow valid users to create virtual machines configured..
TipsMake.com - In the previous articles, we have created some image files for virtual machines and also successfully installed SCVMM but still missing a puzzle piece. At this point, the user does not have an interface to build the virtual machine so we will need to set up Self Service Portal to allow valid users to create pre-configured virtual machines above the cloud infrastructure.
Self Service Portal (SSP) is a free add-on for SCVMM manager. For the purpose of the series, we will use the SSP 2.0 version. You can download the version from here.
Install SSP
After downloading the SSP, launch the installation process by double-clicking the SetupVMMSSP.exe file. Click Install on the screen that appears to install.
The program installation window appears. The first screen will ask if the user accepts the terms of the agreement. Select Accept to accept then click Next . The next screen will ask if the user wants to install optional VMMSSP server, VMMSSP Website or both, as shown below.
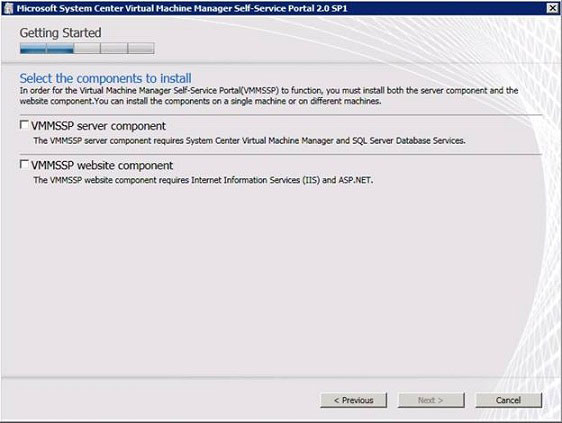
In actual deployment, you may want to install these options on separate servers due to performance and security issues. For simplicity, we will choose to install both components on the same server.
If you look closely at the above, you will notice that there are several conditions required to install these two options. VMMSSP server requires SCVMM and SQL Server database to be installed. Don't worry because we installed them in the previous lesson.
Before continuing, please check the version of SQL Server running on the server. The SSP requires the use of SQL Server 2008. If the server is currently running SQL Server 2005, you will have to upgrade the version before continuing (users will not be able to upgrade if you are using the Express Edition). Of course, you can also choose to connect to a version of SQL Server 2008 on another server.
Here, we assume that SQL Server is installed locally as the 2005 Express Edition version, so you must install SQL Server 2008 in parallel with the current version.
VMMSSP Website requires Internet Information Services (IIS) and ASP.NET. Since IIS is not running on the server, please cancel the installation (unless you intend to run the website component on another server). Here's how to install IIS and then return to the unfinished SSP installation point now.
Install IIS
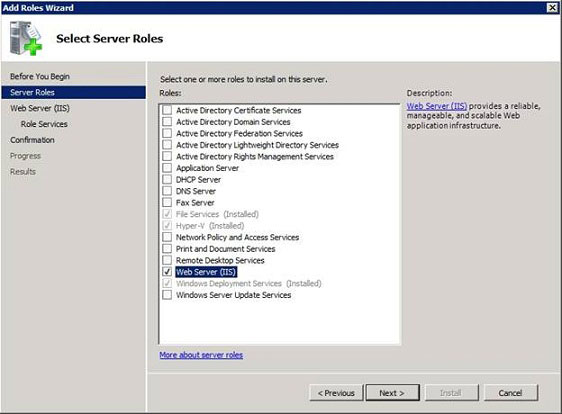
To install IIS, open Server Manager, click on the Roles folder and click Add Roles . When the Add Roles window appears, click Next to bypass the Welcome screen. Now, select the Web Server (IIS) option from the Select Server Roles screen as shown below and click Next .
Click Next again to go to the Select Role Services screen. Select ASP.NET. If asked if you want to add a secondary service role, just click the Add Required Role Services button.
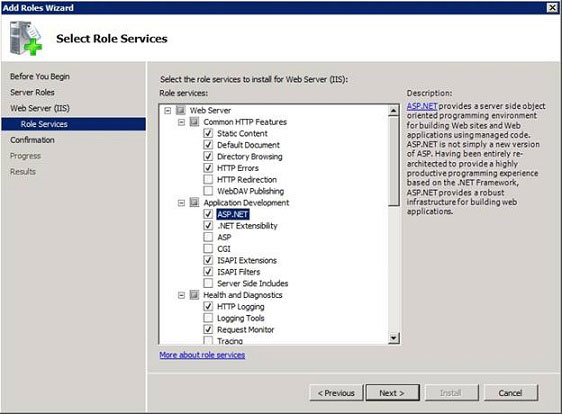
However, there are a few other service roles that are not listed on the first image except IIS and ASP.NET. We need to select IIS 6 Management Compability. You will also need to select the Windows Authentication role service.
Click Next to see which components will be installed. If all is correct, click the Install button. When the installation process is successful, click Close . Although the installation window does not require a server reboot, you should restart the computer to make the deployment steps remaining smoother.
When the server restarts, return to Server Manager, click on the Features folder and click the Add Features link . Select Message Queuing options. Click Next and then select Install to install the Message Queuing feature. When the installation process is complete, click Close and restart the server.
Continue installing SSP
Now, IIS has been installed. Launch the SSP installation window. Accept the installation clause and choose to install both VMMSSP server and VMMSSP website and click Next .
The installation program will take a while to confirm the conditions. If you follow the instructions of the lesson, all conditions must be satisfied.
Click Next to select the installation path you want to use. You can always get the default path and click Next .
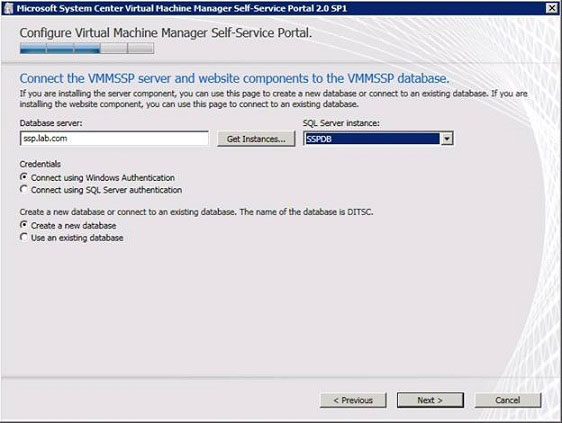
The next screen will ask for the database server name. We can connect to an existing version of SQL Server or create a new one.
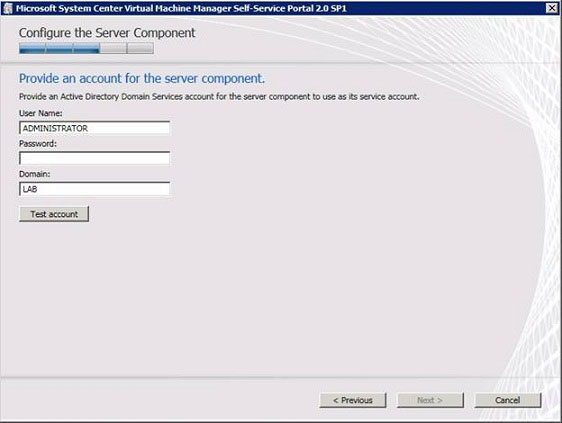
Click Next to enter the Active Directory Domain Services account for the server to use as its service account. The default software uses a domain administrator account but it is better to create a dedicated service account.
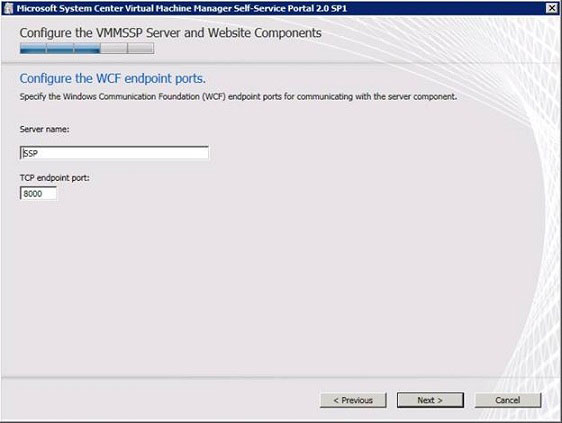
The next screen requires entering the server name. If you are setting up server and website options on the same server, you can accept the default settings.
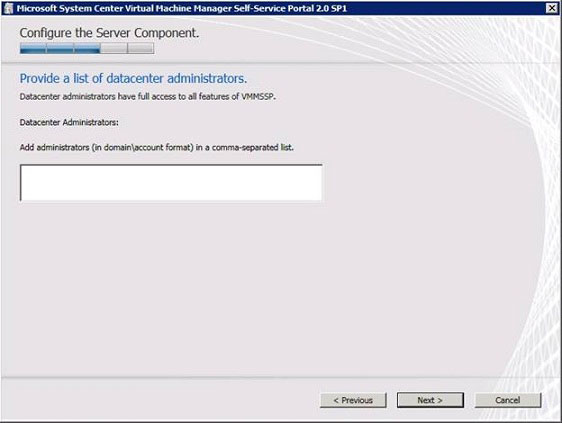
The next step is to enter the list of data center administrators. These are people who will have full access to the SSP and use all its features.
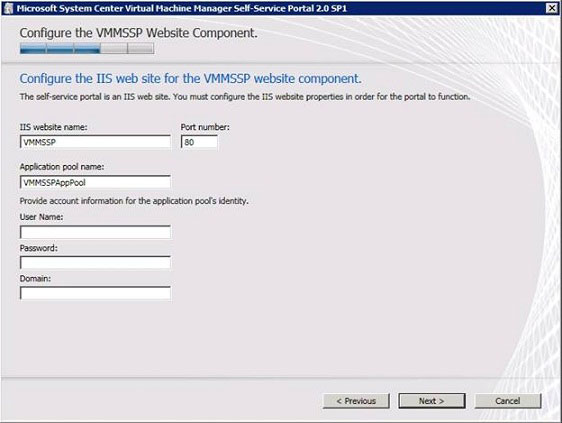
Finally, you will have to provide the name for the IIS Website and the port. Here, since port 80 is already in use, we have to choose another standard port (79).
A screen displays a list of selected options that appear. If everything is correct, click Install . At that time, a warning appears that the process will take a while to complete. Click Yes to install.
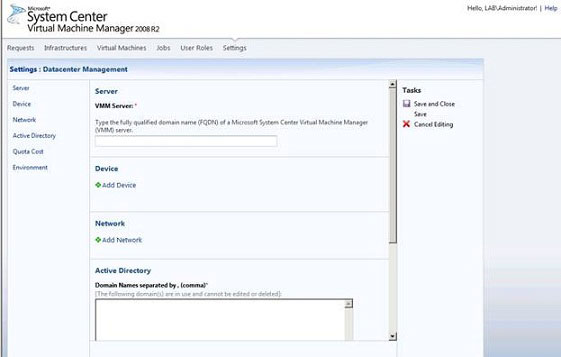
After installation is complete, we still have to configure SSP software before using it. The figure below is the original interface of the software.
Now, we have installed SSP. In the following lesson, we will learn how to configure SSP.