How to create USB Boot with Command Prompt
Creating a Bootable USB for Windows operating system will be very simple if you know how to apply the correct method. Besides using the software to create bootable USB such as Rufus, Hiren's boot, . you also have another way to create USB boot without installing any additional software on the machine. That is to use Command Prompt.
Steps to use Command Prompt to create USB Boot to install Windows
Step 1: Connect the USB to the computer
The first step is to format your USB pendrive to wipe all existing data in the USB drive.
Step 2: Open the Command Prompt under Admin
Next open Command Prompt and select Run as Administrator .
Alternatively, enter cmd in the Search box on the Start Menu and then press Ctrl + Shift + Enter . Or visit Start Manu => All Programs => Accessories => Command Prompt and select Run as Administrator.

Step 3: Enter the Diskpart command
On the Command Promt window, type Diskpart into it and press Enter.

Note:
In case if Diskpart is not available on a Windows computer, you can download Diskpart to your computer and install it.
Download Diskpart and install it here.
Step 4: Enter the List Disk command
Next enter the List Disk into the Command Prompt window and press Enter .

Step 5: Enter Select Disk 1 and press Enter

Selecting Select Disk completely depends on your system (how many Disk is in use). Or you can simply enter your USB drive number. If your USB drive number is 2, enter Select Disk 2.
Step 6: Enter the Clean command
Next enter Clean and press Enter. In case if you display any error, re-enter Clean again and press Enter.

Step 7: Enter Create Partition Primary and press Enter.

Step 8: Enter Active then press Enter

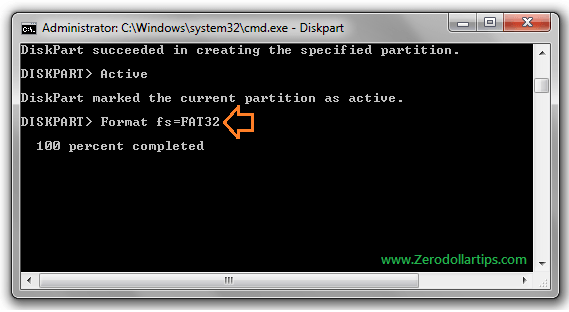
Step 9: Enter Format fs = FAT32 and press Enter
Wait a few seconds to complete the process, until the screen is 100% displayed.

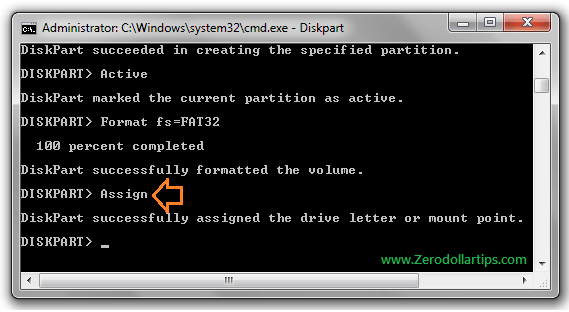
Step 10: Enter Assign command
After the process is complete, enter Assign into the Command Prompt window and press Enter.

Step 11: Copy the file to USB
Finally copy the Windows 7 or Windows 8 DVD or ISO file to the USB flash drive.
So you have completed the process of creating a USB Bootable drive using the Command Prompt to install Windows 7 or Windows 8 operating system.
From now on you can use USB Bootable drive to install Windows.
Install Windows with USB pendrive
After you have finished creating a USB Bootable drive to install Windows, the next step is to install the Windows operating system on your computer. First restart your Windows computer and select the Boot Option option via USB drive to boot from USB.
Follow the on-screen instructions to complete the Windows installation process.
Refer to some of the following articles:
- Use CMD to create an 'undeleted' folder on Windows
- All Frequency Restart, Shutdown, Remote Off . with Command Prompt
- Use the CMD command to remove viruses on Windows computers
Good luck!