Create, install and attach VHD files
New features in Windows 7 and Windows Server 2008 R2 allow Admin to create, install and attach virtual drives VHD which helps reduce costs on third-party applications with similar functionality.
Network Management - New features in Windows 7 and Windows Server 2008 R2 allow Admin to create, install and attach virtual drives VHD which helps reduce costs on third-party applications with similar functionality.
In fact, Microsoft also provides test drives for their test business applications (like Windows 7 and Exchange 2010).
Microsoft Virtual Hard Disk (VHD) files are increasingly popular with the popularity of Microsoft Virtual PC and virtualization software. However, with the introduction of Microsoft Hyper-V (using VHD files), the use of VHD files has been maximized. Windows system administrators can install VHD files on these virtual disk images, and in addition, curves can create separate Image VHDs.
Why do we need to install the VHD file?
Most administrators have installed an ISO file and a ZIP file when using Windows 7 and Windows Server 2008 R2 because we need a driver file from a good storage area to install an application.
Unlike ZIP files or ISO files, most Windows admins will use VHD files for their own purposes, such as operating as virtual hard drives on a virtual machine. However, we can use the VHD file for anything if we want when we have this file on our system.
Where to download VHD file?
VMware's VMDK format is still more popular than the VHD format due to the virtual device distribution process while the VHD format just started to confirm its position. That's because Microsoft distributes demo virtual machines from their Web site using VHD format. Here are some Microsoft sites that allow downloading VHD files:
- Run IT on a Virtual Hard Disk - Test Drive Program. Provides several installations for Windows Server 2008 R2, Windows 7 Enterprise, and Exchange Server 2010, along with countless free VHD files.
- Windows 7 90-day Eval. Although this file is in the Test Drive Program, this is considered the most useful VHD download.
- SharePoint add-on in VHD format.
Create, attach and install VHD file in Windows 7
Windows 7 and Windows Server 2008 R2 allow users to create and install Microsoft VHD files. So we don't have to use third-party tools like before.
Attach and create VHD file is done in Windows Disk Management Console . Most users will access this Console via Computer Management by right-clicking on Computer and selecting Manage . When Computer Management MMC Console appears, we can perform many different tasks here, such as: Tasking, event checking, folder sharing, user and group account creation, real-time testing exam, device management, service management, and disk management.
To attach or create a VHD file, click the Action menu as shown in Figure 1.

Figure 1: Create and attach VHD file in Computer Management Console of Windows 7.
However, the method to access the attached menu and create the fastest VHD file is to run the Disk Management MMC directly by going to the Start menu and entering diskmgmt.msc into the search box and pressing Enter .
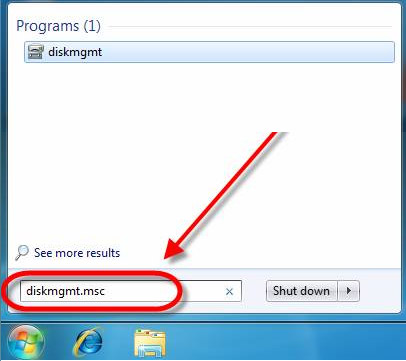
Figure 2: Accessing the Disk Management MMC via the Start menu.
Of course we can attach a previously created VHD file in Microsoft Virtual PC or Virtual Server, or create a VHD file in Windows 7 or Windows Server 2008 R2.
To create a VHD file, click the Create option on the Action menu. Then a dialog box will appear, on this dialog we will specify the location to save this VHD file, select the properties for the VHD file as Dynamic (dynamic or resizable) or Fixed (fixed, cannot resize), and specify the size of the new virtual drive as shown in Figure 3.
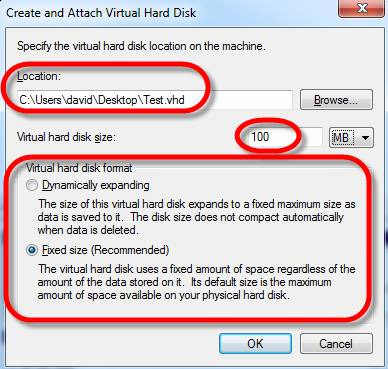
Figure 3: Create a new virtual drive.
In the first time we create the virtual drive, we will see the Microsoft VHD HBA device driver loaded.
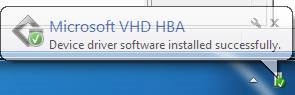
Figure 4: Microsoft VHD HBA driver has been successfully installed.
Then in Disk Management we will see the new drive but we need to enable it, create a new disk and format it like any other drive. First, right-click on the new drive and select Initialize Disk .
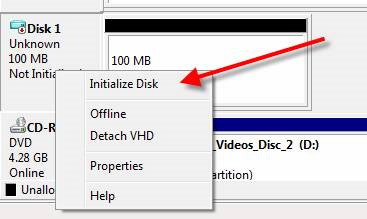
Figure 5: Launching VHD Disk.
A message will appear asking us to confirm the process. Click OK .

Figure 6: The message appears when selecting Initialize Disk from the context menu.
Once done, right-click on this drive again select New Simple Volume to run the New Simple Volume Wizard .
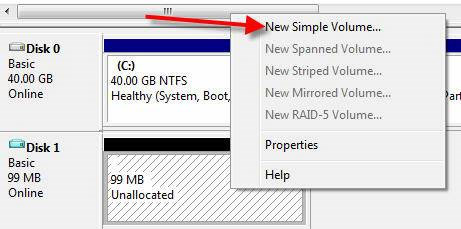
Figure 7: New Simple Volume Wizard.
On this Wizard, select the drive, letter for the drive, format, and the size limit of the drive. When done, click Finish .
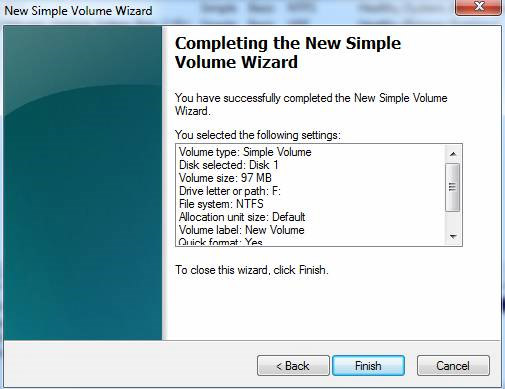
Figure 8: Check the installation information on the Complete page.
Once you have done the operation on the New Simple Volume Wizard, we will see a new drive like any other physical disk partition.
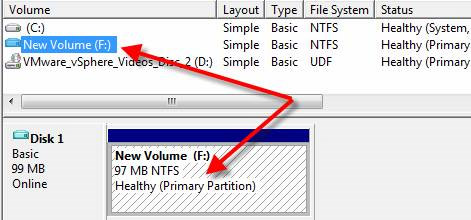
Figure 9: New VHD drive has been created.
In fact we won't be able to tell if this is a VHD file unless we right-click on this drive and see the Detach VHD option.
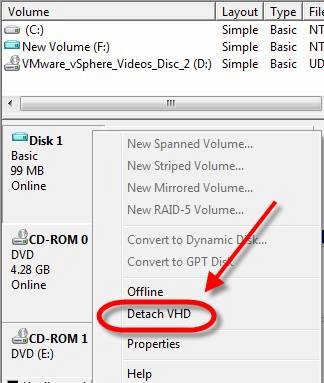
Figure 10: Detach VHD option in the context menu of the virtual drive.
Attaching a VHD is much simpler. Suppose we have selected the Detach option to remove the above VHD file. To attach a VHD file, go to the Action menu Select Attach VHD .
A message will then appear asking to browse for the VHD file and may choose to install this VHD file as Read-only or not, then click OK to attach the file.
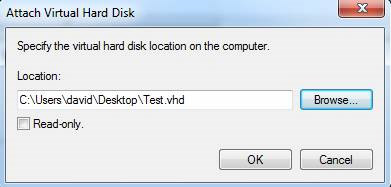
Figure 11: Attach a VHD file.
We will then see this drive as shown in Figure 9.
Was this article helpful?
Your feedback helps us improve.
Related Articles
 Tips for Handling When Your Computer Cannot Attach Files5 minutes read
 Instructions for attaching files to PDF files using Foxit Reader2 minutes read
 9 ways to attach large files to emails10 minutes read
 How to easily attach files to a PDF file using Foxit Reader3 minutes read
 Instructions for attaching files in Word3 minutes read
 Attach files to PDF files with Foxit Reader2 minutes read
Reader Comments 0
Sign in with email or Google to join the discussion.