Create a custom agent from the agent template.
To help you get started building custom agents, Microsoft Copilot Studio provides several agent templates that you can use to create your own custom agents.
These templates are designed to be easily customizable, so you can tailor them to suit your specific needs and use cases.
Important note :
You are responsible for evaluating all safety and legal implications of using the template agent and customizing it to suit your business.
Organizations must assess specific legal and regulatory requirements when using template agents, as they may not be suitable for all industries, scenarios, or use cases. Furthermore, AI services should not be used in ways prohibited by applicable terms of service and related codes of conduct.
The following table lists the agent templates currently available on the agent page in Copilot Studio:
| Name | Home |
|---|---|
| Citizen Services | Custom Agent |
| Financial Insights | Custom Agent |
| IT Helpdesk | Custom Agent |
| Safe Travels | Custom Agent |
| Voice | Custom Agent |
| Weather | Custom Agent |
| Website Q&A | Custom Agent |
| Sustainability Insights | Custom Agent |
| Benefits | Microsoft 365 Copilot agent |
To create a custom agent from a pre-made agent template in Copilot Studio:
1. On the Agents page , under Start with an agent template , select the agent template you want to use.
2. On the agent configuration page, enter a name and, if necessary, a description and instructions for your new agent.
3. To change the icon representing your agent, select Change icon , choose an icon, and then select Save .
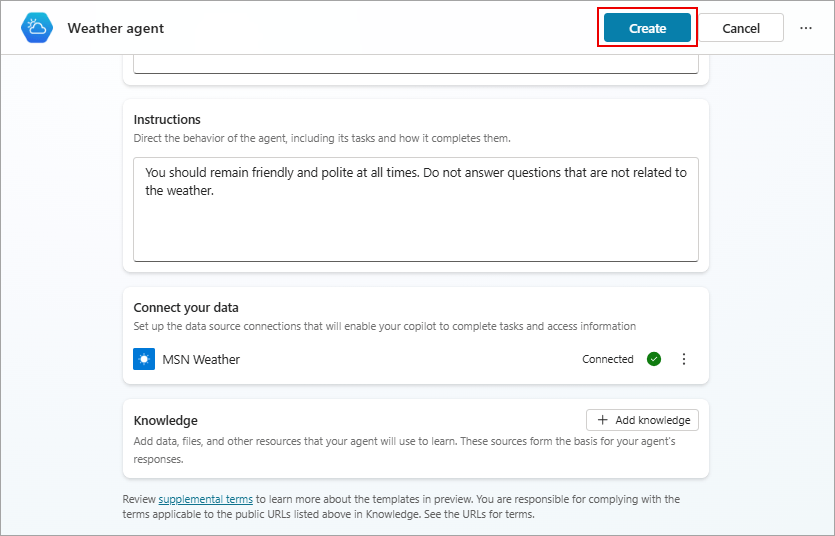
4. If necessary, confirm the agent's data connection:
a. If you need to set up or change a data connection, select the three dots (⋮) next to the data connection, and then select Edit .
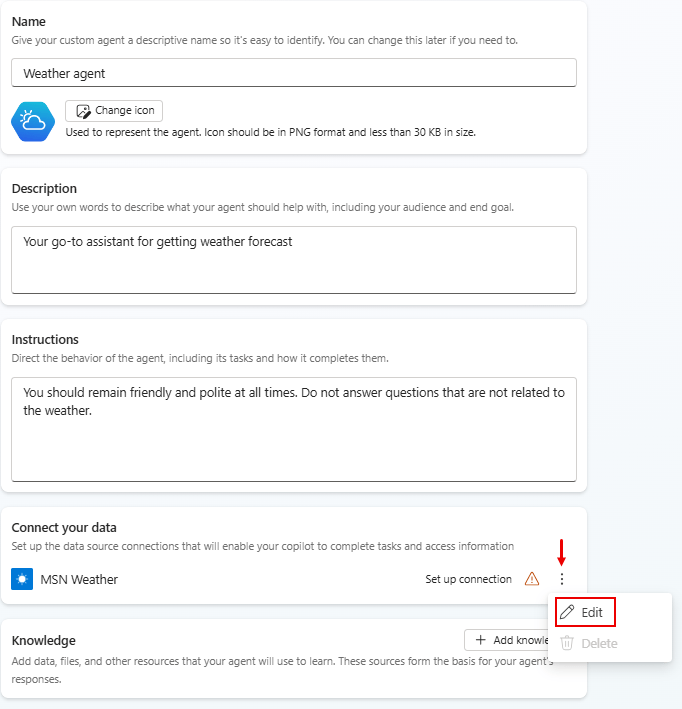
b. On the Connection setup page , if you are satisfied with the listed connection, select Confirm or log in, if required.
5. On the agent configuration page, select your primary language.
6. Optionally, to add a knowledge source, select Add knowledge , choose the knowledge source type, configure the knowledge source, and then select Add to agent .
7. After completing the new agent configuration on the agent configuration page, select Create at the top of the page.
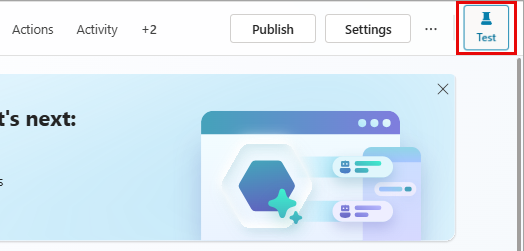
8. To test the new agent, select Test at the top of the page, then check the response. Continue to fine-tune the agent as desired on the Overview page .
9. When you're ready to publish the agent, select Publish at the top of the page.
Note : Agent operations such as publishing and configuring authentication may take a few extra minutes before the agent is ready for use.
- Template agent IT Helpdesk
- Template agent Citizen Services
- Template agent Sustainability Insights
- Template agent Financial Insights
- Template agent Safe Travels
- How to create a Personal Agent in n8n
- How to Create a Custom Template in Apple Pages
- How to create custom templates in PowerPoint
- How to create custom shortcut keys for Raspberry Pi
- 5 Free Excel Templates to Simplify Complex Tasks
-
 TOP best AI Agent building framework tools
-
Upload files to create a knowledge base for agents in Copilot Studio.
-
Worth trying as alternatives to GitHub Copilot
-
Summary of knowledge sources for agents in Copilot Studio
-
Evaluating agent performance in Microsoft Copilot Studio
-
Template agent Sustainability Insights
 TOP best AI Agent building framework tools
 Upload files to create a knowledge base for agents in Copilot Studio.
 Worth trying as alternatives to GitHub Copilot
 Summary of knowledge sources for agents in Copilot Studio
 Evaluating agent performance in Microsoft Copilot Studio
 Template agent Sustainability Insights