Table of Contents
A Personal Agent in n8n gives you a chat-based assistant that can use selected tools to retrieve information or carry out actions. Unlike a fixed automation, the agent interprets each request and decides which available tool to call. This guide covers the dashboard setup shown in the current interface and the checks you should make before using an agent with real data.
Open n8n and sign in to the workspace where you want to create the agent. Menu names and available models can vary by n8n version, plan, and workspace configuration.
How to create a Personal Agent in n8n
1. Open Chat Hub
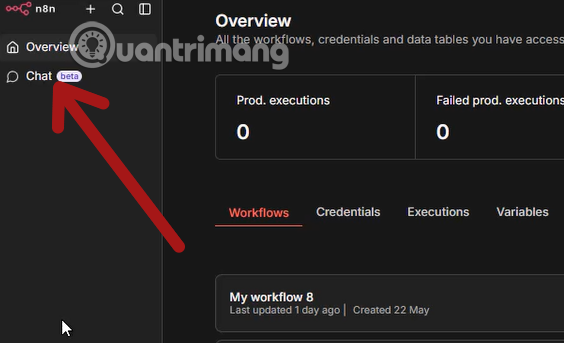
From the main dashboard, select Chat in the left navigation. This opens Chat Hub, where you can start conversations with supported models and manage agents available to your workspace.
2. Create a new Personal Agent
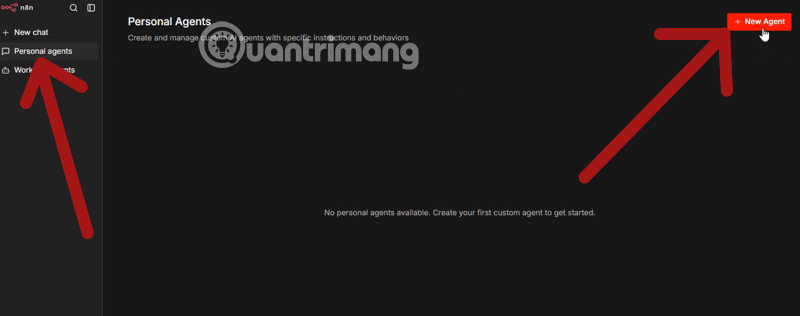
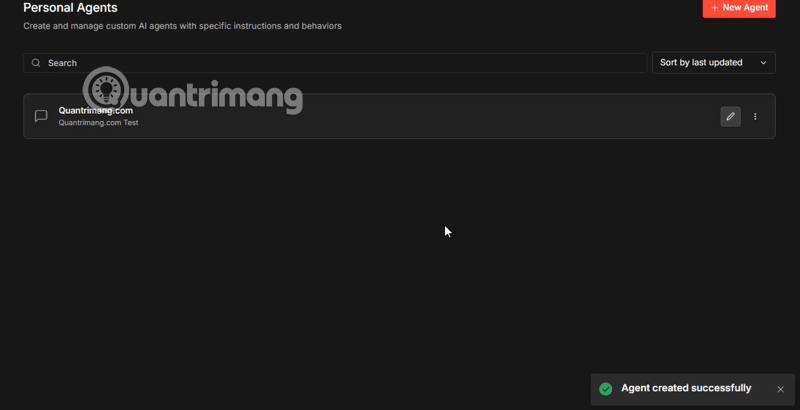
Open the Personal Agents tab, review any existing agents, and select New Agent.
3. Set a recognizable name, icon, and description
Choose an icon that makes the agent easy to identify in a list.
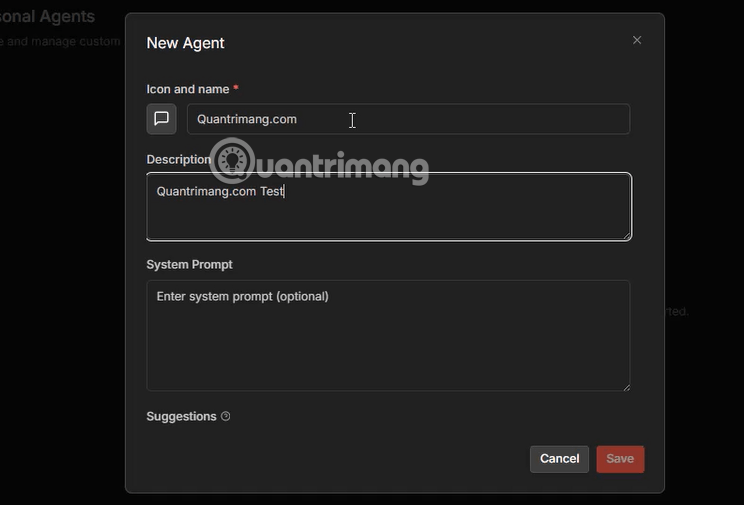
Give the agent a specific, task-based name such as Campaign Reporting Assistant or Customer Research Agent. Add a short description stating what the agent is for and who should use it.
4. Write the system instructions
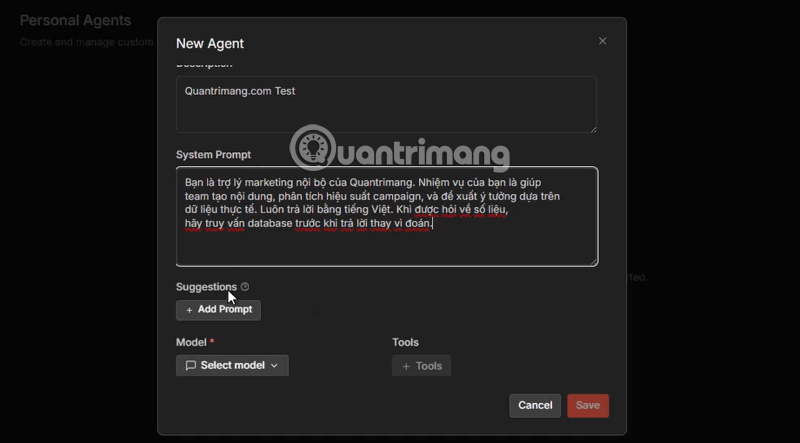
The system instructions define the agent's role and boundaries. Include:
- the task and subject area the agent should handle;
- the data sources it may use;
- the expected language, tone, and output format;
- actions it must not take without confirmation;
- what it should do when information is missing or a tool fails.
A concise starting point might look like this:
You are the internal marketing assistant for [company].
Help the team draft content and analyze campaign results.
Use connected data sources before answering questions about performance.
Do not invent figures. Ask for confirmation before any tool changes or sends data.
Reply in clear English and show the source period for every metric.
Test and refine these instructions with realistic requests. For more platform comparisons, see the best AI agent building tools.
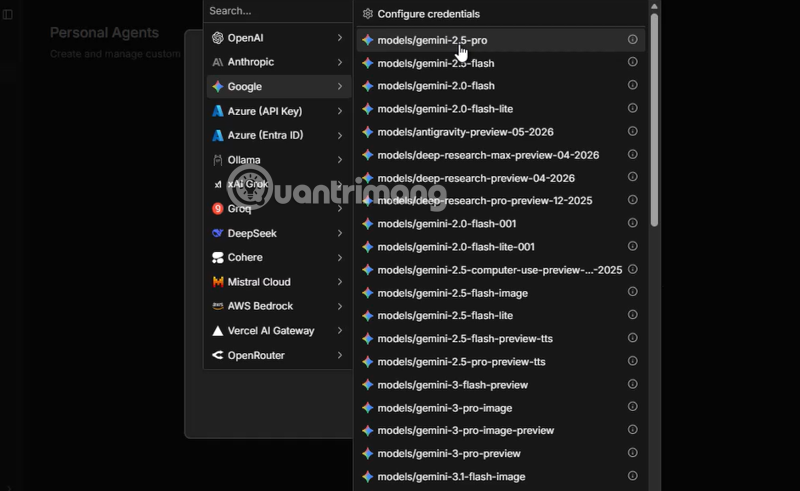
5. Choose a model
Open the Model menu and select one of the models enabled for your workspace. Provider and model availability can change, so choose based on the agent's actual needs rather than an old model list. A smaller, lower-cost model may be enough for routing or structured lookups; more complex analysis may require a stronger model.
6. Add only the tools the agent needs
Open Tools and connect the workflows or integrations the agent may call. Tool names should explain the action clearly, and each description should tell the model when the tool is appropriate.
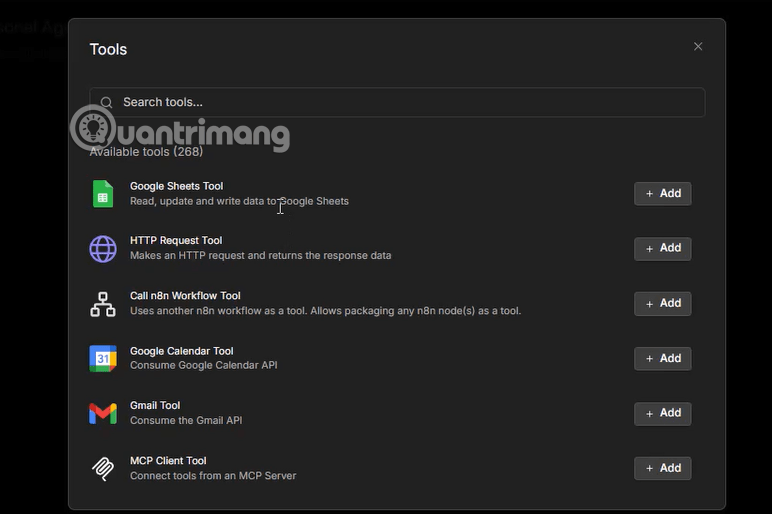
Use least-privilege credentials. If the agent only needs to read a database, do not give it write access. Put approval steps in front of sensitive actions such as sending email, changing CRM records, or deleting data. If Supabase is part of the setup, follow this guide to connecting Supabase to n8n.
7. Save and test the agent
Select Save, then open a conversation with the new agent. Test normal requests, incomplete requests, tool failures, and requests that should be refused or require confirmation. Check the execution data to verify that it chose the intended tool and passed the correct parameters.
Personal Agent or AI workflow?
| Choose | Best for | Main trade-off |
|---|---|---|
| Personal Agent | Different conversational requests that may require different tools | The model has more discretion, so instructions, permissions, and testing matter |
| AI workflow | Repeatable, event-driven processes with defined steps and branches | Less flexible in conversation, but execution is easier to predict and audit |
Use a Personal Agent when the user needs to ask varied questions in one chat. Use a workflow when an event should always trigger a controlled sequence. Many teams combine both: the agent handles the conversation and calls a narrowly scoped workflow for each business action. If you are still choosing a platform, compare the main n8n alternatives as well.
Checklist before wider use
- Limit each credential to the minimum required permissions.
- Require confirmation for external or irreversible actions.
- Test ambiguous, malicious, and incomplete requests.
- Check tool inputs and outputs in execution logs.
- Monitor model usage and failed executions.
- Re-test the agent after changing its model, prompt, or tools.
Related Articles
 OpenAI Launches ChatGPT Agent to Become a Personal Assistant4 minutes read
 Template Agent IT Helpdesk5 minutes read
 How to Turn Claude Code into a Personal AI Agent to Assist9 minutes read
 Template Agent Safe Travels4 minutes read
 Template Agent Citizen Services6 minutes read
 Create a Custom Agent from the Agent Template4 minutes read
Reader Comments 0
Sign in with email or Google to join the discussion.