Table of Contents
With the Copilot Studio for Teams plan included in selected Microsoft 365 subscriptions, makers can build classic-orchestration agents and publish them to Microsoft Teams. Since the end of June 2026, creation takes place in the Copilot Studio web app rather than the older Copilot Studio for Teams app.
The Teams plan is narrower than a standalone Copilot Studio subscription: it uses Dataverse for Teams, supports classic orchestration, and publishes only to Teams. Check licensing and tenant policies before building.
Plan the agent before opening the canvas
For an internal HR help agent, define:
- the approved questions it can answer;
- the authoritative policy source and its owner;
- what information the agent may collect;
- when it must refer an employee to HR;
- where escalations are sent and who can read them; and
- how test transcripts, channel posts, and other records are retained.
Do not post medical, family, disability, or other sensitive leave details to a broad Teams channel. A safer escalation sends a minimal ticket to a restricted queue and lets an authorized specialist contact the employee privately.
1. Create a blank Teams-plan agent
- Open Copilot Studio with the work account covered by the Teams plan.
- If prompted, select the Microsoft Teams team that will own the agent. This provisions or selects its Dataverse for Teams environment.
- Select Create blank agent.
- Enter a name such as HR Support, then create the agent.
- On the overview page, add an approved icon, description, and a few suggested prompts.
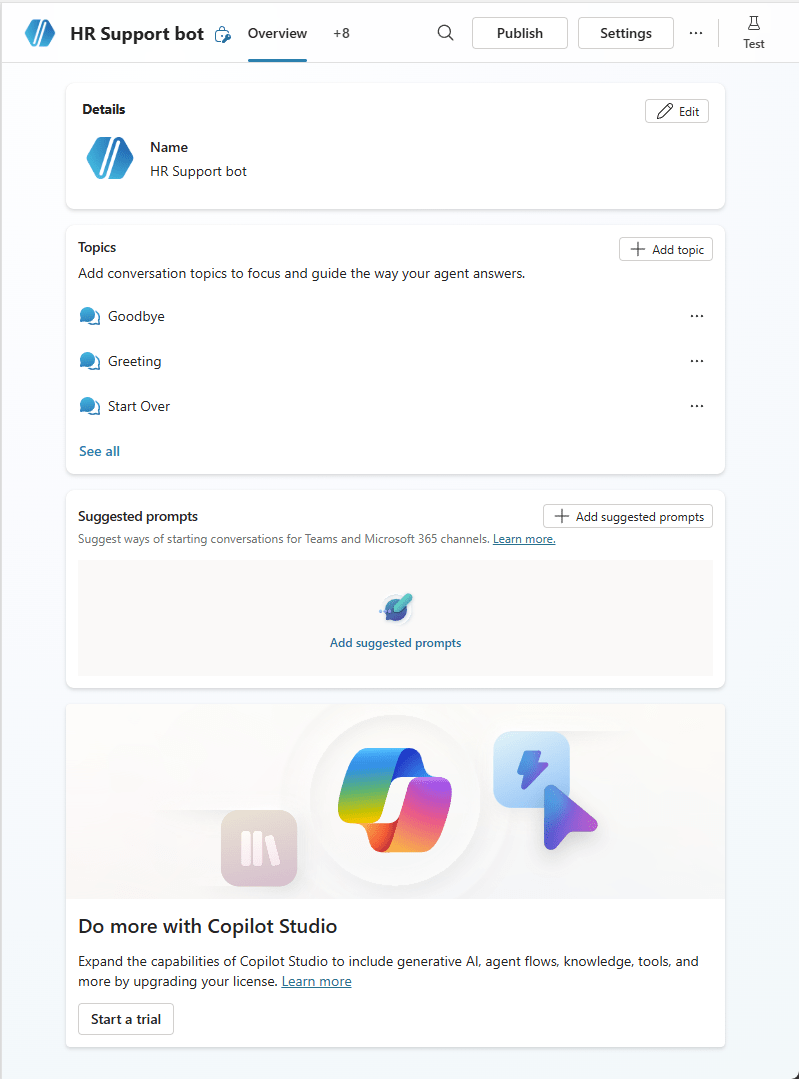
Use a name that identifies the department and purpose. Avoid a human name or wording that could make employees believe the agent is a person.
2. Create a time-off topic
- Open Topics and select Add a topic > From blank.
- Name it Employee time off and add a concise description.
- Edit the trigger and add several natural phrases, such as “How do I request leave?”, “Where is the vacation policy?”, and “Which holidays are observed?”
- Save the topic.
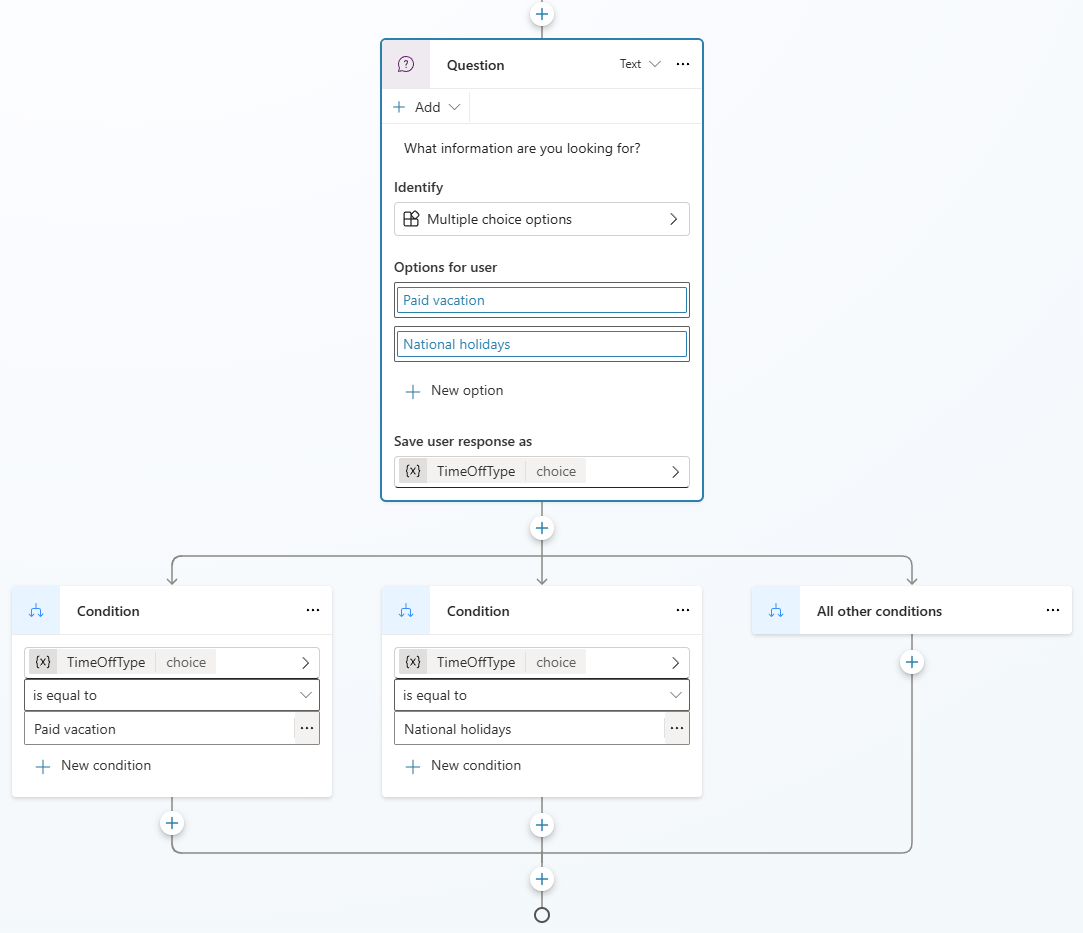
Trigger phrases should represent different user wording, not minor keyword variations. Keep unrelated HR intents—payroll, benefits, workplace concerns—in separate topics with their own owners and escalation rules.
3. Add a question and branches
- Below the trigger, add a Message node explaining what the topic can help with.
- Add an Ask a question node: “What time-off information do you need?”
- Add options such as Vacation policy, Observed holidays, and Extended leave.
- Rename the answer variable to
TimeOffType. - Add a branch for each option.
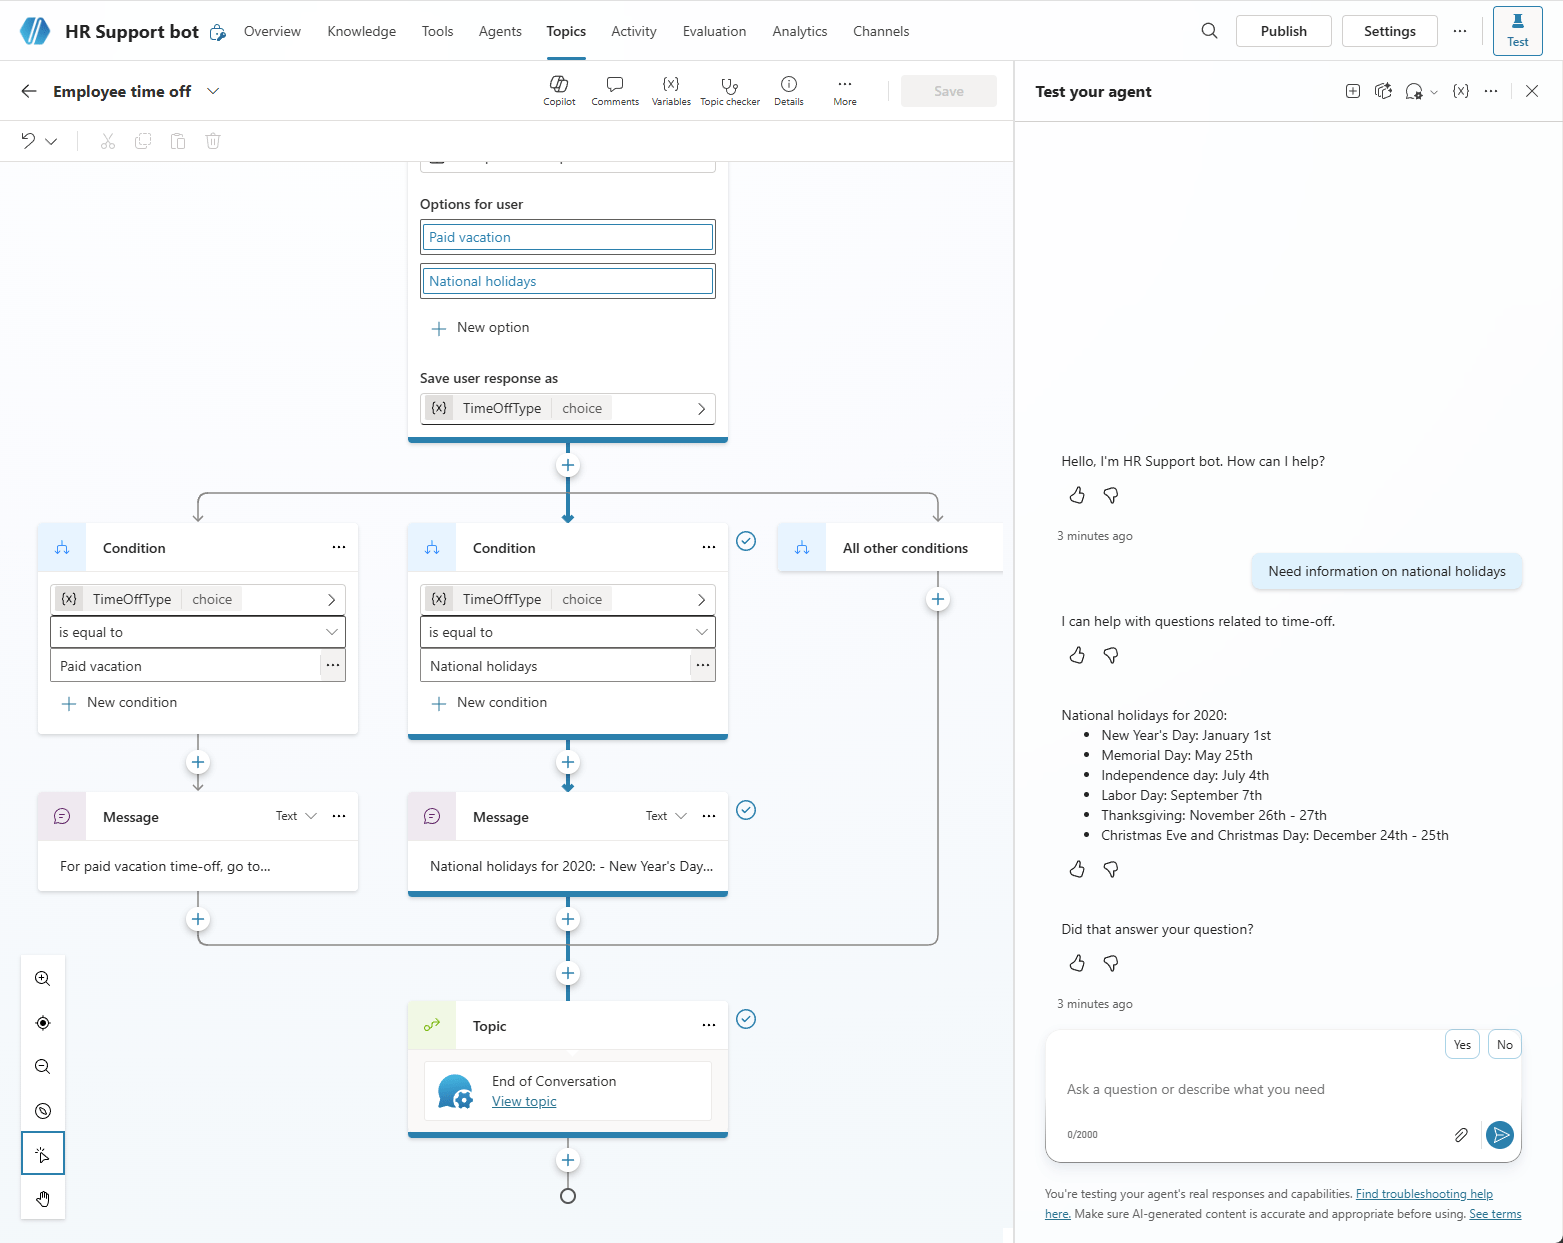
Link to the real internal policy page for vacation requests. Do not hard-code a holiday list copied from a past year; use an approved, maintained source or clearly date the information. If a source requires authentication, test that the agent respects the employee’s existing permissions.
4. Add a safe human escalation
For extended leave or an unsupported question:
- Add a message explaining that an HR specialist is required.
- Ask for only a short, nonsensitive summary. Tell the employee not to include diagnoses or confidential documents.
- Save the response in a variable such as
Description. - Add a tool and create a Power Automate flow.
- Use an approved action to create a restricted ticket or post a minimal notification to a private HR channel.
- Pass a request ID, employee display name or verified identity reference, and safe summary. Do not include the full transcript unless policy permits it.
- Return a success or failure status to the agent and show an accurate confirmation.
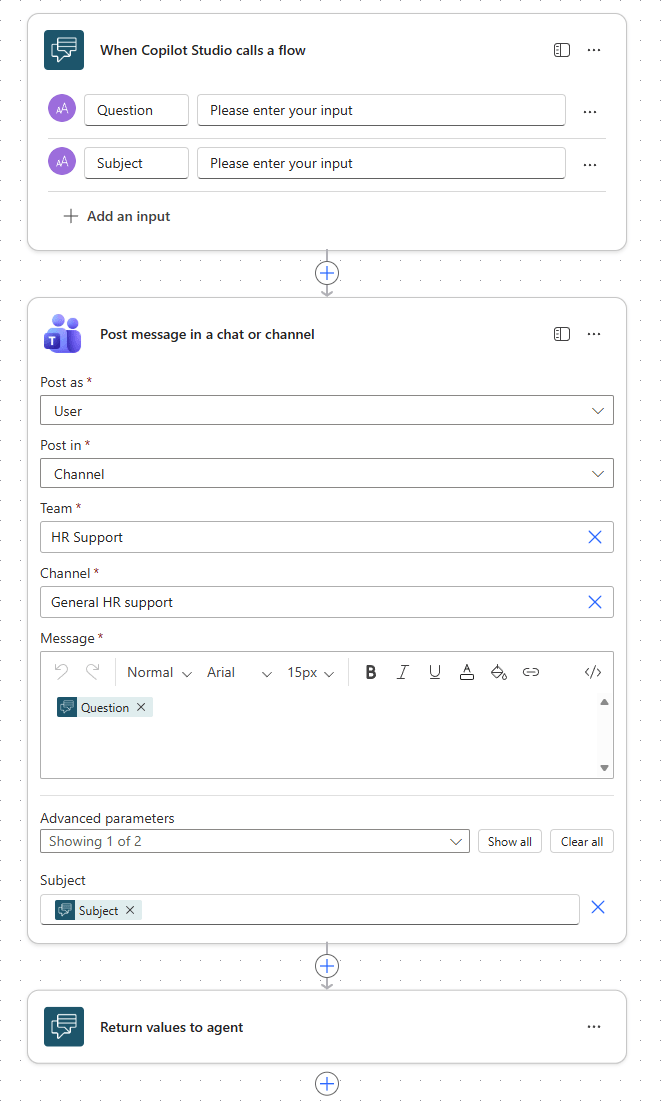
Connections used by the flow must have least privilege. Handle failures explicitly: the agent should not say “HR was notified” unless the flow actually succeeded.
5. Test the complete conversation
Open the test panel and cover at least these cases:
- a normal vacation-policy request;
- a holiday question phrased without the option label;
- an extended-leave request with a safe summary;
- a user who enters sensitive details despite the warning;
- a failed or unauthorized Power Automate connection;
- an unrelated HR request; and
- a second conversation after resetting the test session.
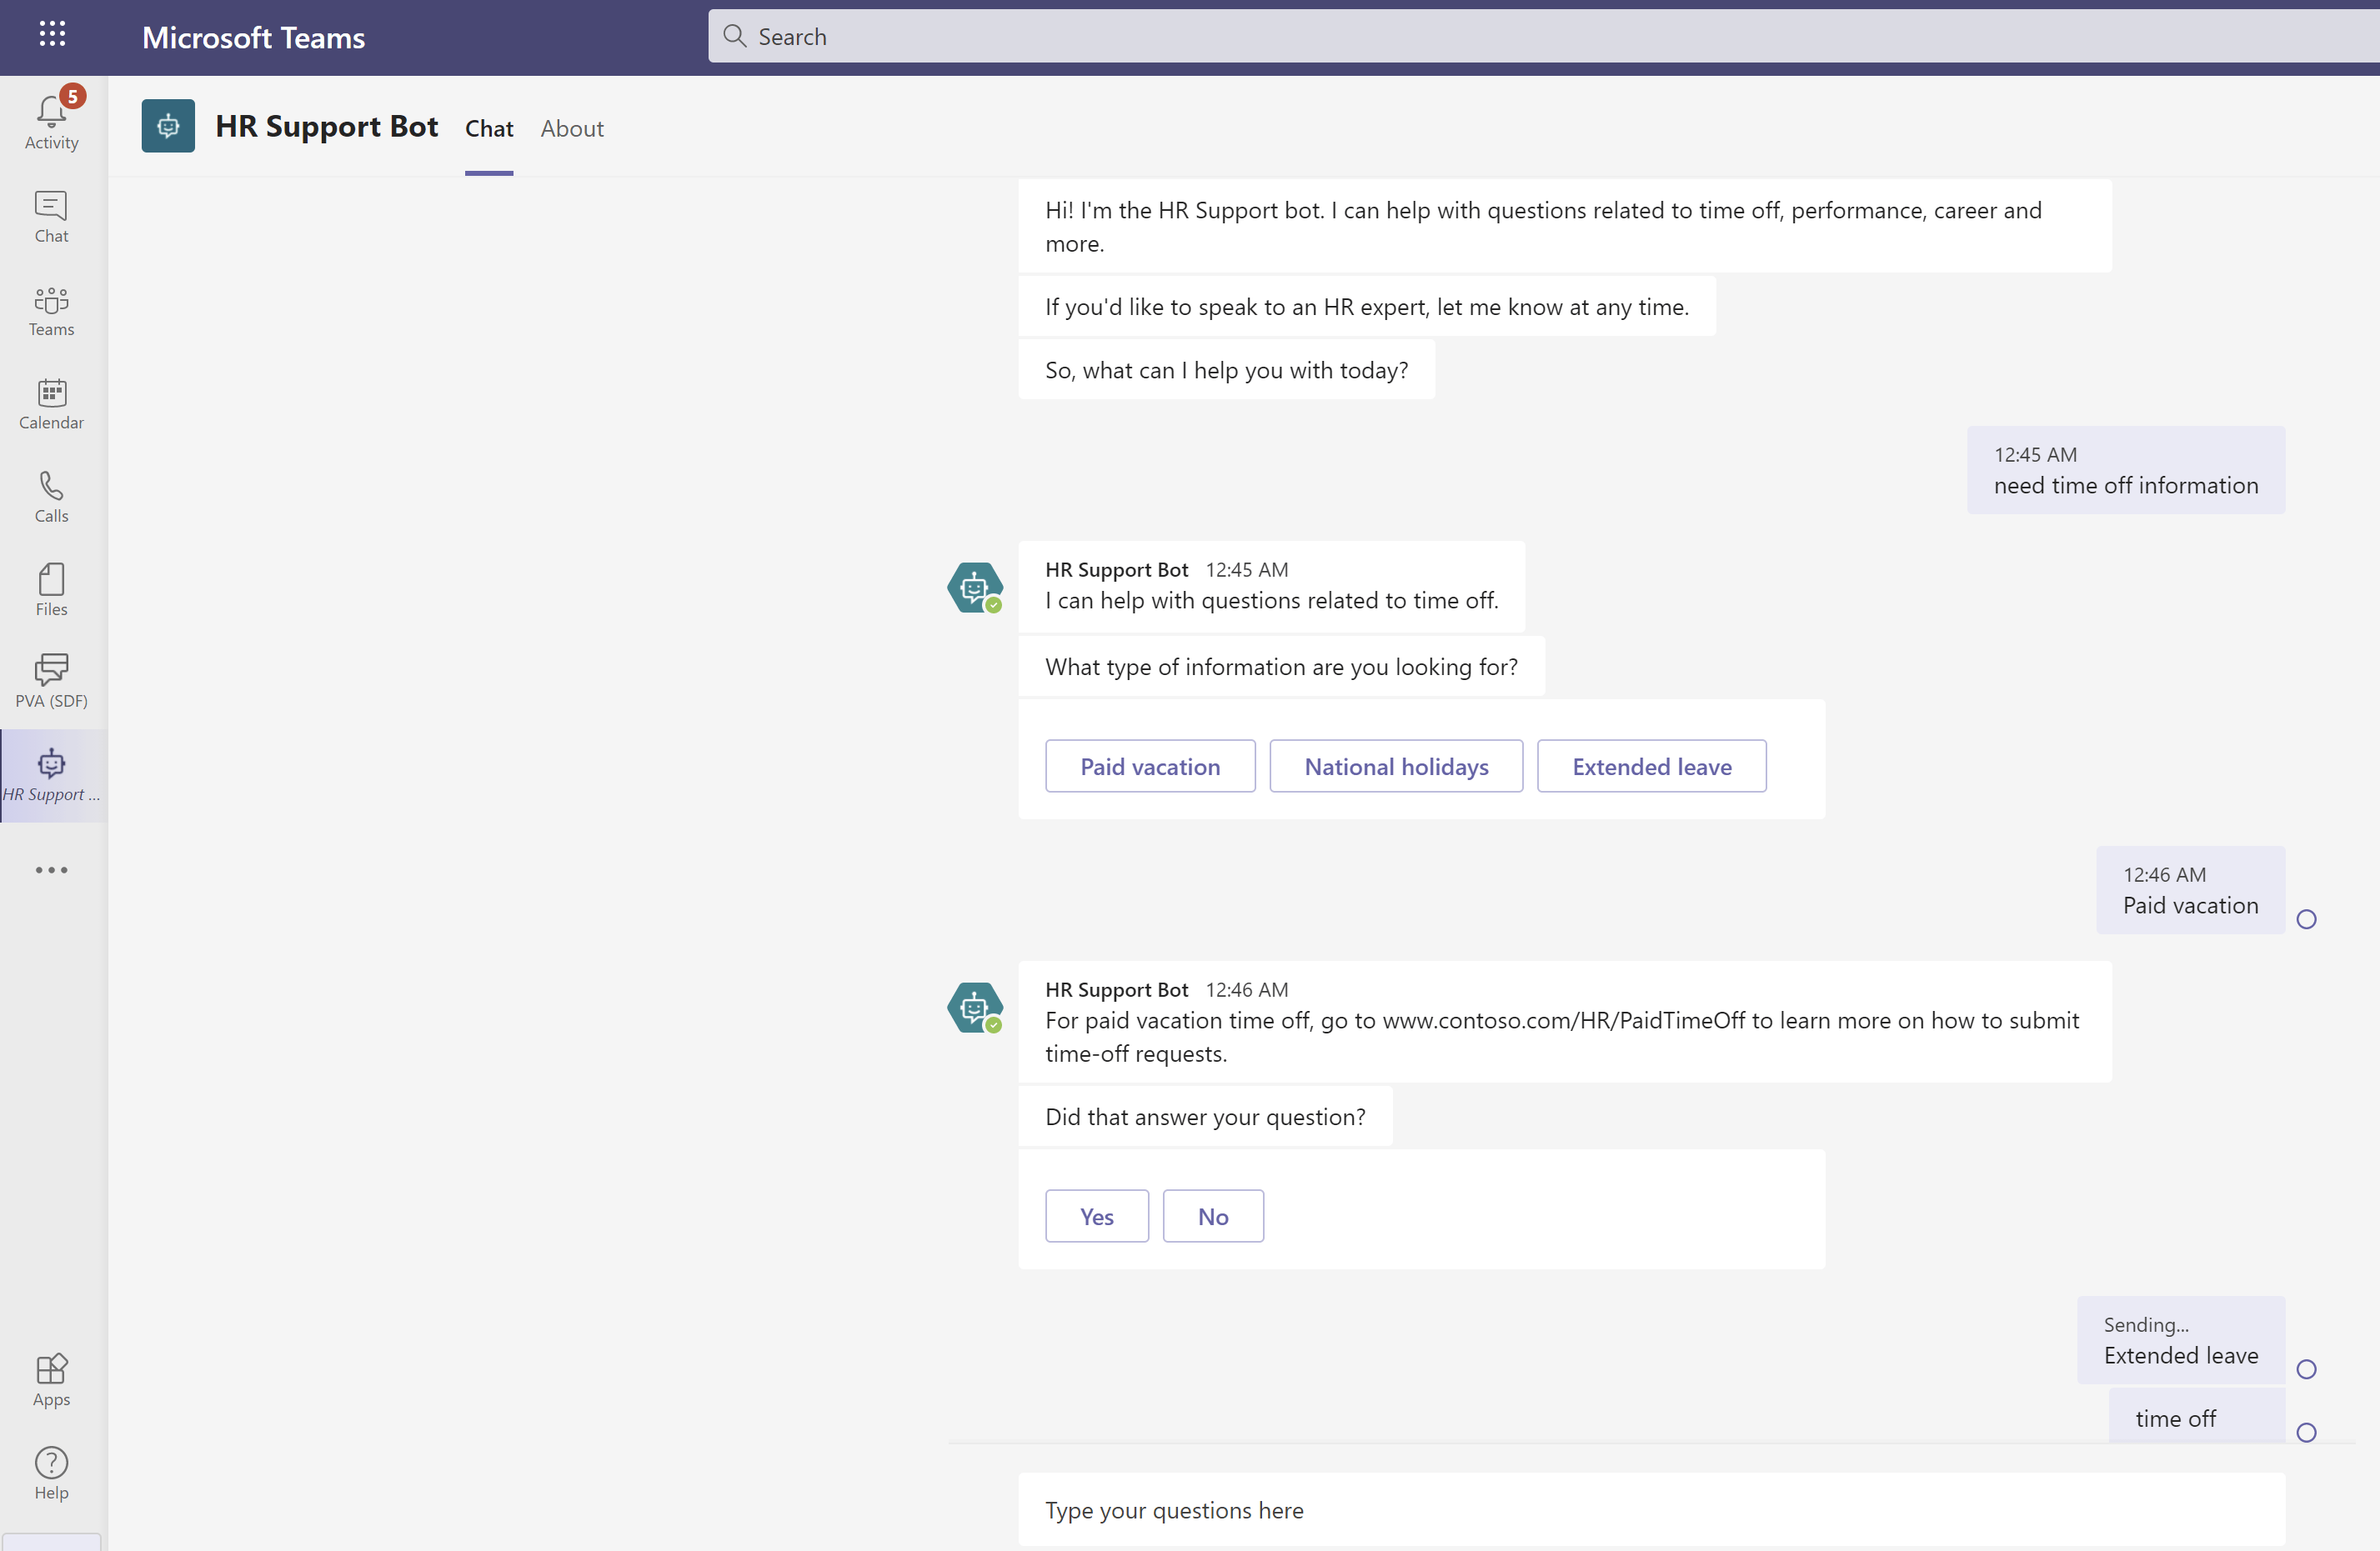
Inspect the TimeOffType and escalation variables. Slot filling may skip the question when a user already says “observed holidays”; verify that this behavior is correct and that critical consent or confirmation questions are still asked.
For deeper testing, see how to test a Copilot Studio agent and use entities and slot filling.
6. Publish and configure Teams
- Select Publish and publish the latest content.
- Open Channels.
- Select the Teams and Microsoft 365 Copilot channel tile shown for your agent and plan.
- Choose Add channel or connect Teams, then review the app name, description, icons, suggested prompts, and access settings.
- Install the agent for yourself and test the published version in Teams.
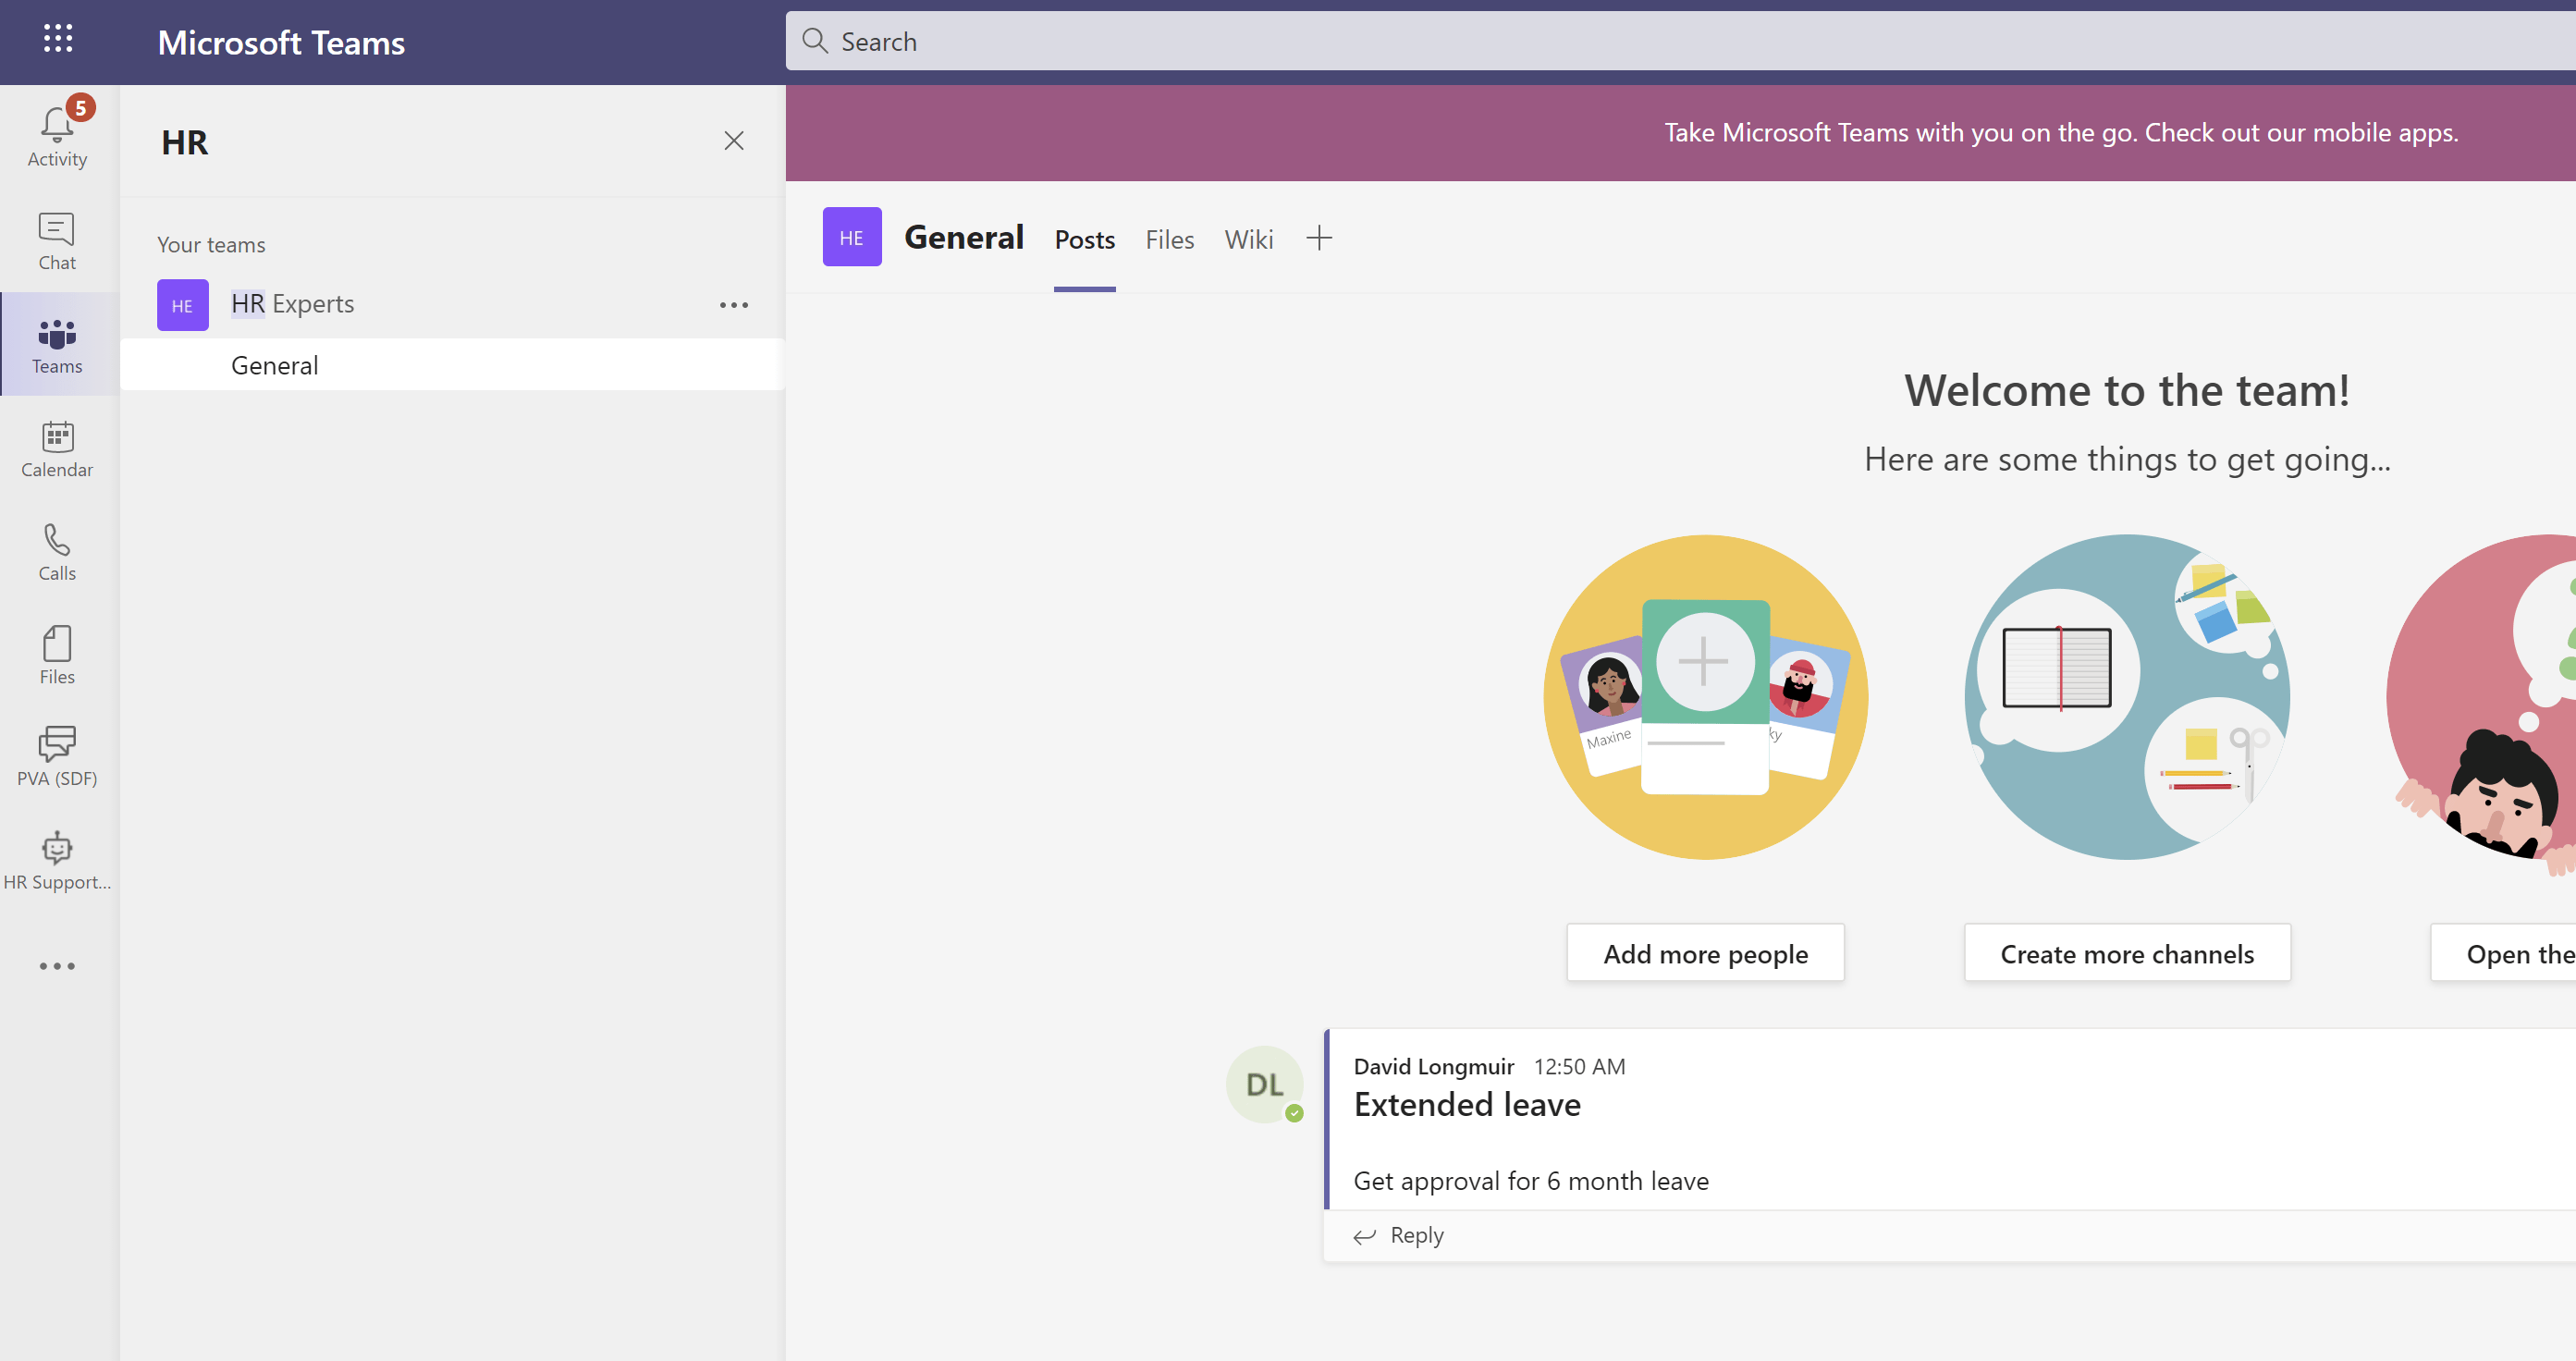
Publishing makes a version available to configured channels; it does not necessarily make it visible to the entire organization. Republish after content changes.
7. Share it with the right audience
Start with a small pilot group. Depending on tenant policy, you can share an installation link with authorized users or submit the agent for organizational approval. An administrator may need to approve and deploy it before it appears under Built for your org or a similar Teams app-store section.
Sharing user access is different from granting edit rights. Give maker or environment permissions only to people who maintain the agent, and use groups instead of individual assignments where practical.
If the agent does not appear in Teams
- Confirm that the latest version was published.
- Check that the Teams channel is connected and the agent is enabled for the intended users.
- Review Microsoft 365 and Teams admin approval, custom-app, and agent policies.
- Verify that the user is included in the shared group and is using the correct tenant.
- Remove an old personal installation and reinstall after a metadata update if instructed by the administrator.
- Check quotas and Teams rate limits if the app installs but stops responding.
The official Teams-plan quickstart contains current plan restrictions, while Microsoft’s Teams channel guide covers channel configuration and known limitations.
Pre-release checklist
- Every answer points to a current, owned policy source.
- The agent cannot expose information beyond the signed-in user’s permissions.
- Escalations go only to an approved restricted destination.
- Flow success, failure, and duplicate submission are handled correctly.
- The published Teams version—not only the authoring test panel—has been tested.
- Owners, review dates, retention, and support contact are documented.
Related Articles
 How to Use Microsoft Teams Online: Step-by-Step Guide4 minutes read
 Link Download Microsoft Teams 1.3.00.35649 minutes read
 How to Create and Join Meetings on Microsoft Teams7 minutes read
 Steps to Recover Microsoft Teams Password3 minutes read
 How to Create a Free Microsoft Teams Account Without EDU3 minutes read
 How to Create Exams on Microsoft Teams: Step-by-Step Guide3 minutes read
Reader Comments 0
Sign in with email or Google to join the discussion.