Backup and restore SQL 2008 - Part 1
Don Schlichting
TipsMake.com - In this article, we will introduce you to backup and restore SQL Server database. In addition to introducing standard backup options like Full Backups and Differential Backups, new SQL Server 2008 features like Backup Compression will also be introduced in this series. Backup from SQL Server Management Studio as well as from the command line utility. There is also a backup of the system database for users who have created databases. Scheduled Backups are reviewed, checking the security and logon issues related to transferring the database from the test server to the production machine.
Full Backup
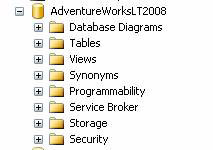
To begin, we begin with an introduction to Full Backups, Full Backups can be understood as the simplest way to provide a complete backup solution. Full Backup will create a file containing the entire database, including Transaction Logs. (In the next section, we will introduce Transaction Logs and Recovery Models recovery models.) When viewing a database from within SQL Server Management Studio Object Explorer, you will encounter a number of different objects such as Tables, Views, Stored Procedures and Security.

All of these objects are included within a full SQL Server backup file. To create a backup, click on the database, select Tasks and then click Backup. This will bring up the ' Back Up Database ' window with the General settings. The source will be filled in with the database you selected. Make sure the ' Full ' option has to be selected for this backup type.

The other options like Differential and Transaction Log will also be introduced in the following section. In the Backup Component, select Database .

Another option button is ' Files and Filegroups ' which is also used when the database has been created to expand into multiple files on the operating system. This problem is sometimes done on very large databases to increase performance issues. If you are in this case, select the database that has any and all Filegroup.
Next, name the backup and its description.
The next section ' Backup set will expire ' can be used when backing up to tape or creating backup groups ' Media Sets '. In this example, we will backup to a hard drive so by default it will be 'after 0' days.
The last option on this screen locates the location for backup. By default, SQL Server will put all backups into the MSSQLBackup folder. Backups end with an extension of .BAK. Although this is not necessary, you should note that there are many target files that can be specified as shown below.

This can allow SQL backups to spread across other hard disks. In the above example, both files are required for Restore. This technique can also be used to extend backups on multiple tapes when your environment is too small to hold the entire database on a tape.
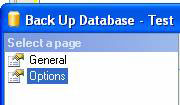
To check options, select ' Options ' from the top right menu.

The first set of options is labeled ' Overwrite Media '.

This volume is typically used when backing up to tape. When backing up to the hard drive, if you use a unique name for your backup on the previous screen, these options can be ignored. If the backup name is not unique, select the ' Overwrite All existing backup sets ' button. This will create a file with only the most recent backup in it. When you want to restore from this file, you will be prompted to choose which backup settings to reside to restore.
In the next section, ' Reliability ', select ' Verify backup when finished ' to make sure your backup is valid.
The Transaction Log section will be displayed in gray because the Full Backup will automatically remove the log file.
The final section contains options for compression (only for SQL Server 2008). Compression compression is a new feature in SQL Server 2008. It can reduce up to 20% of the physical size of the original file. If this feature is used, Restore will automatically recognize this compressed file. However, one weakness of this feature is that it takes up a lot of computer resources during the backup process.
Click the OK button in the lower right corner to start the backup process. When the backup is complete, a message will appear saying that the process is complete.
Command line
Backup can also be done from the command line or by script. To execute a backup using TSQL, open a new Query Window (To open Query Window, from Management Studio, click the New Query button in the upper right corner). The following command will execute Full backup to the hard drive.
BACKUP DATABASE AdventureWorksLT2008
TO DISK = 'C: Program FilesMicrosoft SQL ServerMSSQL10.MSSQLSERVERMSSQLBackuptest.bak'
WITH FORMAT;
The backup statement starts by specifying the backup database. However, there is no way to back up all databases that can only be performed separately. We will introduce you to a simple script and a task in which all the databases are grouped. The next statement specifies that we will backup to the disk and the destination of the file. If we backup to tape, use ' To TAPE ' instead of ' To Disk '. Finally, ' With Format ' means creating a new file. Without the last statement if the backup already exists, your new backup will append to it.
Conclude
There are indeed many options and different types of backups for SQL Server, but Full Backup will still be the option that contains all the objects related to a database. In the next part of this article series, I will cover database recovery as well as checking Transaction Logs, Recovery Methods and other backup options and how to manage them.