Personalize the Start Menu of Windows 10
Finally, with Windows 10 version, Microsoft also brought back the familiar Start Menu button. And of course it also allows users to customize more than before. Here are ways you can personalize the Start Menu the way you want.
>> You can download Windows 10 here!
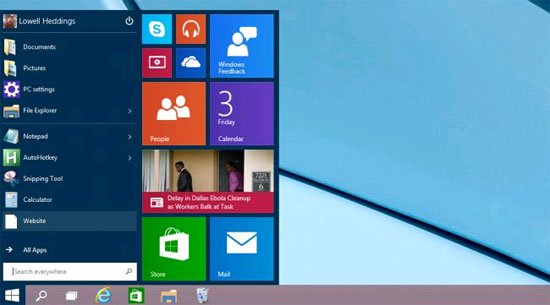
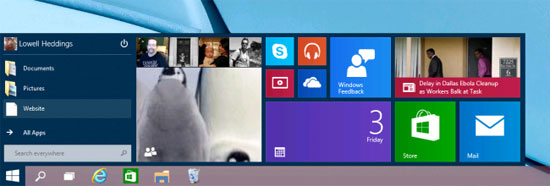
Resize Start Menu
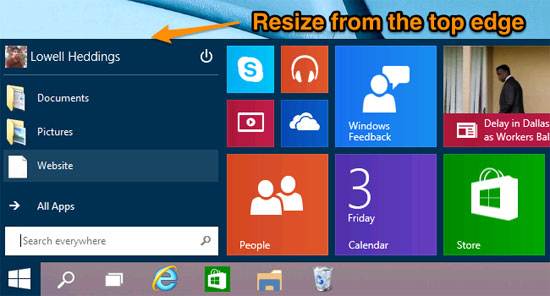
You can quickly resize the Start Menu by moving the mouse to the top edge of the Start Menu and pressing and holding down.
Pin and Unpin Tile
You can easily pin and unpin the tiles by right-clicking on the tiles and selecting Unpin from Start ( you can also drag them around to rearrange the location ).

And if you want to write a tile to the Start Menu, you can use the All Apps option to see a list of all applications installed on your computer, then right-click on the application and select Pin to Start from there. You can also pin frequently used applications to the right if desired.
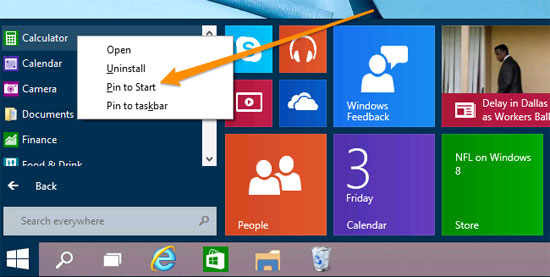
Of course, users can fully perform the Pin and Upin operations of applications from the taskbar in the same way as above.
Resize Live Tile
You can change the tile size by clicking on them and selecting Resize then selecting a suitable display size.
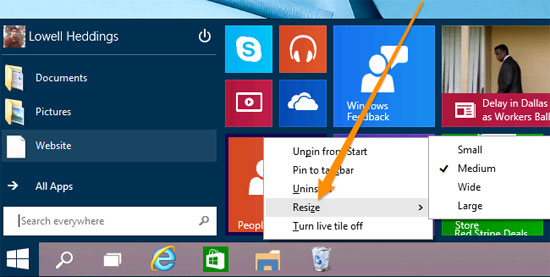
Depending on your needs, you can choose one of the available tile size options, try one by one until you choose the right size you want. So that both eyes can be clearly seen to help users with poor eyes find and select applications faster.
Turn off Live Tile updates
If you feel all the tiles blinking on the screen to update automatically and constantly bothering, just right click on them and select ' Turn live tile off ' to turn them off.
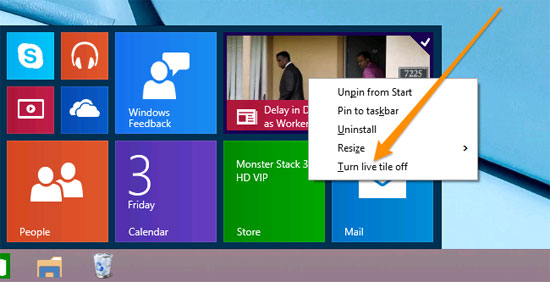
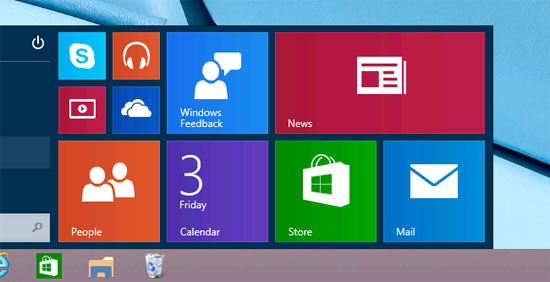
Compared to the New application image above when updating news continuously, when turned off, it will return to a normal tile as shown below.
Change the Start Menu color and Taskbar
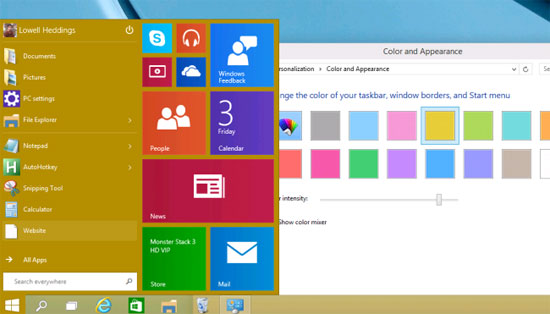
You can easily change the colors of the Start Menu and Taskbar by right-clicking any space and selecting Personalize .
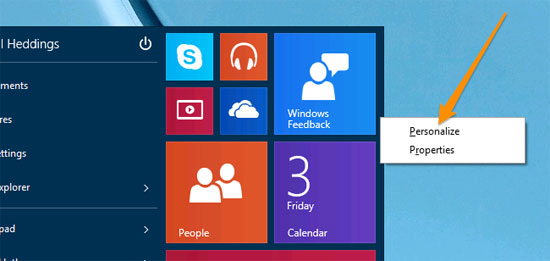
The Color and Appearance dialog box will appear, from which you can choose to change any color you want.
Pin items to the left of the Start Menu
You can pin applications to the left side of the Start Menu with a single drag and drop of applications' shortcuts to the Start button and you will see a ' Pin to Start Menu ' hint displayed to let you know if you should drop. That shortcut.

After dropping the shortcut, it will immediately be added to the left side of the Start Menu. You can also drag and drop items to change positions if desired.
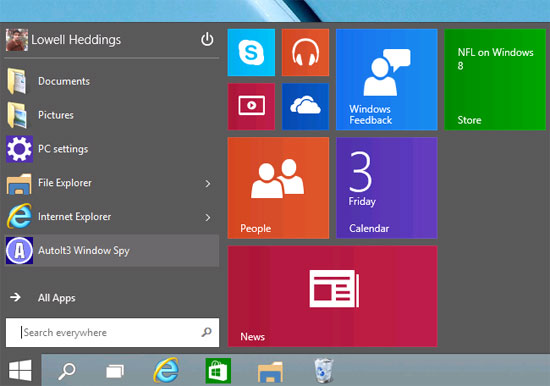
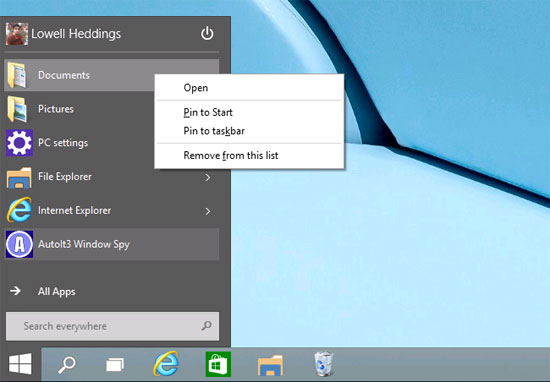
Strangely enough, you can pin applications right or left, but can't drag and drop from right to left, just drag and drop from left to right. To remove any shortcut on the left of Start Menu, just right-click the shortcut and select " Remove from this list ".
Add Control Panel and special items to the left of the Start Menu
You can also add some special shortcuts to the left side of the Start Menu, but you will need to install them by clicking on them. Right-click any space and select Properties .
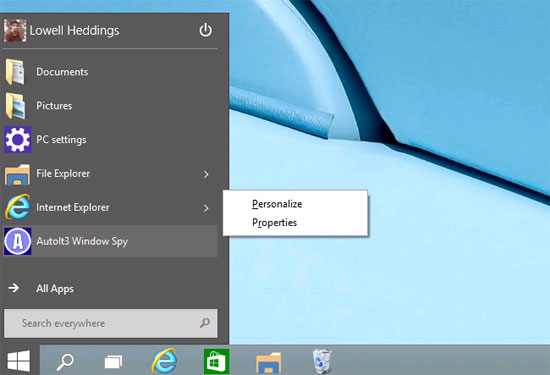
In the dialog that appears, switch to the Start Menu tab and then click the Customize button .
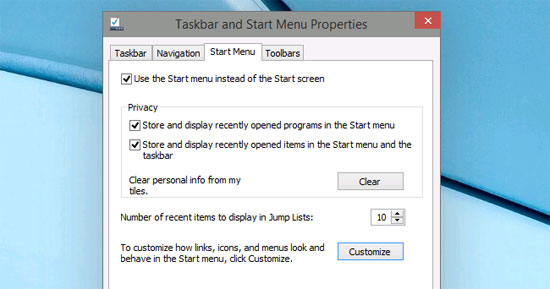
Inside the Customize Start Menu dialog box, you can select specific and frequently accessed items that you want to pin into the Start Menu just below the Pin to Start list .
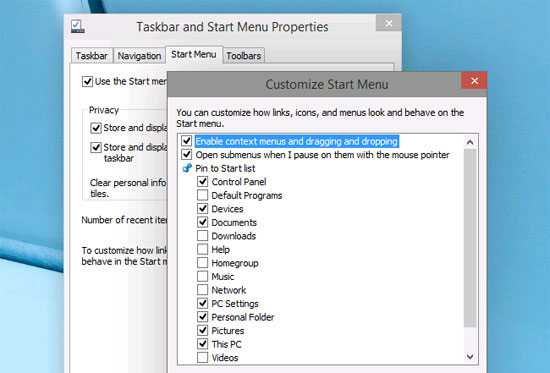
Depending on the different usage needs, each user will choose to display the items he or she regularly accesses to the left of the Start Menu.
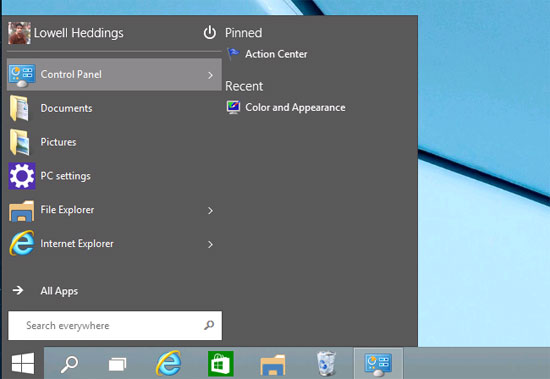
Remove all Live tile for Start Menu to look like on Windows 7
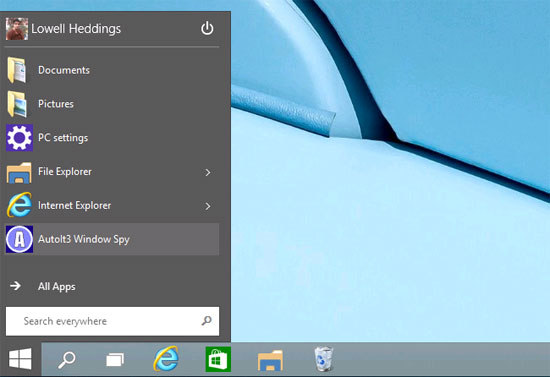
One of the best ways to customize the new Start Menu is to just remove all the Live tiles to make it look like Windows 7. All you need to do is unpin all the items on the right, Put the required items to the left of the Start Menu, then reduce it to the size of the Start Menu until you are finished.