Tips or help you master the Start Menu on Windows 10
The Start menu is one of the highlights of the Windows 10 operating system. In particular, the Start Menu on Windows 10 is more customizable than other operating systems..
The Start menu is one of the highlights of the Windows 10 operating system. In particular, the Start Menu on Windows 10 is more customizable than other operating systems.
In the following article, Network Administrator will introduce you to some of the Start Menu customization tips on Windows 10, help you customize the Start Menu more quickly and efficiently, saving your time.

1. Resize (Resize) Start Menu
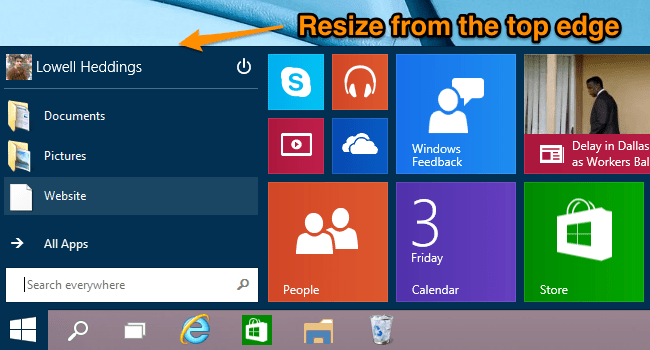
To resize the Start Menu, move your mouse to the top edge of the Start Menu, then drag to resize the Start Menu size down.
On the screen you can see the size of the Live Tile also changed.
2. Pin (pin) or unpin (Unpin) Tile
You can easily pin (pin) or remove Live Tile (unpin) pin on Windows 10 Start Menu.
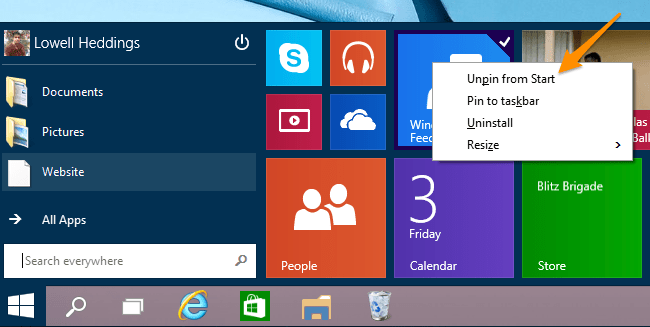
To unpin, first right-click on the Live Tile you want to unpin and select Unpin from Start .
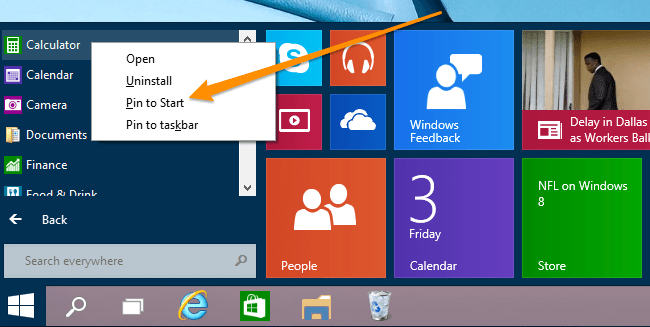
To pin a Live Tile on the Start Menu, go to All Apps and select the application you want to pin (pin) then right-click the application, select Pin to Start .
3. Resize Live Tile
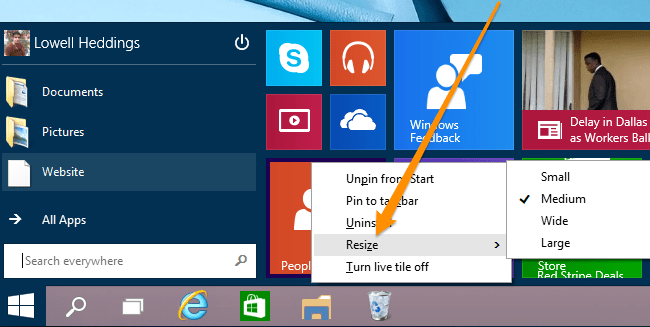
You can resize any Tile (Windows) on Windows 10 Start Menu by right-clicking on that Tile, select Resize and then choose a size of your choice.
4. Turn off Live Tile update
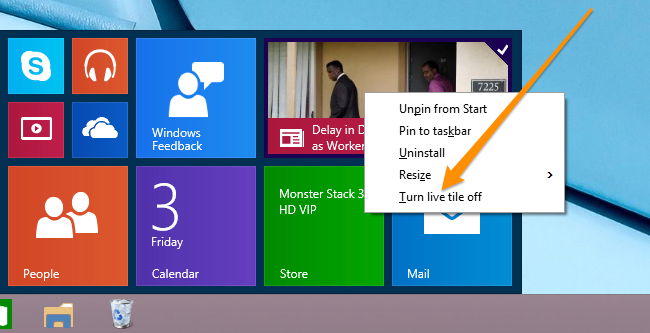
On Windows 10 Start Menu, sometimes there are many self-updating applications. This is one of the causes of "consuming battery" of your computer. However, you can also turn off these updates by going to the Start Menu, right-clicking on Live Tile, and selecting Turn LiveTile Off.
5. Change colors Start Menu and Taskbar
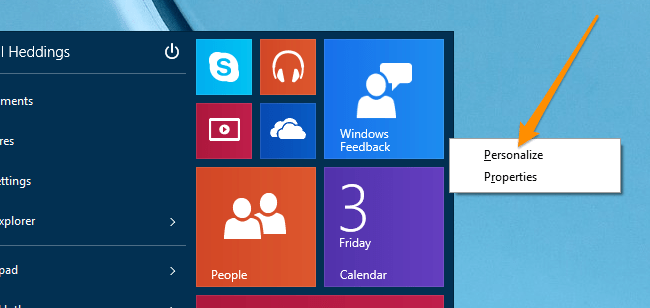
To change the Start Menu or Taskbar colors, right-click any space on the Start Menu, select Personalize.
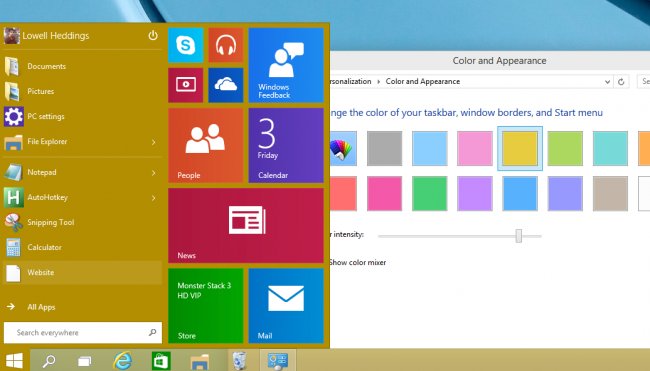
Now, the Color and Appearance dialog box appears , you can freely choose your favorite color to change the Start Menu color.
6. Add Control Panel and special shortcut to the left of Start Menu
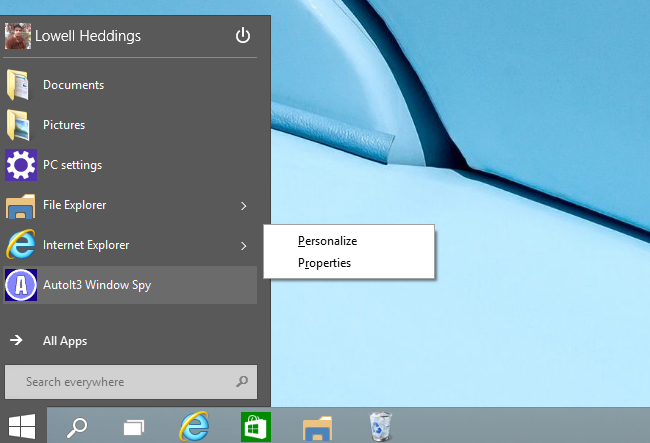
You can add Control Panel and special shortcuts to the left side of the Start Menu by right-clicking any white space on the Start Menu and then selecting Properties .
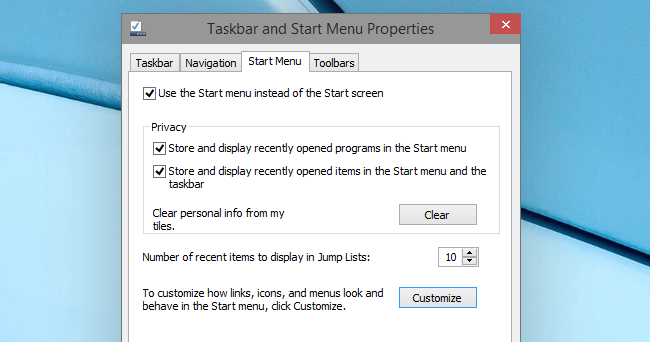
On the screen appears the Taskbar and Start Menu Properties window, click your mouse on the Start Menu tab, then click Customize.
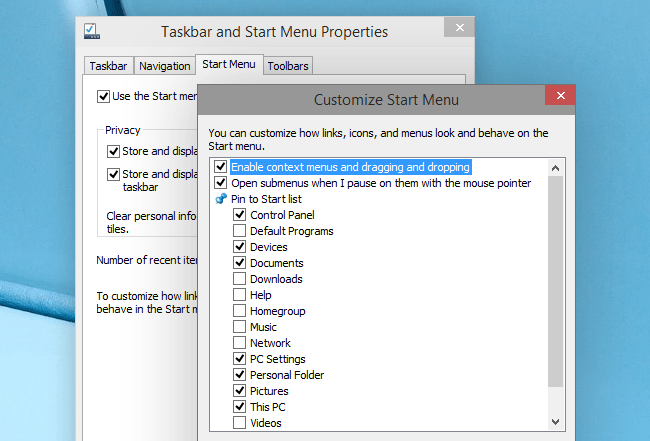
The Customize Start Menu window appears on the screen. In this window you can select any item you want to add on the Start Menu. Check the Control Panel item to add it on the Start Menu.
7. Pin any application to the left of the Start Menu
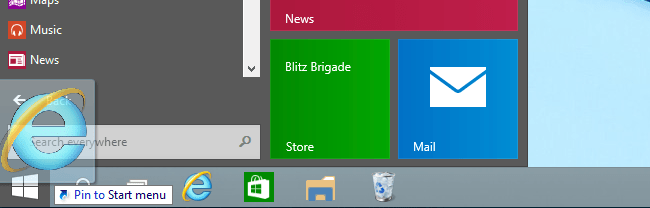
To pin any application to the left of the Start Menu, hold and drag the application shortcut to the Start button. On the screen you will see the " Pin to Start menu" tooltip message.
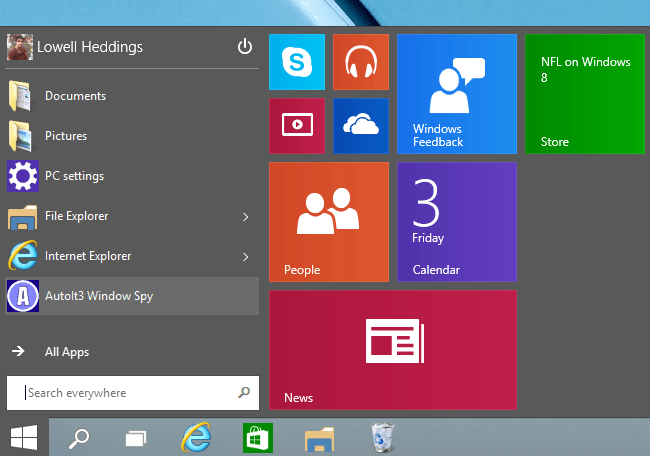
You can arrange the application you just pinned to the top or under the Start Menu at will.
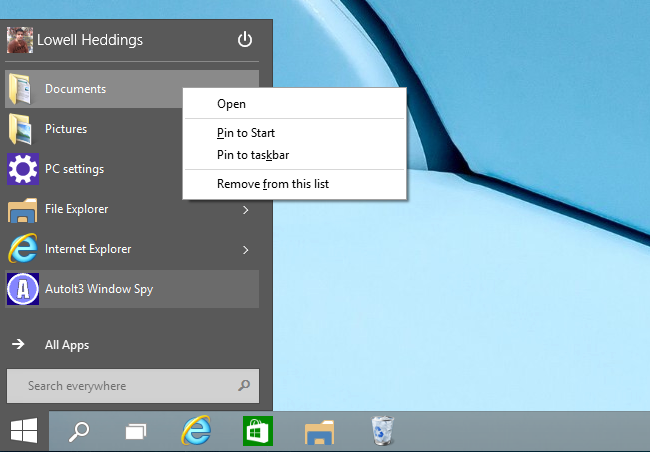
In addition, you can delete any application you want by right-clicking the application and selecting Remove from this list.
8. Delete all Live Tile
One of the best customization tips on the Windows 10 Start Menu is that you can delete all Live Tile.
You just need to remove the pin (unpin) all Live Tile on the Start Menu, then resize the Start Menu. Now on the screen you will see the new Start Menu quite similar to the Start Menu on Windows 7.
You can refer to some of the following articles:
-
10 animations illustrate the most outstanding features on Windows 10
-
Tips to customize Taskbar on Windows 10 effectively
-
Trick to launch Command Prompt easily on Windows 10
Good luck!