Table of Contents
This guide provides a practical overview of Adjust Autoplay Option in Windows 7, including its main features, benefits, limitations, and important considerations.
To change the default values for AutoPlay as you like. Follow the article below to learn how to adjust the AutoPlay option in Windows 7.
Step 1: Open the Autoplay window.
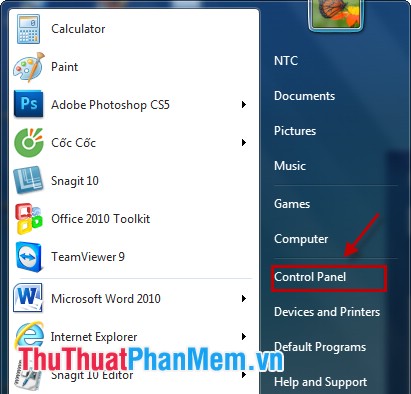
- Go to Start -> Control Panel .
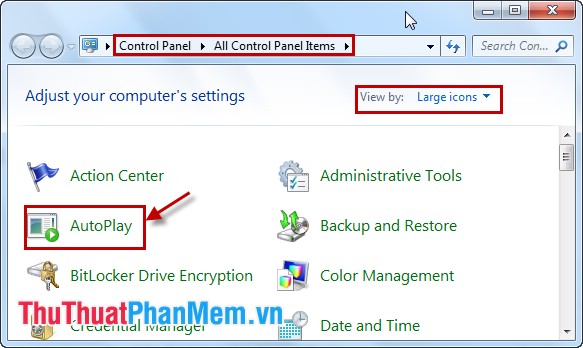
In Control Panel -> Autoplay .
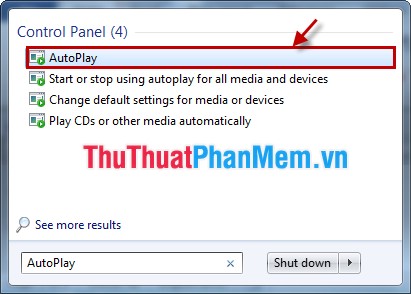
- Or select Start , in the Search programs and files box, type the keyword AutoPlay and select AutoPlay .
Step 2: Adjust the options in the AutoPlay window.
- To use the AutoPlay feature for all devices when connecting to the computer, you need to tick the box Use AutoPlay for all media and devices .
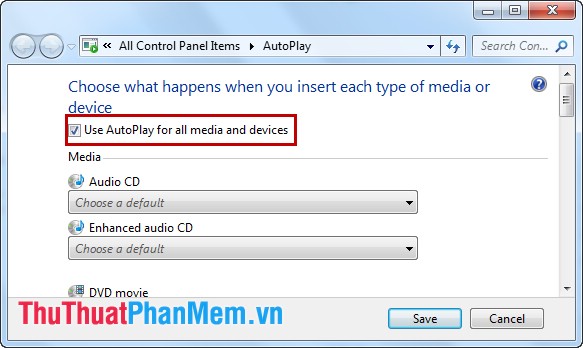
- For each type of private media and devices, you select the option on the right of it will drop down list for you to choose to suit your needs.
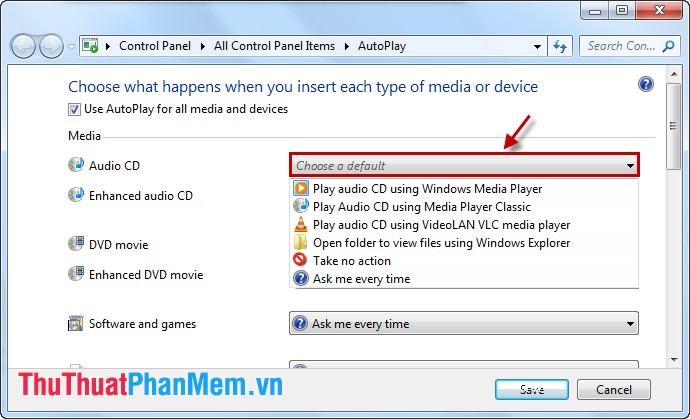
- There are many media and devices connected to the computer for you to customize Autoplay .
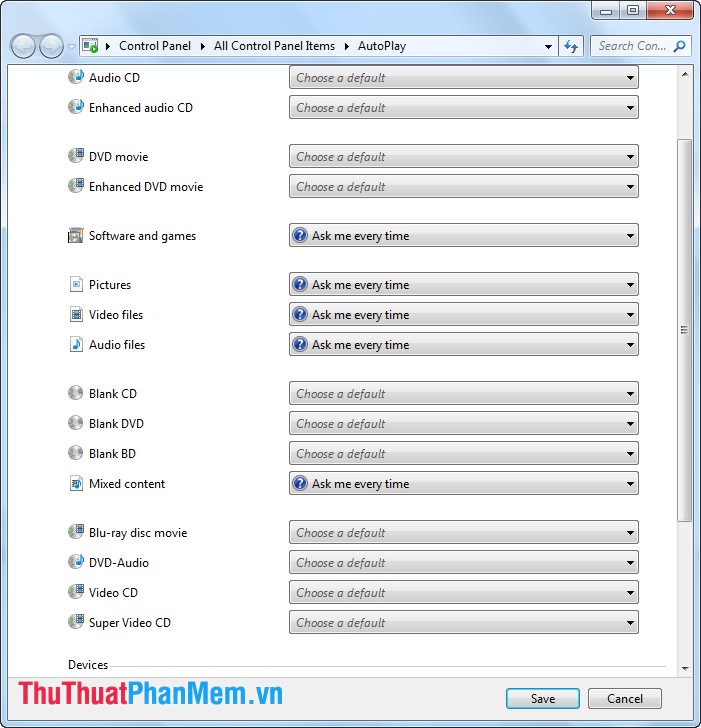
Step 3: After adjusting Autoplay option, select Save to save your settings.
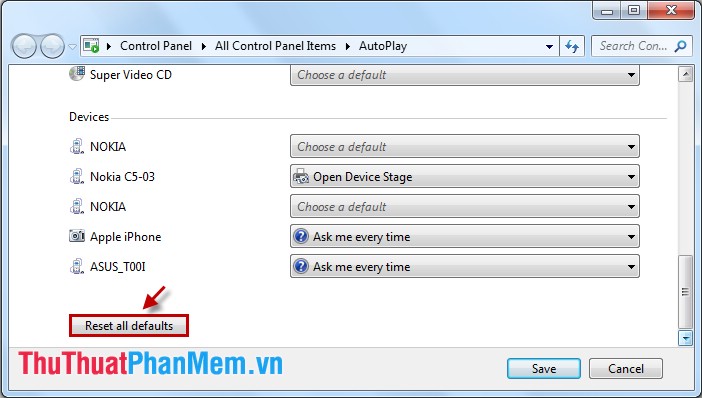
- To reset the default mode for the options you select Reset all defaults .
- To disable AutoPlay, uncheck Use AutoPlay for all media and devices .
With simple and quick operations, from now on you can customize the options for AutoPlay to suit your needs.
FAQ
What should I know about Adjust Autoplay Option in Windows 7?
Focus on the key features, requirements, limitations, and practical use cases explained in this guide.
How do I get the best results with Adjust Autoplay Option in Windows 7?
Follow the recommended steps, use current software or information, confirm compatibility, and review settings before major changes.
Are there any risks or limitations?
Potential limitations depend on compatibility, data quality, cost, privacy, support, and how the product or method is used.
Related Articles
 Turn Off Autoplay in Windows 10, XP3 minutes read
 How to Set up or Turn Off the Autoplay Feature on Windows 115 minutes read
 How to Change Autoplay Settings in Windows 83 minutes read
 3 Ways to Enable and Disable Windows 11 AutoPlay3 minutes read
 Custom Instructions Turn on, Turn Off Autoplay in Windows 106 minutes read
 How to Adjust Power Option on Windows 10 for the Most3 minutes read
Reader Comments 0
Sign in with email or Google to join the discussion.