Windows 10 error cannot be Sleep, this is a fix
Sleep mode on Windows is one of the extremely useful features for computer users with repeated frequencies.
However, after upgrading to Windows 10, quite a lot of users reflect that this Sleep mode does not work. So how to fix this error, please refer to the following article of Network Administrator.
Fixing Windows 10 errors cannot go into Sleep mode
- 1. Change Power Plan settings
- 2. Check Power Requests
- 3. Run Windows 10 Troubleshooter
- 4. Update Driver Chipset
- 5. Check out the nearest 'wake up' events
- 6. Check the compatibility of connected devices
- 7. Reboot PC in Safe Mode
1. Change Power Plan settings
To fix the problem that Windows 10 computers can't sleep, the first solution you can think of is to change the Power Plan settings.
Step 1:
First click on the Start button, then select the Settings option.
Step 2:
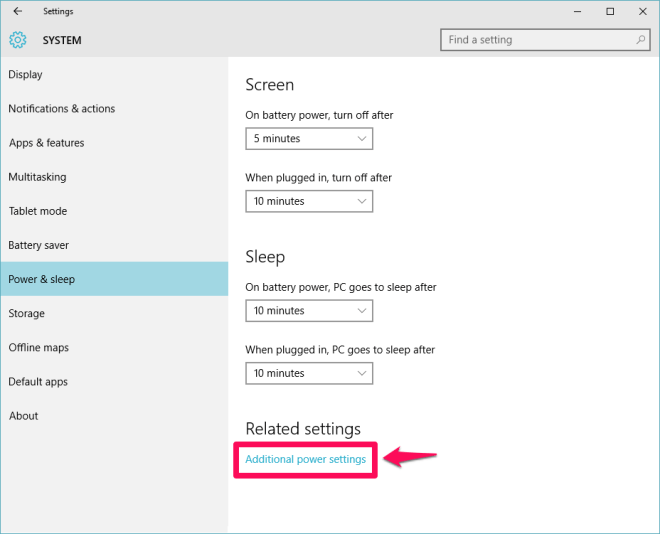
On the Settings window, select System => Power & options .
Step 3:
Make sure the Sleep option is set to value. Click to select Additional power settings option to access Additional power settings.
Step 4:
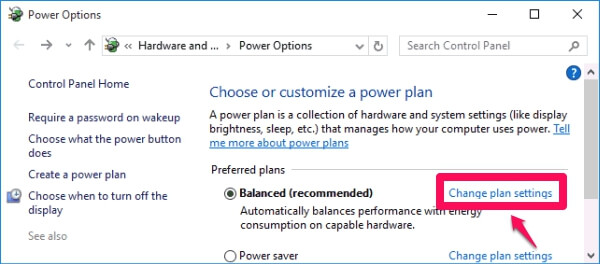
From the Preferred Plan item you choose, click Change plan settings next to the Plan (Balanced (recommended), High performance, or Power saver) that you are using on your Windows 10 computer.
Step 5:
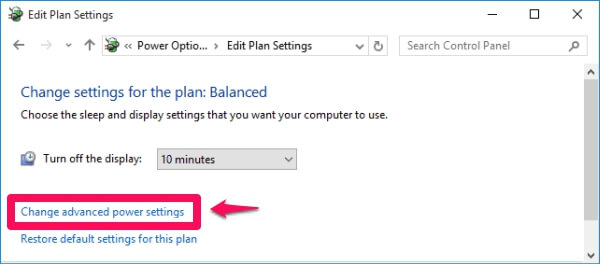
On the Edit Plan settings window, click the link Change advanced power settings.
Step 6:
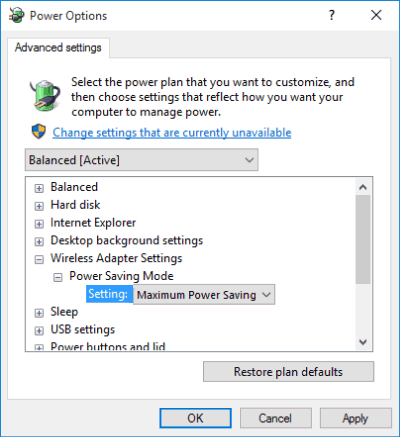
The Power Options dialog box appears on the screen. To fix Sleep errors on Windows 10, you just need to expand all settings to find and activate Sleep mode on all settings.
Step 7:
Go to Multimedia settings => When sharing media and select Allow the computer to sleep , then click OK to apply the change.
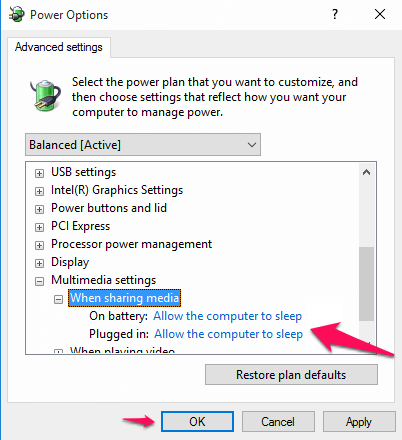
In case if you do not want to expand all settings to check if Sleep mode is enabled or not, just click Restore to Defaults to fix the error.
2. Check Power Requests
Step 1:
To check if all Power Requests are active on your computer, first open the Command Prompt under Admin.
Step 2:
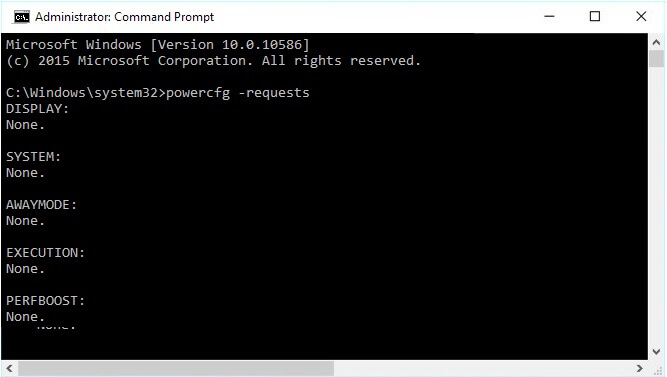
Next enter the following command into the Command Prompt window and press Enter:
powercfg -requests
Step 3:
If you see SRVNET, it means that a service request is sent by some application. You can check which application is running from Task Manager and close the application.
3. Run Windows 10 Troubleshooter
If you've applied the above two solutions and still can't fix the error, then you might think of a solution to run Windows 10 Troubleshooter to fix the error:
Step 1:
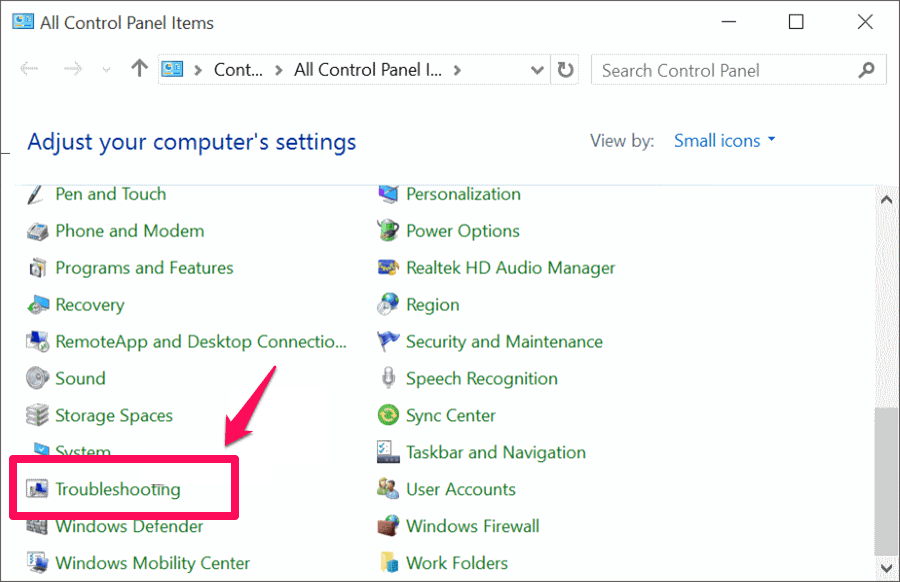
Open Control Panel on your Windows 10 computer and then click Troubleshooting.
Step 2:
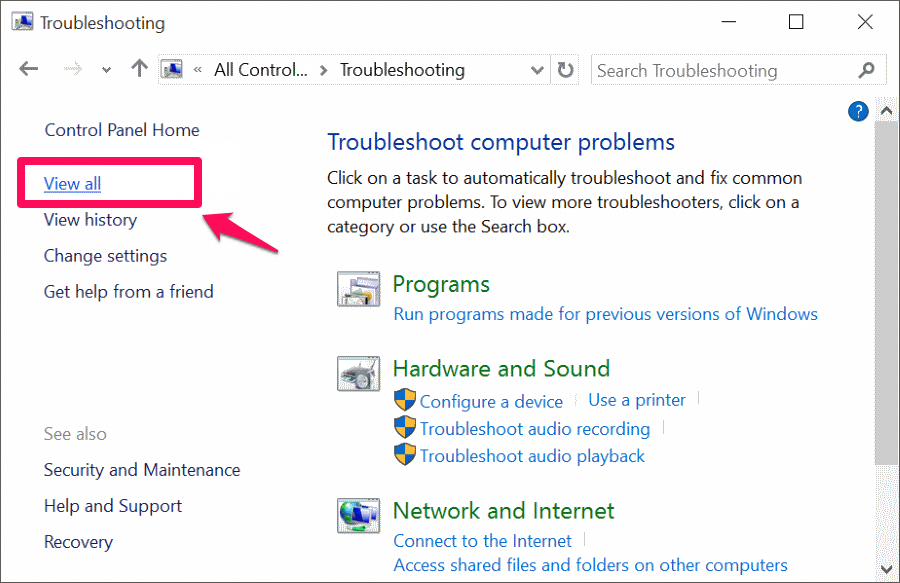
Next on the Troubleshooting window, click View All to see the list of Troubleshooter available on your Windows 10 computer.
Step 3:
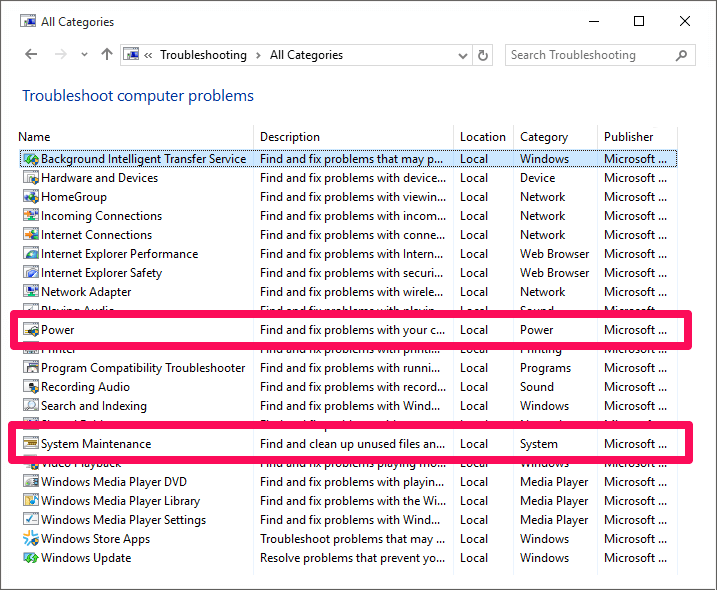
On the Troubleshooter computer problems window, run troubleshooter of Power and System Maintenance.
Step 4:
After the process has finished, check if the Sleep error on your Windows 10 computer is fixed.
4. Update Driver Chipset
Please check if the driver has been updated. The most important ones are chipset, network, audio and BIOS drivers. Ensure that you are running the latest version of Windows 10 is also recommended.
In addition, you can use the help of automatic driver update tools. These tools will detect the latest version of the chipset driver, then you can download and install this driver version on your computer.
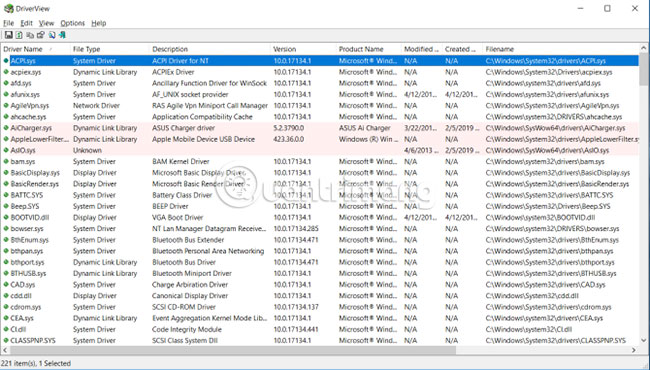
- Check last modified version and date numbers : Download the DriverView utility from Nirsoft ( download link: http://www.nirsoft.net/utils/driverview.html ). Check the version number, installation date, creation or modification date and driver's digital signature.
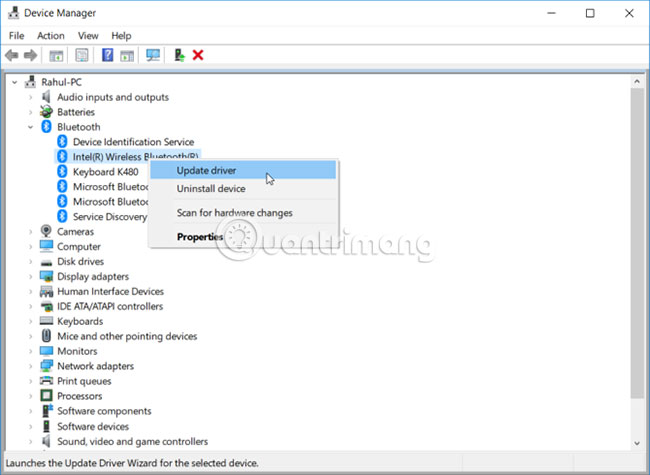
- Driver update : Windows will automatically update the driver via Windows Update. This is a completely safe and reliable method because Microsoft verifies the drivers for the system and updates them as needed. You can also update your drivers through Device Manager. Right-click the driver and select Update driver.
- Check the manufacturer's website : Most PCs will include a DVD and a support website lists all the drivers that are compatible with their version number. Please bookmark the site again and check for periodic driver updates.
Never download a third-party application that requires driver updates. These sources are not reliable and can make the system unstable.
After you have installed the driver, restart your computer and check if the error has been fixed.
5. Check out the nearest 'wake up' events
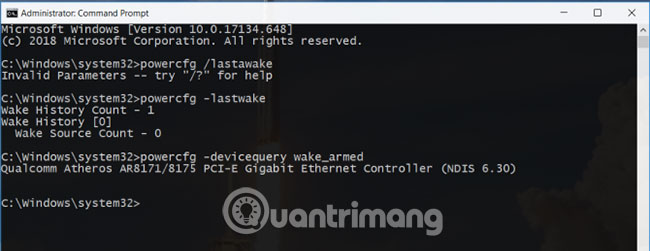
If your PC is "awake" suddenly from Sleep mode and you want to know which device has enabled this 'wake up' event, use the following command:
powercfg -lastwake To see a list of devices that "wake up" the system, enter:
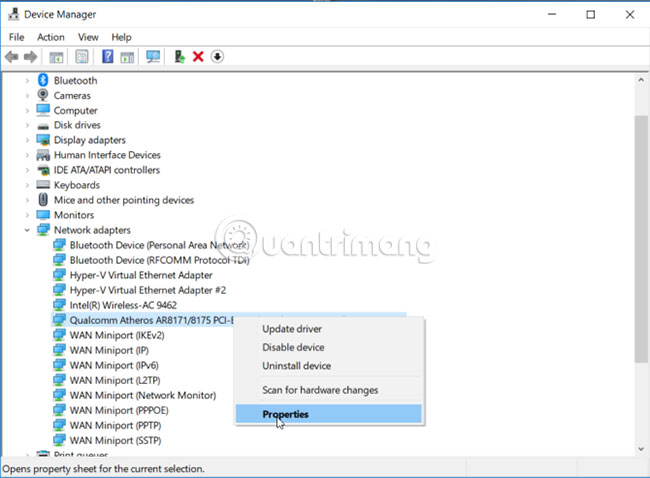
powercfg -devicequery wake_armed In the screenshot below, you will see that the Ethernet adapter is causing the PC to suddenly wake up.
Open the driver network adapter in Device Manager, right-click the driver and select Properties.
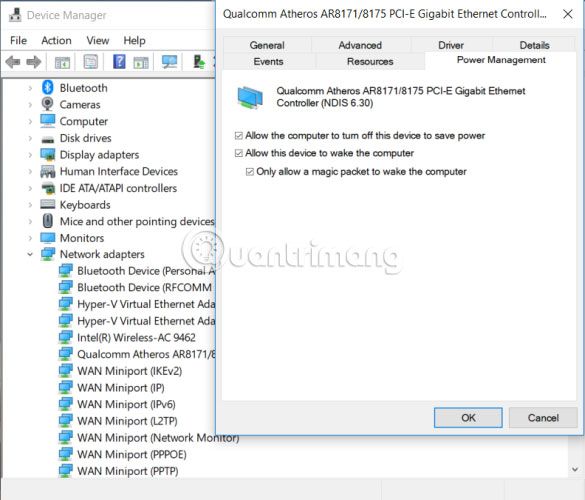
In the Power Management tab , uncheck Allow this device to wake the computer . You can leave this option enabled and check the Only allow a magic packet option to wake the computer to prevent everything except Wake-On-Lan packets that wake up the PC.
6. Check the compatibility of connected devices
It is also possible that some devices connected to the PC are not compatible with the Windows 10 version. Some manufacturers take a long time to release updates before they are compatible with the new Windows version. than. These devices may include printers, scanners, game consoles, webcams, etc.
Visit the manufacturer's website and check if there are any compatibility issues. If there is no problem, unplug the device and check if the problem with Sleep mode remains.
7. Reboot PC in Safe Mode
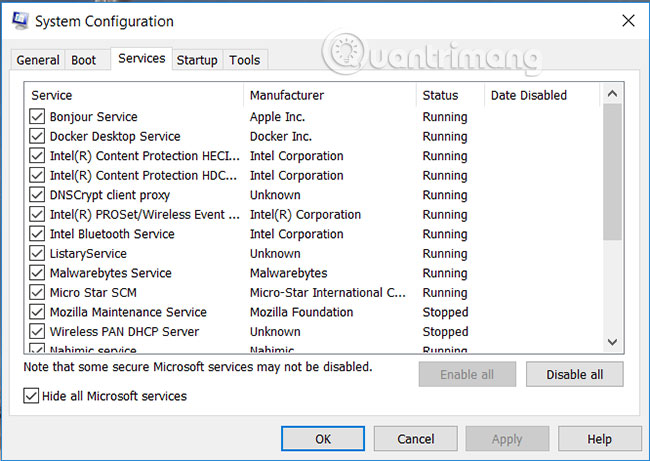
Problems with Sleep mode are often caused by the complexity of hardware and software during the boot process. To check if this is the case you are having, restart Windows 10 PC in Safe Mode and see if it can go into Sleep mode. If possible, you will need to perform a clean boot to minimize errors.
Refer to some of the following articles:
- Unlock hidden features on Windows 10 with some Registry tricks
- How to re-activate Windows 10 after changing the hardware?
- Instructions for fixing errors do not turn off Windows 10 computers and laptops
Good luck!