How to fix Windows 10 automatically activating Sleep Mode instead of locking the screen
The steps to fix the problem Windows 10 automatically go into Sleep Mode instead of locking the screen are as follows:
1. Set the login request when waking the computer from Sleep Mode
You can check this setting by visiting the Settings app . This setting is called Require sign-in . If it is set to Never then your computer will not display either the login screen or the lock screen. So anyone can log into your computer after waking up from Sleep Mode .
To change this you need to do the following:
- Press the Windows + I key combination to access the Settings application
- Navigate to Accounts> Sign-in options
- On the right side window, you will see a title titled Require sign-in
- Make sure that the When PC wakes up form sleep option is selected
- If not, open the drop-down menu to select it

2. Use Registry Editor
Registry Editor is a pretty powerful Windows customization tool. Of course, you can use it to reinstall the screen lock mode for Windows 10. Before doing this, you can back up the Registry file and back up the Windows 10 system as a backup.

Press the Windows + R key combination and type regedit and press Enter to open the Registry Editor . If you receive the UAC confirmation message, click Yes. Next, you need to find the following path:
HKEY_LOCAL_MACHINESoftwareMicrosoftWindowsCurrentVersionPoliciesSystemRight-click on the System folder and choose New> DWORD (320bit) Value to create a new value. You name the new value as DisableLockWorkstation . This value has a default parameter of 0 and you do not need to change it.
After creating this new value, try to check if your Windows 10 machine can lock the screen or not. Also, if you see the DisableLockWorkstation value check it and set its setting to 0 .
3. Activate login screen in Screen Saver settings
When setting Screen Saver you should also remember this option because it is dangerous if someone can access your device from this mode without logging in.
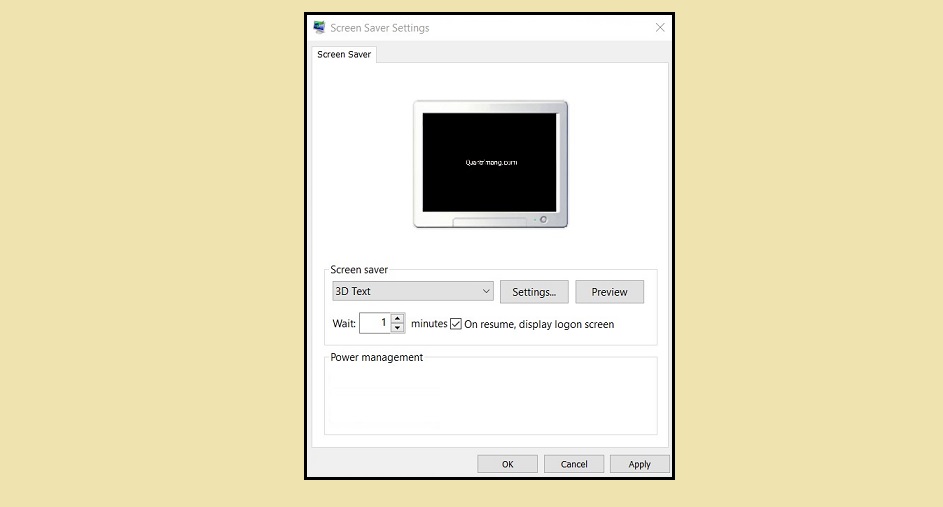
To set up you need to open the Settings app by pressing Windows + I then selecting Personalization> Lock scree n. In the right window, click the Screen saver settings option .
You can also search for " change screen saver " in Taskba 's search box to open Screen saver settings .

Then, in the Screen saver setting s window , make sure you click on the checkbox under On resume, display logon screen . Then click Apply and OK to complete.
Good luck.