Table of Contents
A dim laptop screen and a blurry screen are different problems. Dimness usually involves brightness settings, power saving, HDR behavior, the graphics driver, or the backlight. Blurry text more often points to a non-native resolution, scaling, ClearType, or an app. Flicker, colored lines, patches, and image distortion should be diagnosed separately because they can indicate a cable, panel, GPU, or driver fault.
First, identify the exact symptom
| Symptom | Likely areas to check |
|---|---|
| The whole screen is uniformly dim | Brightness, Energy Saver, automatic brightness, HDR, power profile, graphics driver, or backlight |
| The image is faint but visible under a flashlight | Backlight, backlight power circuit, display cable, or panel |
| Text and icons look soft or stretched | Resolution, scaling, ClearType, app DPI behavior, or duplicate-display mode |
| Motion looks smeared but a still image is sharp | Panel response, refresh rate, display mode, or game settings |
| The screen flickers or changes when the lid moves | Display cable, hinge-area damage, panel, or connector |
| Lines, blocks, corrupted colors, or artifacts appear | Graphics driver, GPU, cable, panel, memory, or overheating |
| Only one app is blurry | That app's scaling or rendering settings rather than the panel |
1. Correct brightness and power settings
- Press the laptop's brightness-up key, with Fn if required.
- Press Windows + A and move the brightness slider.
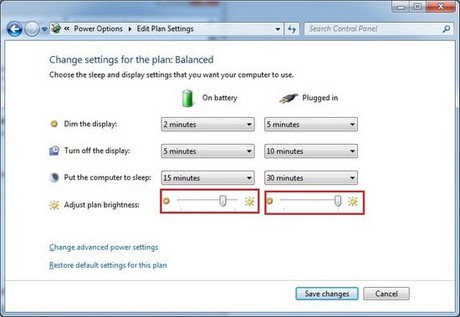
- Open Settings > System > Display, select the built-in screen, expand Brightness, and review automatic or content-adaptive brightness.
- Open Settings > System > Power & battery. Turn off Energy Saver temporarily and compare the screen on battery and the charger.
- Disable HDR temporarily under Display settings to see whether the problem affects only HDR or SDR tone mapping.
Do not set the screen to maximum brightness indefinitely as a diagnostic rule; use a level that makes the image easy to read in the room. TipsMake's Windows laptop brightness guide covers the available controls.
2. Reset the graphics driver and restart
Save your work, then press Windows + Ctrl + Shift + B. The screen may blink while Windows resets the graphics stack. Restart the laptop and test before changing drivers.
If the fault began after waking from sleep, a full restart is more useful than closing and reopening the lid. Disconnect docks, adapters, and external monitors to simplify the display path.
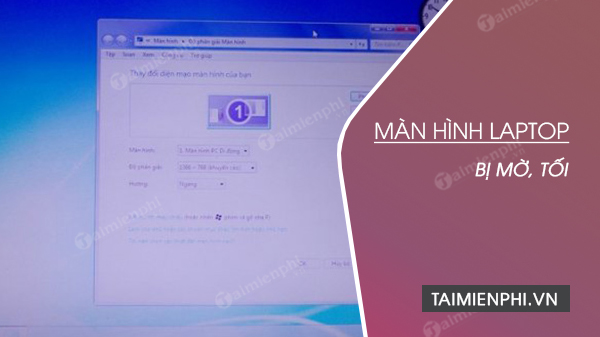
3. Restore the native resolution and recommended scaling
- Open Settings > System > Display.
- Select the laptop panel.
- Set Display resolution to the value marked Recommended.
- Set Scale to the recommended value.
- In a duplicated multi-monitor setup, press Windows + P and test PC screen only or Extend. Duplicate mode may force a shared resolution.
A lower-than-native resolution can make text soft, stretched, centered, or surrounded by borders. The exact native value varies by model; do not copy a resolution from a screenshot. See how to change screen resolution for additional context.
4. Tune text clarity rather than the whole display
If photos and Windows controls look sharp but text is fuzzy, search Windows for Adjust ClearType text, turn ClearType on, and complete the tuner while viewing the panel at its native resolution. Also update the affected app and test its compatibility or high-DPI settings.
Browser zoom and document zoom change content size without fixing system scaling. Reset the app's zoom to 100% for comparison, then choose a comfortable supported value.
5. Check refresh rate only for motion or flicker problems
Open Settings > System > Display > Advanced display, select the laptop panel, and choose a refresh rate supported by that panel. Use the recommended/default mode unless the manufacturer documents another option.
A higher refresh rate can make motion and scrolling smoother, while a lower rate may save battery. It does not normally fix a uniformly dim backlight or blurry static image. Do not choose arbitrary 50, 60, 70, or 75 Hz values; Windows shows the modes the display and driver report as supported.
6. Compare the built-in screen with an external monitor
- Connect a known-good monitor or TV directly with a known-good cable.
- Press Windows + P and select Duplicate for a quick comparison, then Extend so each screen can use its own native resolution.
- Display the same static image and move the same window between screens.
- If the external display is normal while the laptop panel stays dim, lined, or distorted, the built-in panel, cable, backlight, sensor, or connector is more likely.
- If both displays show the same artifacts, driver, GPU, application, or source-file problems become more likely.
- If the external display has a different brightness only, that comparison is not decisive; the two panels have independent backlights and picture settings.
7. Distinguish a backlight fault
In a dark room, set brightness to a safe normal level. If the laptop screen appears black but you can see a very faint desktop when a flashlight is aimed obliquely at it, the LCD may still be drawing an image while its backlight is not operating correctly. Stop flexing the lid or repeatedly power-cycling the machine and arrange service.
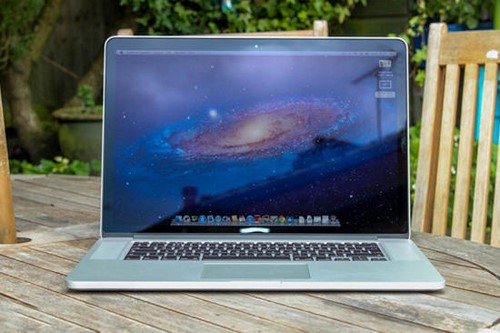
Older laptops with fluorescent (CCFL) backlights used a high-voltage inverter board. Most modern laptops use LED backlights and do not have that same CCFL inverter design. A repair diagnosis should identify the actual panel and circuit rather than automatically blaming an “inverter.”
The source article's claim that most laptops are rated at 1,000 cd/m² was inaccurate and has been removed. Laptop brightness varies widely, and a numeric threshold cannot diagnose a failed backlight without the model specification and a valid measurement.
8. Update or roll back supported display drivers
Install Windows updates and restart. Then obtain the chipset, integrated-graphics, discrete-graphics, and system-control drivers for the exact laptop model from its manufacturer, Windows Update, or the GPU vendor when appropriate.
If the problem began immediately after a driver update, open Device Manager > Display adapters, view the affected adapter's Properties > Driver, and use Roll Back Driver when available. Avoid generic driver-updater tools.
9. Test outside normal Windows
Check whether the problem appears on the manufacturer logo, firmware setup screen, or built-in hardware diagnostics:
- A defect visible before Windows loads is unlikely to be caused by an app or Windows scaling setting.
- A normal firmware screen followed by a fault only after sign-in points more strongly to a driver, display mode, or software profile.
- A fault that changes with lid angle strongly suggests a physical connection or panel problem.
When to stop troubleshooting and arrange repair
- The laptop was dropped, crushed, or exposed to liquid.
- The battery is swollen or the case is separating.
- The image flickers when the hinge moves.
- Lines, patches, cracks, or backlight failure appear before Windows loads.
- The panel becomes excessively hot, smells burnt, or makes electrical noise.
Power the device off if there is swelling, heat, odor, or exposed damage. Do not open a modern laptop display assembly unless you are trained for the model; fragile cables, bonded panels, and batteries create additional hazards.
Recommended diagnostic order
- Classify the symptom: dim, blurry text, motion blur, flicker, lines, or artifacts.
- Correct brightness, power, HDR, native resolution, and scaling.
- Reset the graphics driver and restart.
- Compare an external display and test without a dock.
- Install or roll back supported drivers.
- Check the firmware screen and built-in diagnostics.
- Use TipsMake's laptop screen testing checklist and arrange service for persistent hardware signs.
Related Articles
 Causes and How to Fix Dark, Dim Laptop Screen7 minutes read
 How to Fix a Dark Laptop Screen Simply and Effectively: Step-by-Step Guide9 minutes read
 How to Fix Blurry or White Spots on a Laptop Screen6 minutes read
 3 Default Settings That Make 4K TV Screens Look Blurry: Explained8 minutes read
 When the New Screen to Replace the Laptop?4 minutes read
 Why Doesn't Dark Mode Help Improve Battery Life on Your Laptop?6 minutes read
Reader Comments 0
Sign in with email or Google to join the discussion.