Table of Contents
This updated guide examines Transfer System from Windows Small Business Server 2003 to Sbs and organizes the essential facts, background, and practical takeaways in clear American English.
- Windows Small Business Server 2003 (SBS 2003)
- Windows Small Business Server 2011
- Microsoft Baseline Configuration Analyzer - downloaded from here.
And below are the specific steps.
1. Check the entire SBS 2003 system:
This is an important step to take first, which is to check the current status of the Small Business Server system as well as backup important data. To do this, make sure that you have selected System State in the list of components to backup. And then the latest updates of SBS 2003, specifically:
- Windows 2003 Service Pack 2 - check again by right-clicking My Computer> Properties
- Windows Small Business Server Service Pack 1 - check by opening the Registry and finding the key:
HKEY_LOCAL_MACHINESoftwareMicrosoftSmallBusinessServerServicePackNumber
with the value in parentheses is 1.
- Microsoft Exchange 2003 Service Pack 2 - check with Exchange System Manager.
After meeting all of the above requirements, use Windows Update to start the update process. Continue and remember to check for these updates until done:
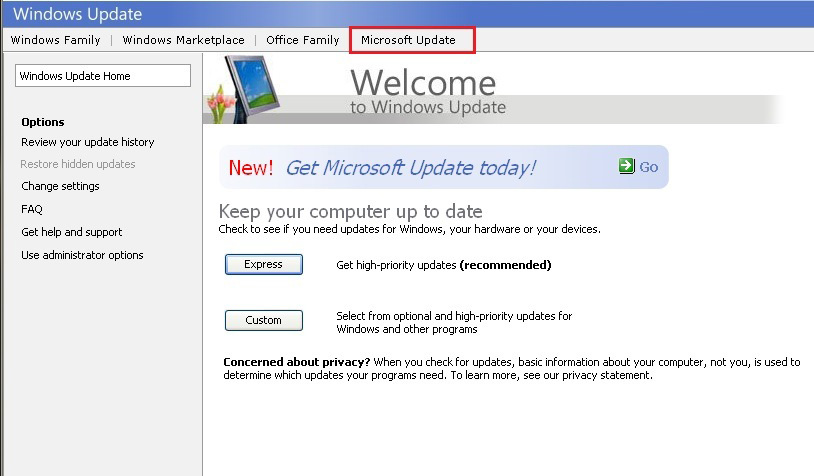 In Windows XP, open Start> All Programs> Windows Update
 With Windows 7, select Start> All Programs> Windows Update

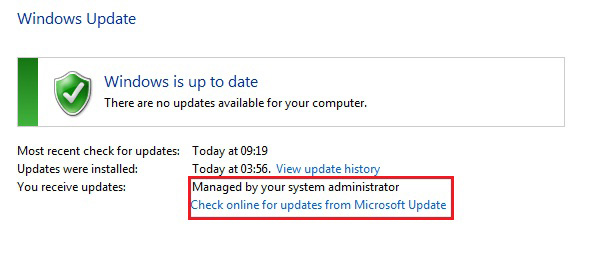
And then, if we want to test Active Directory , we will use the DCDIAG command. On the other hand, there is a frequent problem that caused this process to fail, because the SBS 2003 server system does not have an IP address in the DNS list at TCP / IP.
2. Setting up SBS 2003:
Before embarking on the next steps, we need to reconfigure the NIC parameters and remove the ISA server (if you're using it) - in the Control Panel> Add / Remove programs or Programs and Features section .
In addition, we need to have a router device that matches the type of Internet connection we are using - requiring support for NAT and IP address identical to the NIC on the server. After completing this process, turn off the second NIC function and reconnect using the Internet Wizard to make sure that SBS 2003 has been set up correctly. It is best to restart the system to apply the change.
3. Use the Migration Preparation tool on SBS 2003 and create the Answerfile file:
Before proceeding, we need to download and install the Microsoft Baseline Configuration Analyzer support tool. Then, start by inserting the SBS2011 DVD installation disc into the server, the autoplay menu is displayed as shown below:
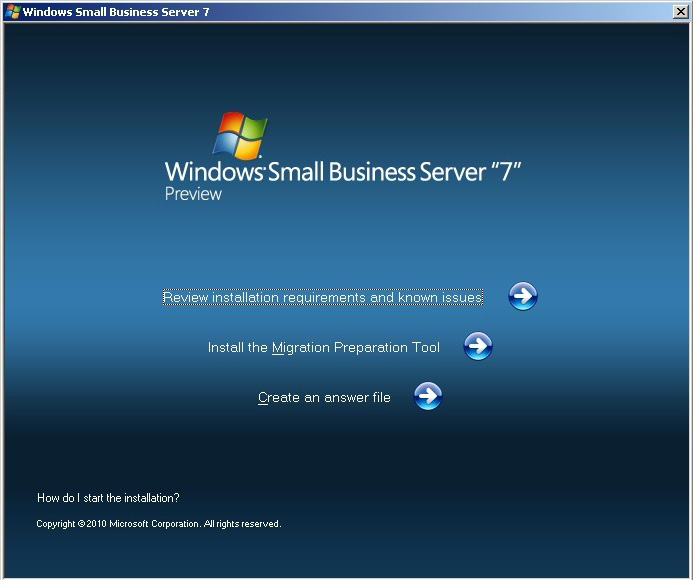
Here, you select the Install the Migration Preparation Tool section , the next screen shows some information that requires installing and upgrading components in the system. We recommend that you do not update this step unless your system is having problems:
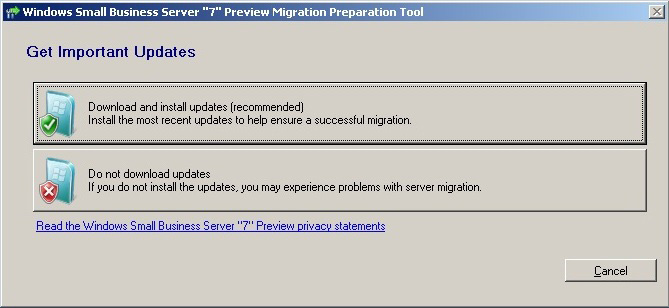
After selecting, you need to confirm that the SBS system has been fully backed up:
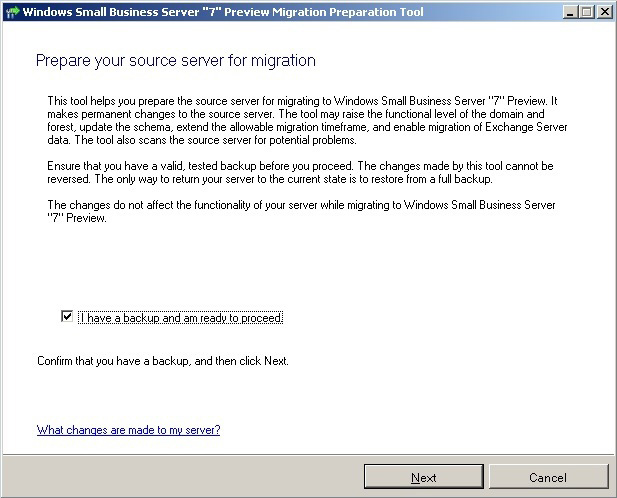 Check the box I have a backup. and click Next
The next process is to prepare the necessary components for Exchange and Active Directory of the new SBS 2011 server system. We will see the following screen at this step:
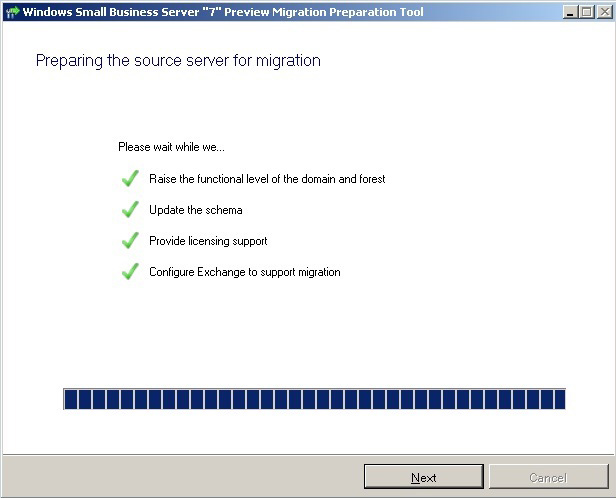
When the process is finished, click Next . The next step of the Migration Wizard will use the previously installed analytical tools for a final review, to detect the smallest possible causes of risk in the entire integration process. this:
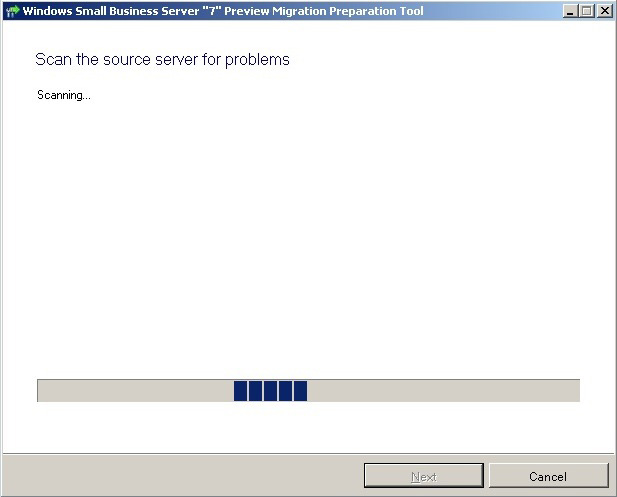
This whole step will take about a few minutes. If the result is the same as the image below, it means that our entire system is completely guaranteed:

Click Next , the system will notify us that the source has been prepared, and some options to see the instructions:

The second option is to create an answer file, which is quite necessary with the whole process of moving later to a higher platform - SBS 2011, so choose and set it correctly with the picture below. The reason when we choose to create an answer file above is because the system will ask the user to declare some information in the next installation step, which can be considered as a second test step before actually proceeding.. And one important point here is that you should not perform any updates:
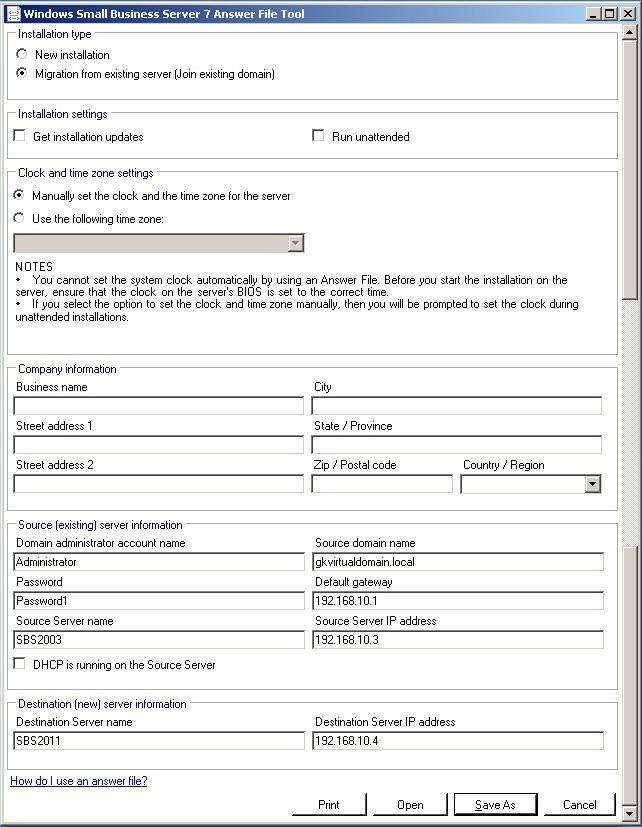
Now, you should save this answer file based on the available options. Then copy this file to USB and plug in the new server along with the DVD2011 DVD installation disc. The following screen is the first part to select when we install a new one:
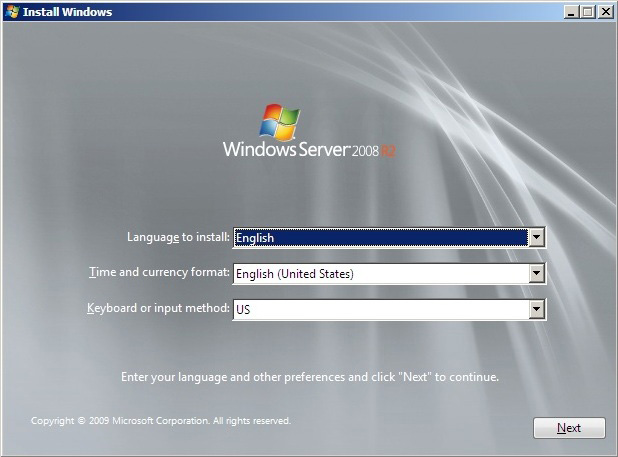
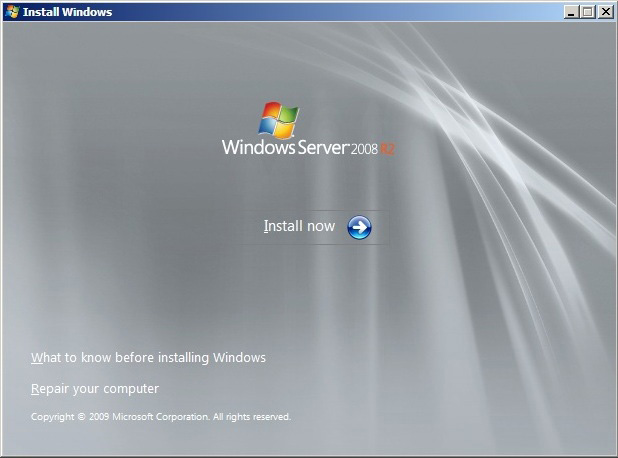
Select the appropriate options and click Next , then Install :
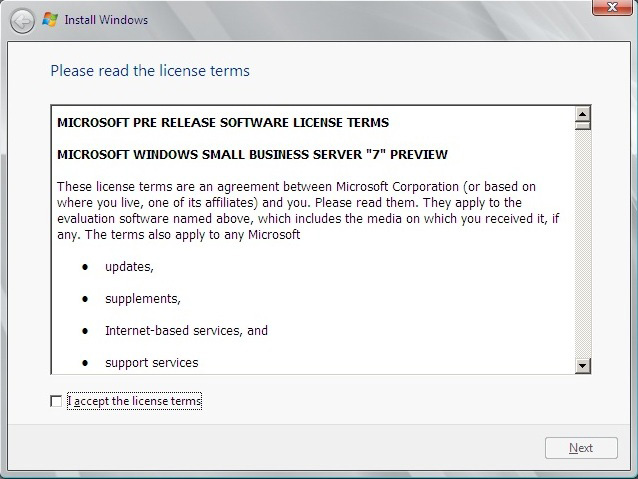
The License Agreement information panel (shown below) is displayed, check the I accept. box and Next to continue:
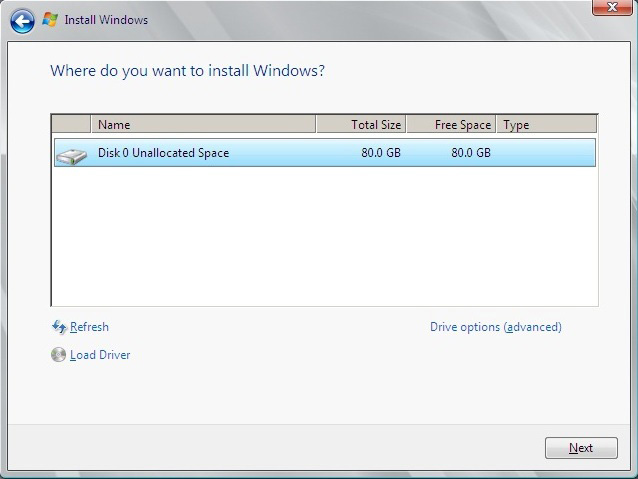
Next is the screen showing the hard drive device to install, if at this step you cannot see anything, please use the option Load Driver:
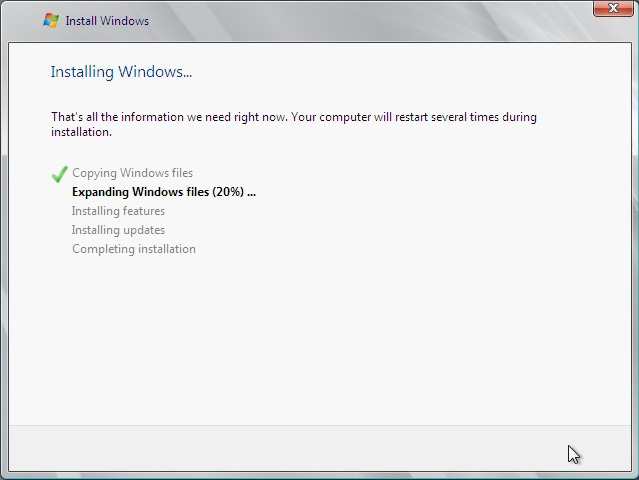
Continue, click Next and the screen similar to the image below will display, meaning that the installation process is going on:
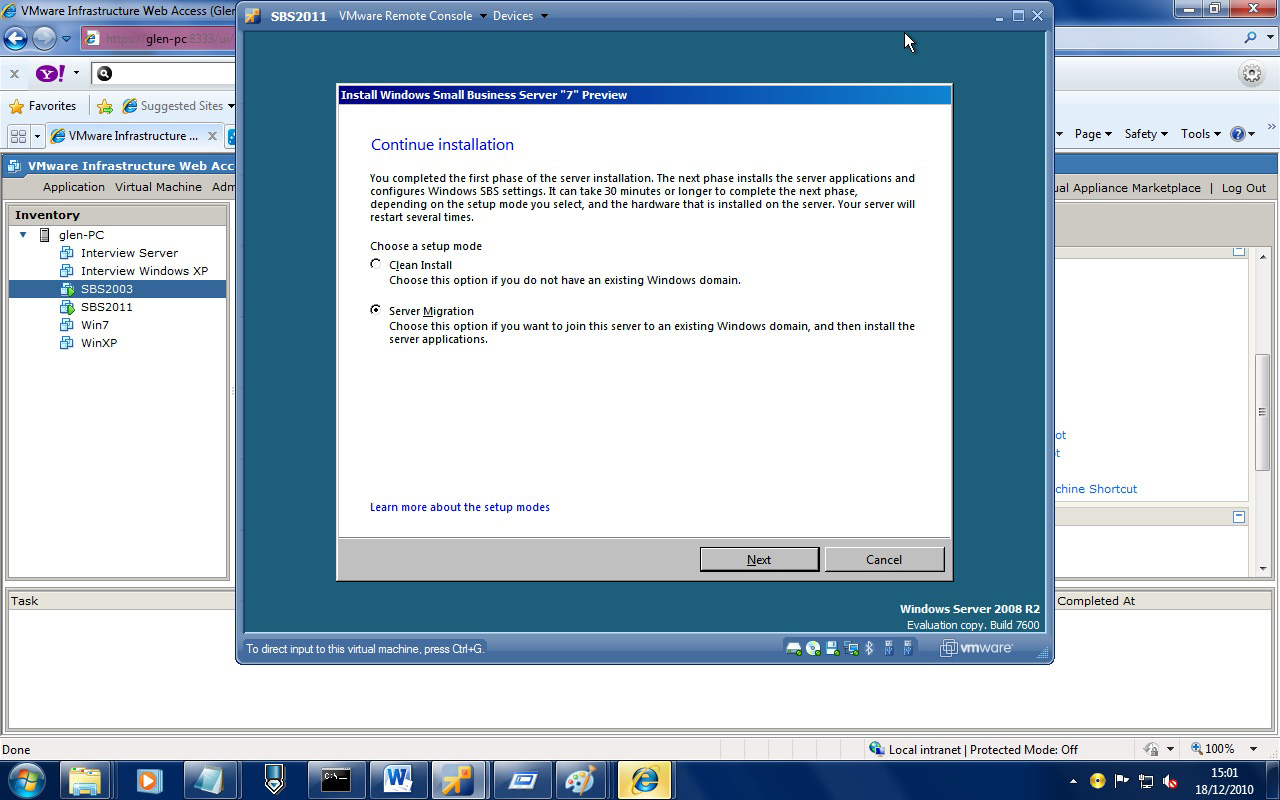
After that, the system will reboot once, next we will select Server Migration and continue:
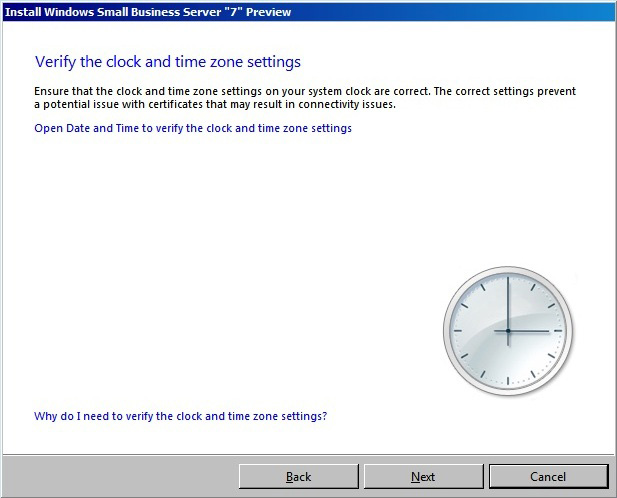
Adjust the system date and time for the match and Next :
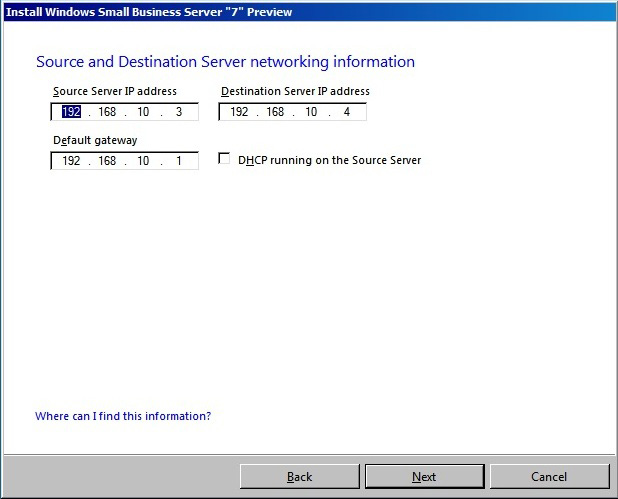
The system will ask you to confirm the IP address of the system and server, check carefully at this step, then click Next :
And continue to be a confirmation number, old server name, domain and administrator account.:
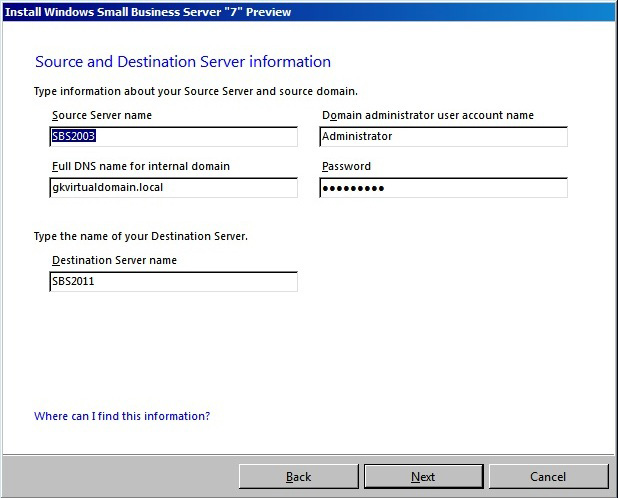
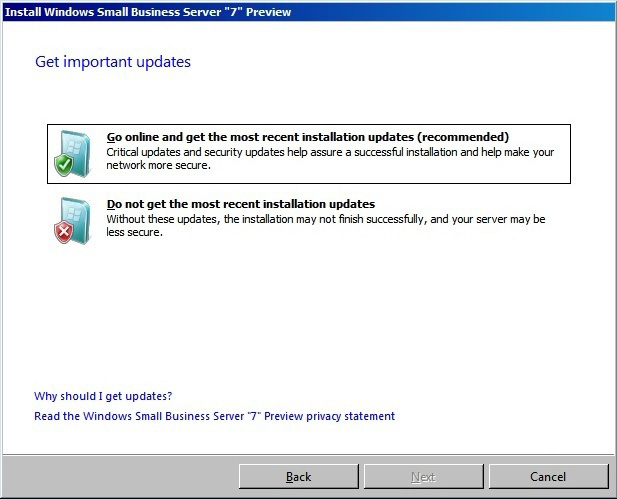
Click Next, and we will see the screen asking for updates from the system, select the section Do not get. and Next :
The following is detailed information about companies, businesses or organizations that use the system, which will be displayed in the Companyweb / Remote Web Workplace section:
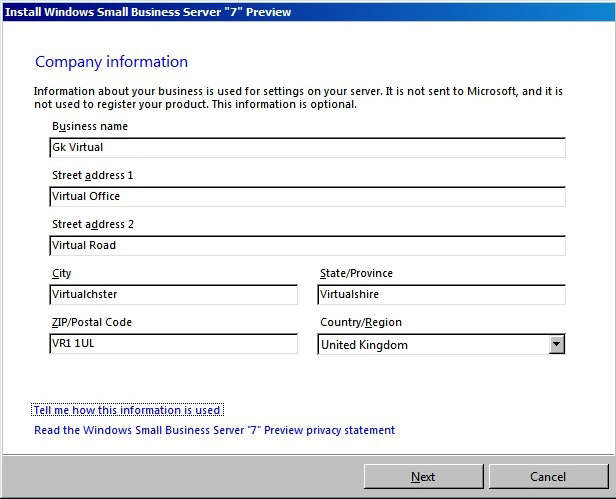 Click Next after the full report
When the next screen is displayed as shown below, it is the process of installing components of SBS 2011 which is taking place, usually it takes about 30-45 minutes:
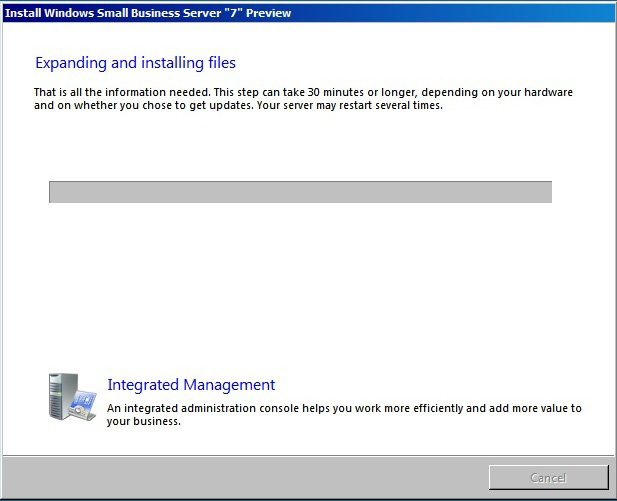 The system will restart once in this process
When we see the screen below, it means that the basic installation is complete:
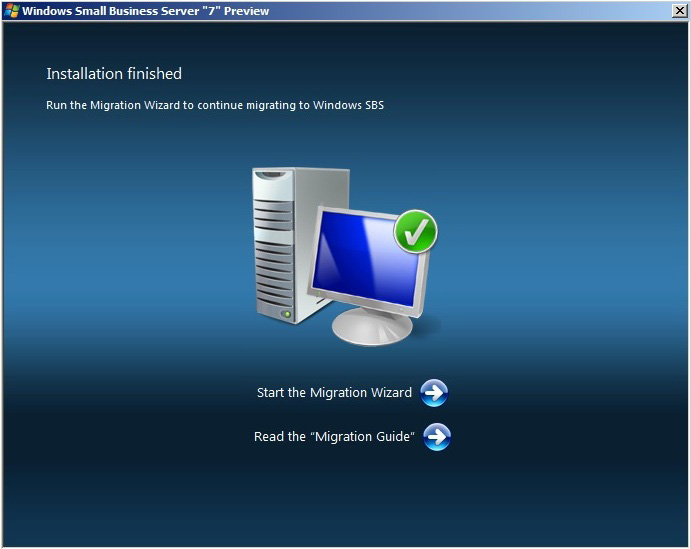
4. Create an administrator account:
The first time we log into SBS 2011 system after the installation is complete, we will see the following screen of control:
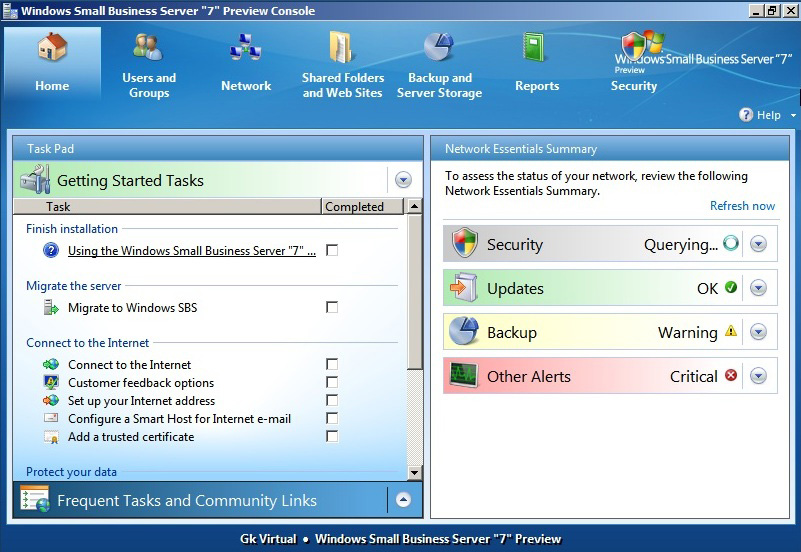 There are many similarities with SBS 2008
It is quite similar to SBS 2008, most tasks must be done by the administrator account, otherwise we will get the following error when using the Migration Wizard:

Therefore, the first step to take is to create the corresponding account. In the SBS Console console, select Users and Groups:
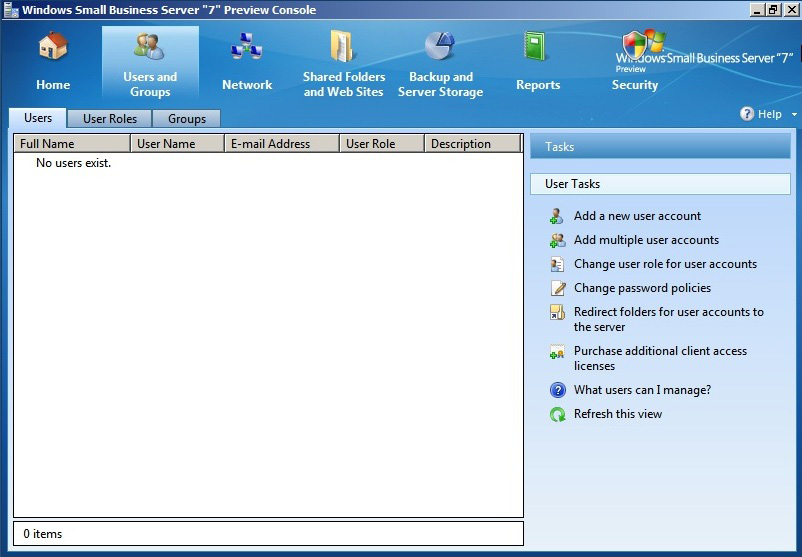
Here, if you find that there are no accounts, don't worry, because this is very normal. We cannot see the accounts in the system when this integration process has not ended. In the right window, select Add a new user account:
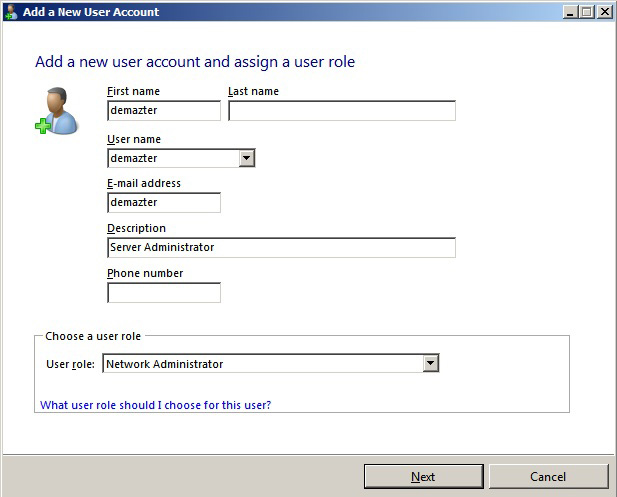
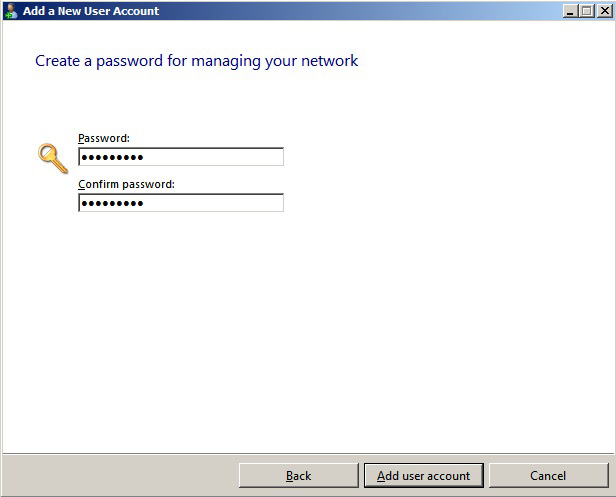
Enter the specific information for this new account, the most important point in this step is to select the User Role - Network Administrator . Click Next to continue, then create a password for this account, finally click the Add User Account button :
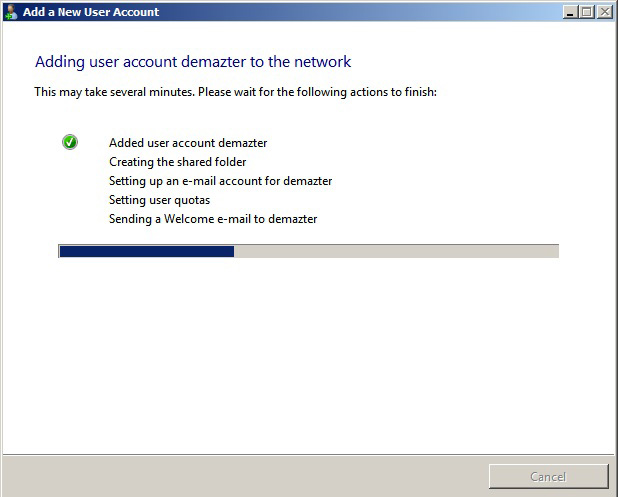
The next process will take about 5 - 7 minutes:
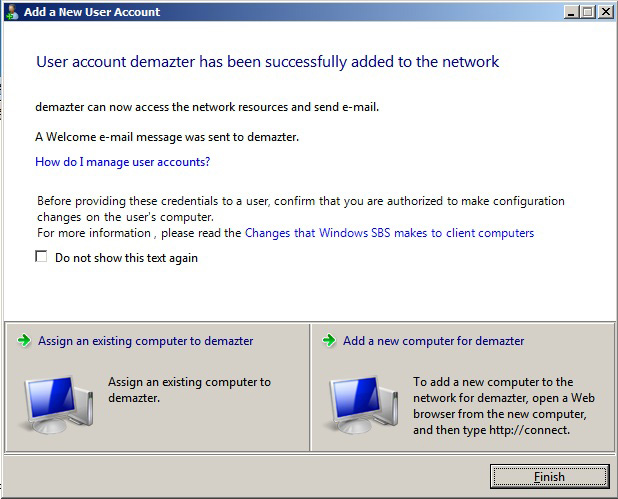
The next step, we can combine computers with newly created accounts or other computers in the same system, for Administrative User accounts is really unnecessary. At the main console of SBS Console, select Home> Migrate to Windows SBS to continue:
Here, we will see a lot of work to complete:
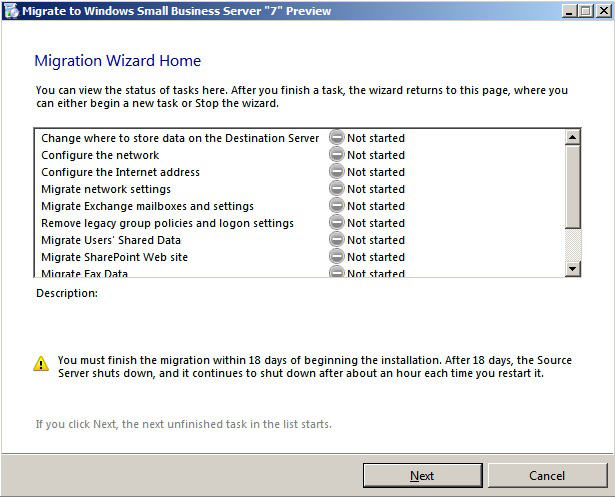
The first is to set up the location of Exchange, Sharepoint data, Shared Folders, Redirected My Documents and Windows Software Update Services . Note that if you do not use a second storage device (for example, in case there are 2 hard drives), this step is not required, otherwise you will see an error message similar to the image below:
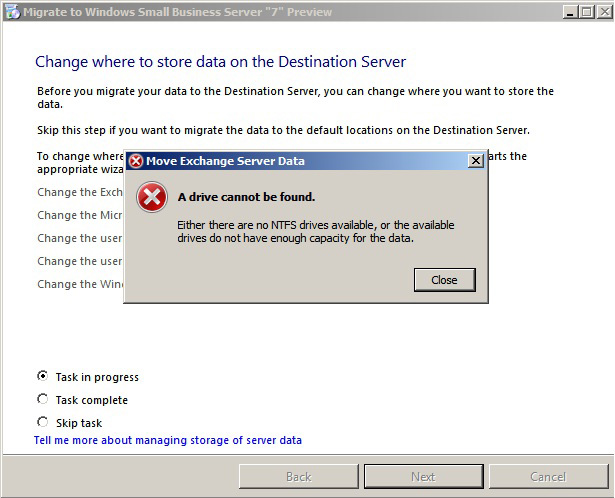
When you encounter such a situation, you select Task Complete and click Next :

To continue the above sections, you just need to click on the corresponding link:
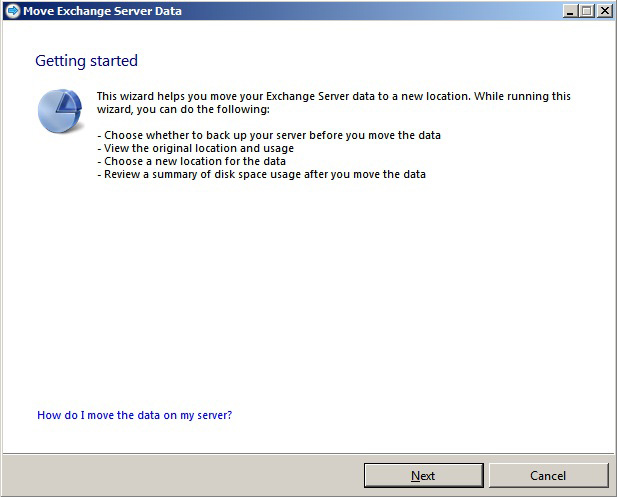
Next is the process of checking how to configure, then continue to partition, hard drive and data file size to move:
When finished, the system will continue to display the selection of the data transfer place. Because we have not set up the previous backup method, we will display an error in this step, click OK to continue:
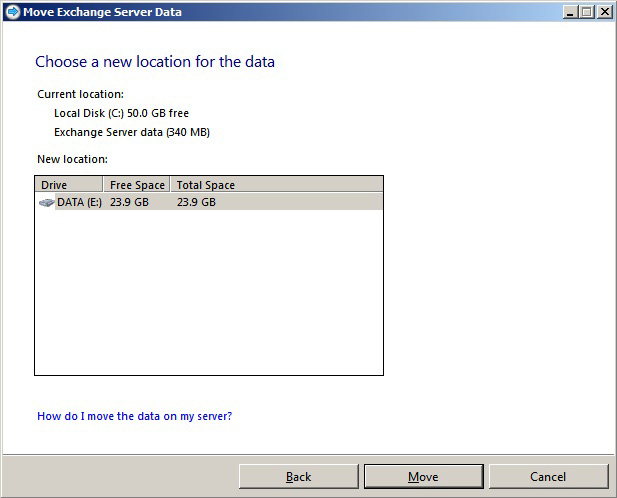
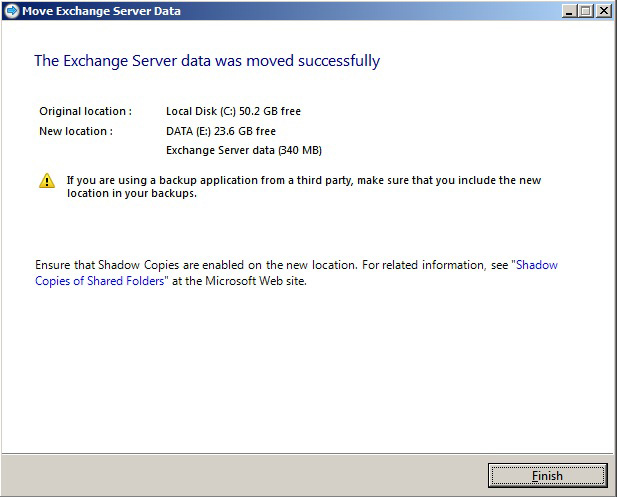
Reselect the storage device and press the Move button. When this process is complete, we will see the screen shown below, click Finish and move on to the next component:
6. Network setup:
In the next section, we will go to Configure the Network - configure network parameters to connect to the Internet :
 At this screen, you select the Start the Connect to the Internet Wizard link
And continue to follow some guidelines:
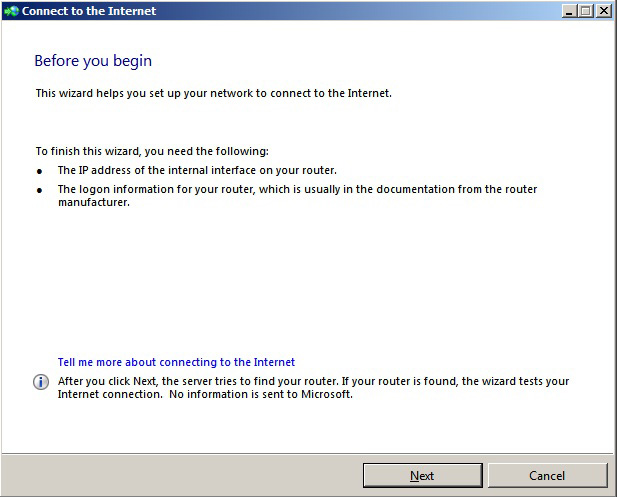
You should be careful when declaring this information, click Next to continue. After that, the process of checking some configuration parameters takes place, checking other devices on the same system or active DHCP services:
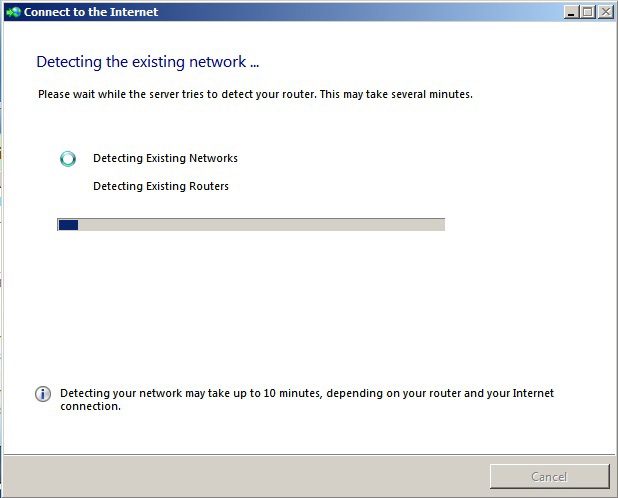
The process will not continue if any DHCP service is detected, so if you want to use this service, you must temporarily turn off DHCP:
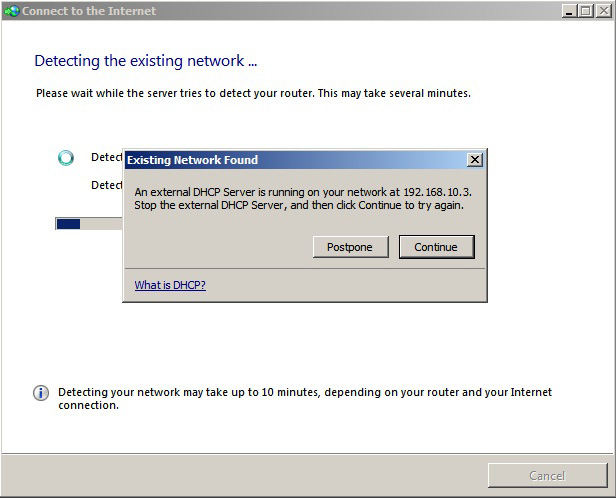
When you turn off the DHCP service, the wizard changes a bit and displays what is currently checked on the current system:
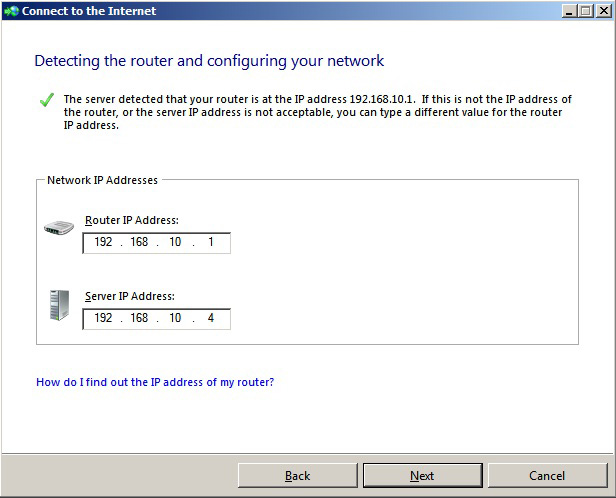
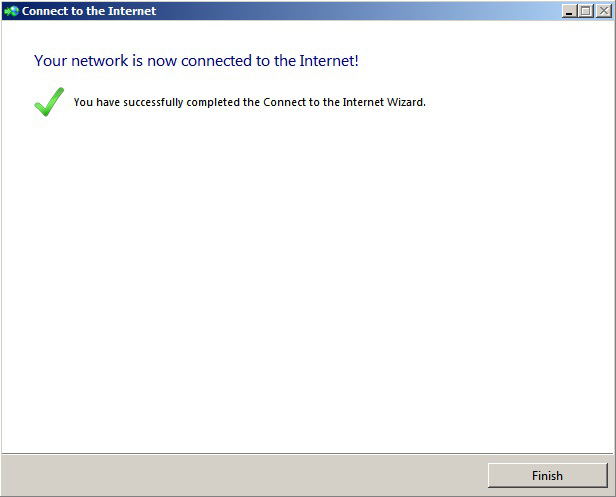
Check the accuracy of this information and click Next , when you see the following screen, it means the network is fully set up:
7. Set up an IP address:
The third stage in this integration process is Configure the Internet Address , for configuring an external domain for use with SBS 2011 server system:
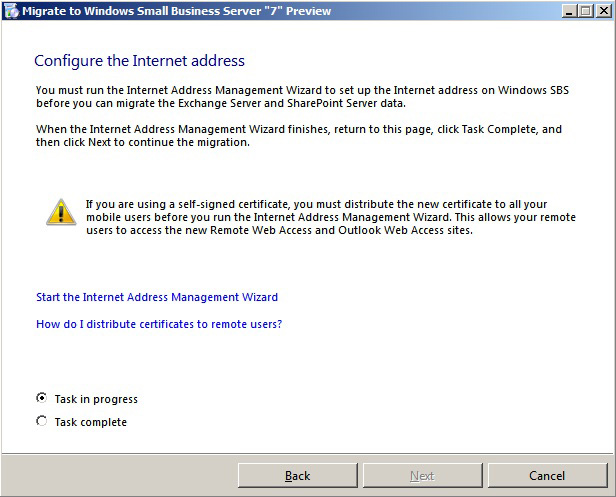
Select the Start the Internet Address Wizard link and continue to follow the steps available:
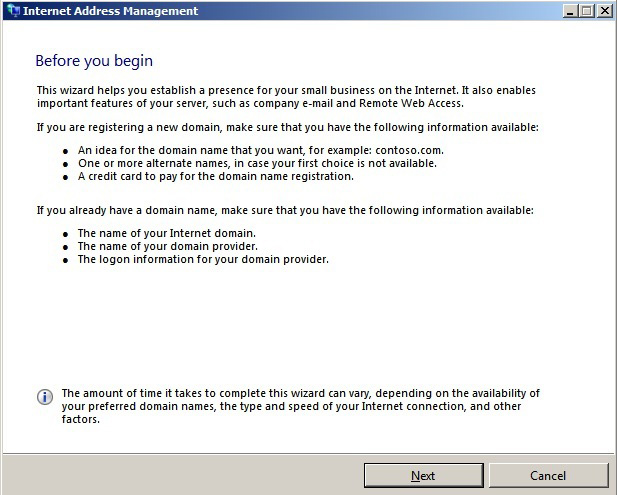
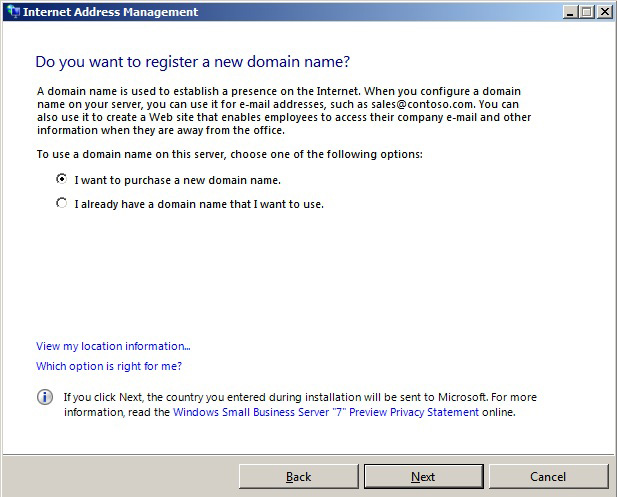
In the rest of the article, we assume that you already have a domain, and use a control tool from your ISP to manage External DNS. Click Next to continue the configuration steps. On the next screen, check the box I already have a domain name that I want to use and click Next :
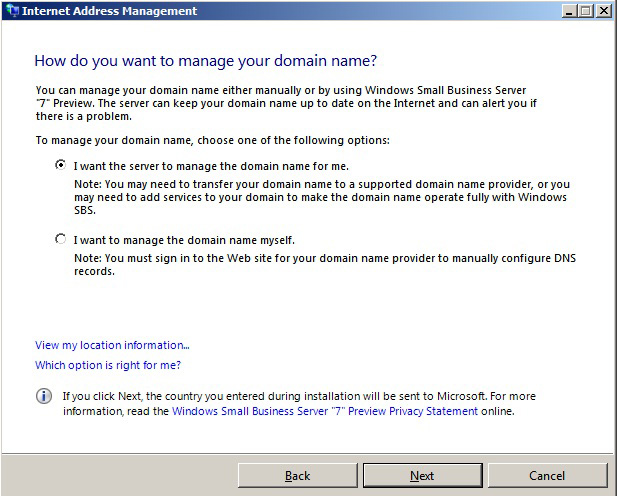
Continue selecting I want to manage the domain name myself and Next :
In the next screen, you enter the information of the external domain to be used later, and this is also the domain name used in the path of Remote Web Workplace, Outlook Web App, ActiveSync. and create the email address later:
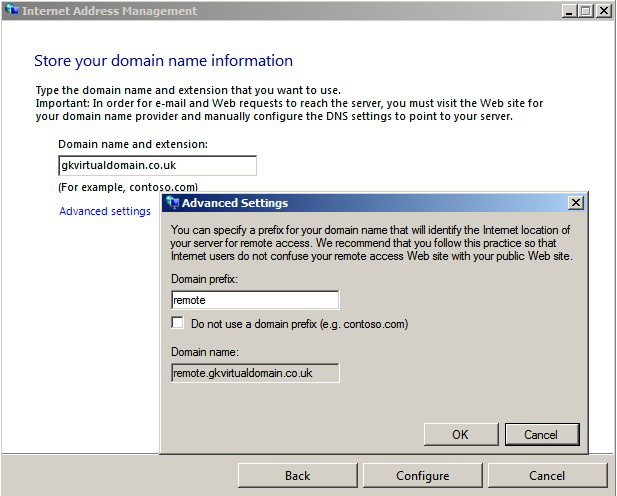
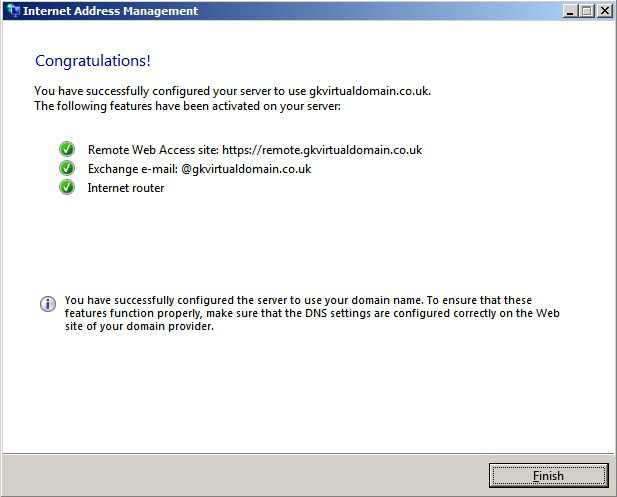
The Advanced Settings link will allow us to reset the display name value in the SSL validation mechanism from the remote.domainname.com domain section to other components. In case you have used mail.domainname.com or owa.domainname.com already set up, this is the step to enter specific information. After completing this step, click the Configure button and change some specifications if you want. Our system will display the screen as follows:
8. Exchange integration:
Next are the steps needed to move and integrate the Exchange mailbox section and the Public folder in the system:
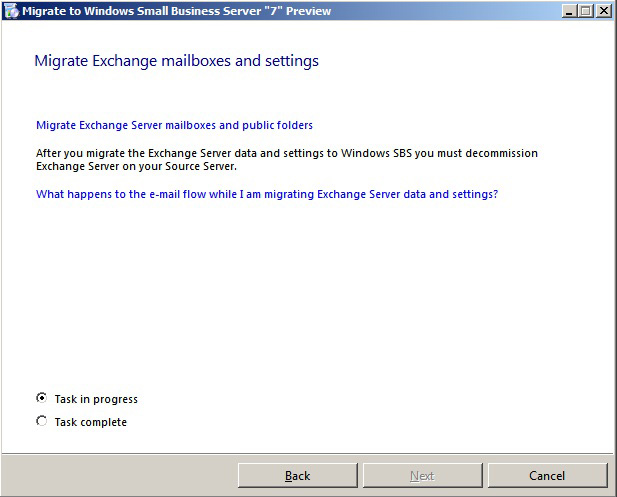
To do this, we need to delve into the Exchange Management Console . Click Start> All Programs> Microsoft Exchange Server 2010> Exchange Management Console . When the control tool is started, open the Recipient Configuration> Mailbox section , and here we will see all the mailbox components that are fully listed:
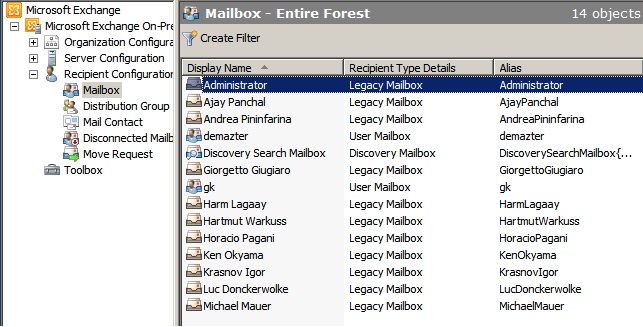
Besides, we can select multiple mailboxes by holding down SHIFT or CTRL. After selecting all mailbox items to move, use the New Local Move Request option on the Action Pane control panel on the right:
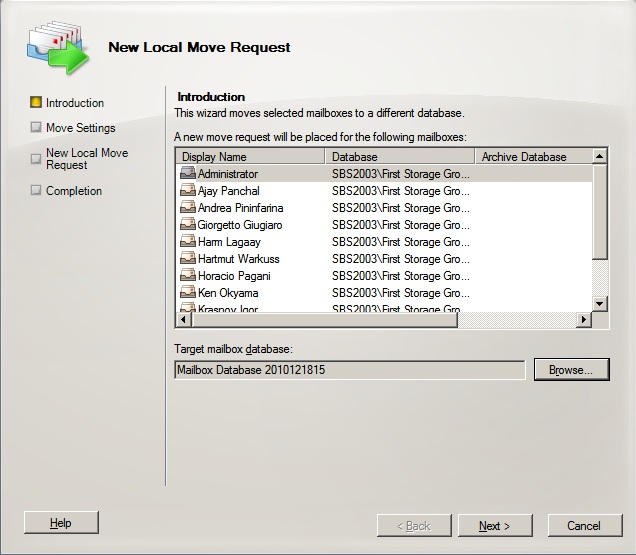
At the next screen, click the Browse button to select the Mailbox Store folder on the new SBS 2011 server, click Next to continue:
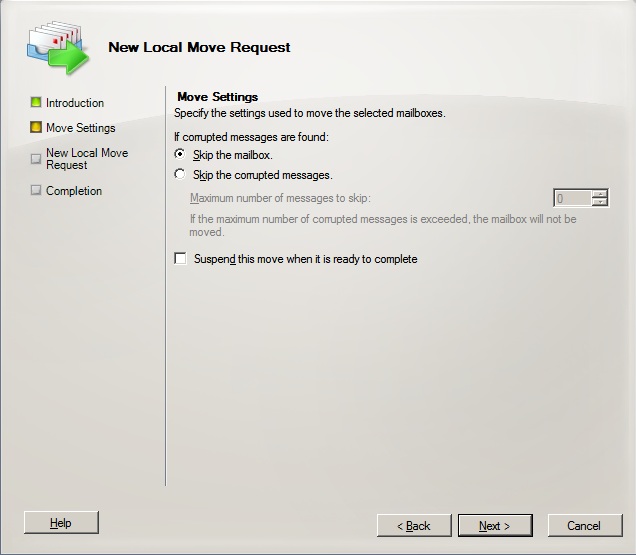
Next, keep the default parameters, if there is a case where the mailbox cannot be moved because of an error, we should change some of the values and specifications here so that the system ignores the The component encountered an error and completed the whole process:
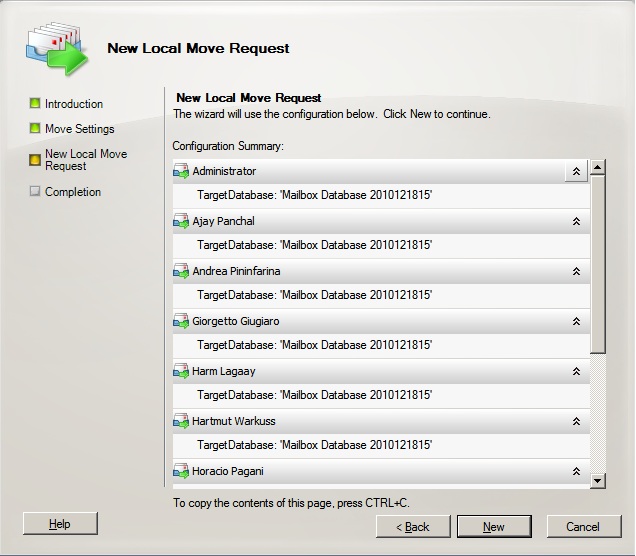
The screenshot above is our general information in this test, so click the New button to start moving mailboxes. And when finished, the system will display the screen as follows:
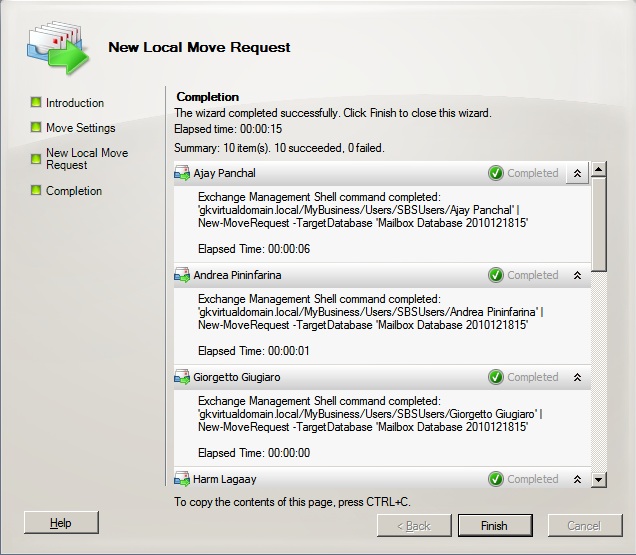
If you choose to move multiple mailbox items, just repeat the above steps, and the next step is to integrate Public Folders. To perform this process, complete some of the following steps on the SBS 2003 Server system:
- Open Start> All Programs> Microsoft Exchange Server> System Manager
- Go to the Administrative Groups section > First Administrative Group> Servers> Servername> First Storage Group
- Right-click the Public Folder Store entry and select Move All Replicas , where you will only see a single option in the Exchange 2010 server list. Click OK here.
When the transfer process to SBS 2011 server system is complete, please exit the Exchange Settings settings.
9. Delete Legacy Group Policies and Logon Settings:
The next step we need to do is to remove the settings for Legacy Group Policies and Logon Configurations that are incompatible with the SBS 2011 system. The recommended scheme is to use any login-logon script code. used will be transferred to Group Policies. Besides, please refer to the information here: Delete logon scripts for Windows SBS integration process: http://technet.microsoft.com/en-us/library/cc527605(WS.10).aspx
Delete Active Directory Group Policy objects in Windows SBS 2008 migration process: http://technet.microsoft.com/en-us/library/cc527585(WS.10).aspx
10. Combine shared data of user accounts:
The basic steps to do this, please refer to the following article. After we successfully set up the system with the setup, configuration, and backup plans for SBS 2003, 2011 server will recover all data of the account and the associated decentralization level..
Alternatively, you can use robocopy - part of the Windows 2003 Resource Kit to implement this process. Some basic function commands of robocopy here.
11. Integrating fax data:
Today, in the SBS2011 system there is no fax function, but if you have used or have fax data stored on the SBS 2003 server, we still have to do this step:
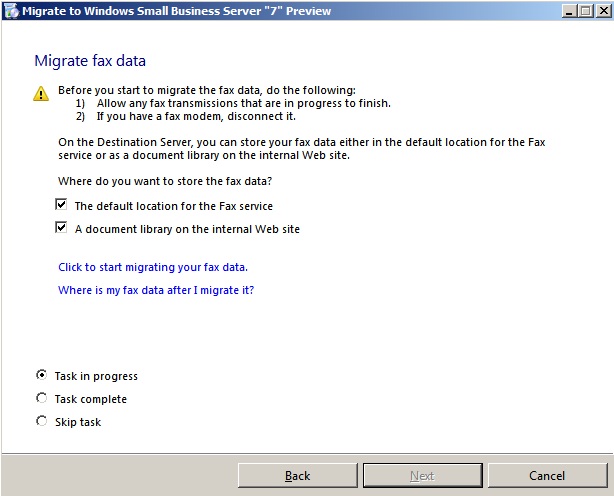
Select the link Click to start Migrating your fax data - the process of moving data to the new server system will begin. At this step, if the system reviews and checks that there are no fax services available on the SBS2003 server, the error shown below is displayed:
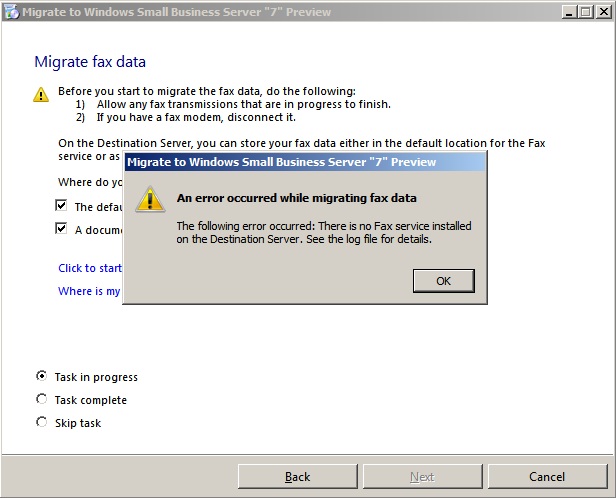
This is not really a serious problem, we can easily ignore it and consider the process completed.
12. Combining User and Group accounts:
Part of the process of importing server SBS 2011 to a domain containing SBS 2003 and creating a Domain Controller based on Active Directory with user and group accounts. However, these components are not displayed in the SBS Console list, which is easy to understand as we have not completed the process. To continue, select the path Run the change user role wizard as shown below:
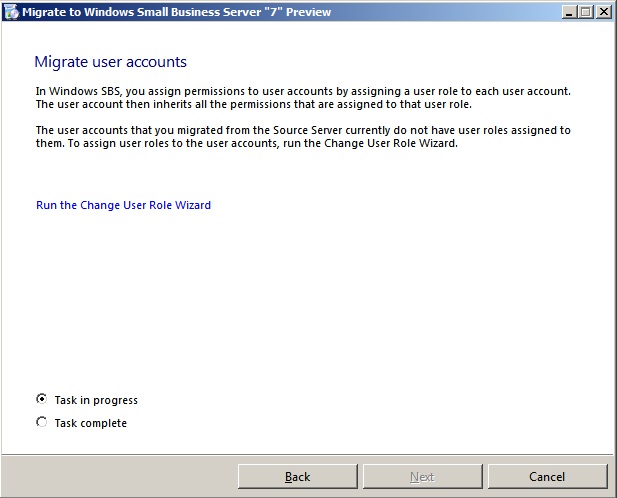
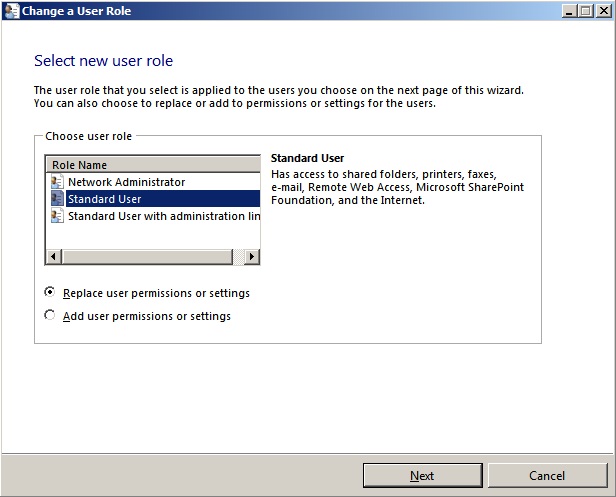
In the list displayed, please select the permission level you want to assign to the user account:
At the next screen, check the box Display all user accounts in the Active Directory as shown below to display all accounts. Select the components to handle and click the Add button to move to the window on the right:
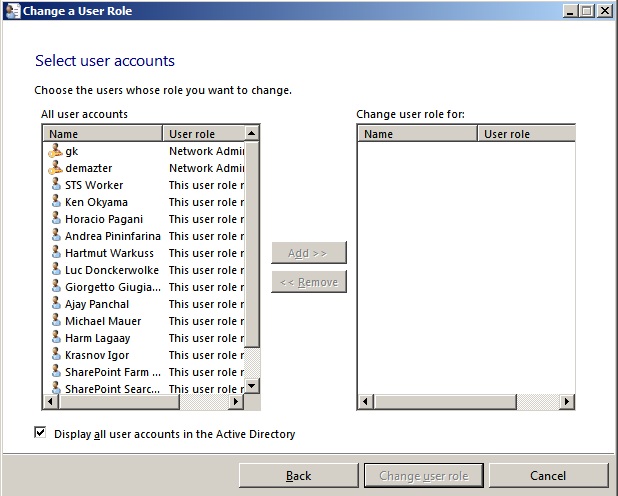
Then, click the Change user role button, and the system will display the result screen as
FAQ
What is Transfer System from Windows Small Business Server 2003 to Sbs about?
It provides a structured overview of Instructions, explains the main context, and highlights practical takeaways for readers.
Why does this topic matter?
Understanding the main concepts helps readers evaluate the issue, avoid common mistakes, and make better-informed decisions.
How should readers use this information?
Use the guidance as a practical starting point, confirm details that may have changed, and follow current product, safety, or security recommendations.
Related Articles
 Transfer Windows 2003 System with Exchange to Small Business13 minutes read
 Windows Server 2012 Includes Only 4 Versions4 minutes read
 What Does Windows Server 2016 Bring to Small and Medium4 minutes read
 Choose the Server That Suits the Needs of the Small Business5 minutes read
 Build an AI operating system with Claude for Small Business15 minutes read
 minutes read
Reader Comments 0
Sign in with email or Google to join the discussion.