How to Draw a Spider Web in Adobe Illustrator
Whether you're drawing on a Halloween theme or learning how to add new tricks to your illustration skills, knowing a quick and easy way to create an expandable spider web is always something worth learning. .
Whether you're drawing on a Halloween theme or learning how to add new tricks to your illustration skills, knowing a quick and easy way to create an expandable spider web is always something worth learning. .
Adobe Illustrator's shape tools and Blend functions allow you to quickly do this precisely. In just a few short steps, you can easily create a fun spider web in Illustrator.
Step 1: Draw a star
To start, draw the base shape of the spider's web with the Star tool. To find the Star tool, select and hold the Rectangle tool in the toolbar, then select the Star tool.
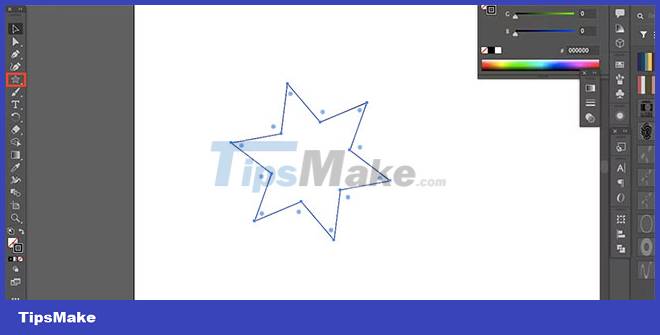
Click and drag a star on your canvas. Hold down Shift while dragging to keep the shape from distorting, and press the up or down arrows on your keyboard to add or remove points of the star until there are 6 to 8 points.
Select the shape and set the Fill swatch to None in the toolbar, leaving only the outline. Normally, it will be black in the Stroke swatch , but you can choose a different color if you want.
You can turn your Illustrator illustrations into animations using After Effects. Include other simple shapes for some extra movement.
Step 2: Round the inside corners
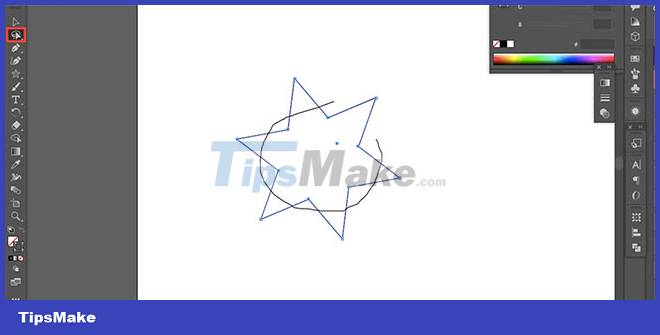
To take your shape from a star to a spider web, the inner corners need to be rounded. Select and hold the Direct Selection tool (A) on the toolbar until other tools appear; Select the Lasso tool . Draw a circular selection so that all the inner corners are inside the selection and the outer corners - the outer points of the star - are outside the selection.
You will know which corners are selected as anchor points will have a blue square appear. Unselected anchor points will have a blue square outline.
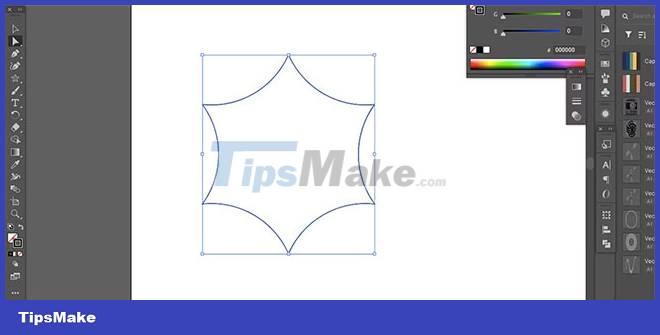
Once selected, select the Direct Selection tool and hover the pointer over one of the selected anchor points until a circle appears. Click and drag the circle outward to round the corners. This gives you a traditional spider web outline.
Step 3: Duplicate, resize and align
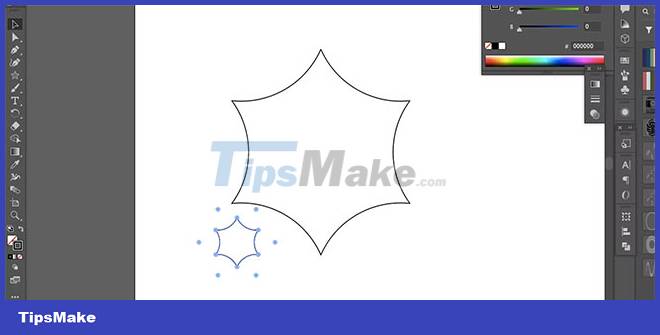
Duplicate your shape by selecting and copying it ( Cmd + C on Mac or Ctrl + C on Windows) and then pasting it ( Cmd + V on Mac or Ctrl + V on Windows). Select the copied outline. Hold down Shift while clicking and dragging one of the anchor points in the inner corner.
Now you have a large outline and a small outline of the same shape.
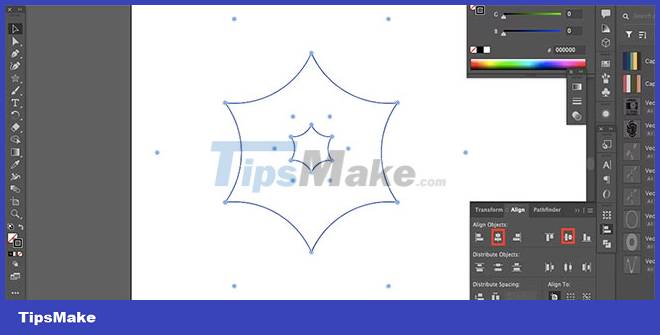
Go to Window > Align to open the alignment features. Select both outlines, then select Horizontal Align Center and Vertical Align Center . This will bring the two outlines between each other.
Step 4: Create layers of cobwebs
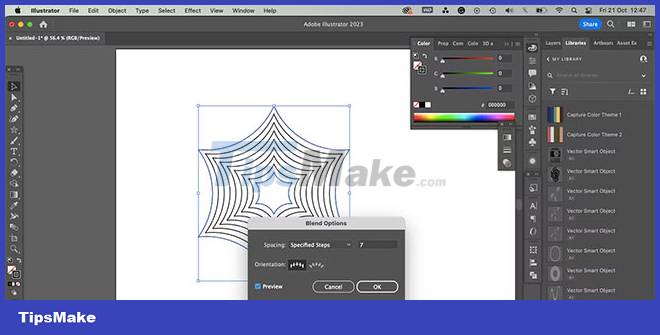
With both outlines selected, go to Object > Blend > Make . Then go to Object > Blend > Blend Options . Set Spacing to Specified Steps and choose somewhere between 6 - 10.
This creates layers in the web. Click Preview to see how it looks, and when you're satisfied, select OK.
Step 5: Draw with Polar Grid
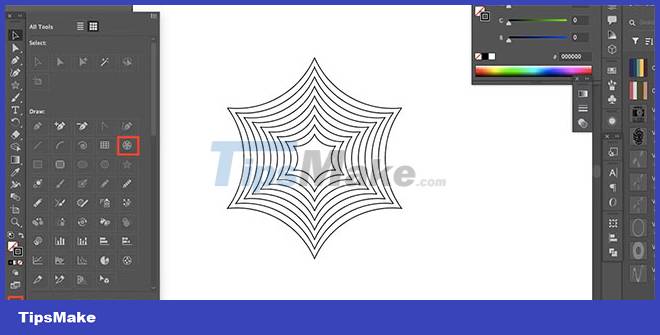
To add spikes to the web, draw a mesh with the Polar Grid tool. To find this tool, select the ellipse at the bottom of the toolbar to display a larger toolbar. The icon is a circle with lines from the center to the edge. Select it and then get out of the additional toolbar to use.
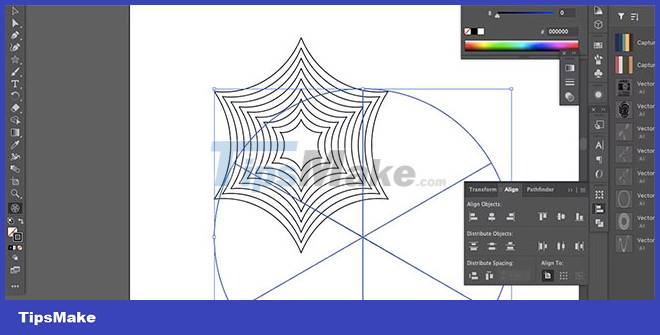
With the Polar Grid tool selected, draw a circle by clicking and dragging across the same space where your spider web was drawn. Hold Shift to get equal circles, press down arrow to delete inner circles and press left or right arrow to add spikes. If you make a star of 7 points, you will have 7 spikes in the circle.
Step 6: Align and clean up the lines
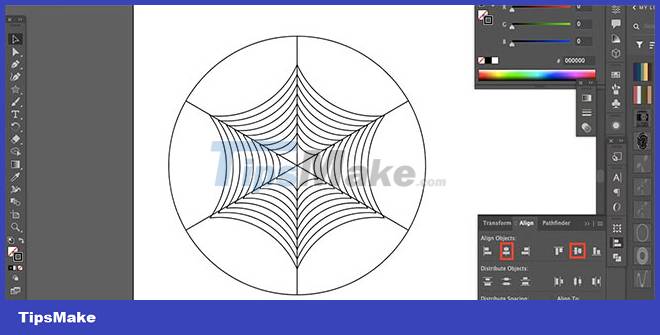
Select both the Polar Grid and the cobweb shape and use the Align tools to center them together. If the spikes don't align exactly with the points of the spider's web, you may need to rotate the Polar Grid or resize it for a better fit.
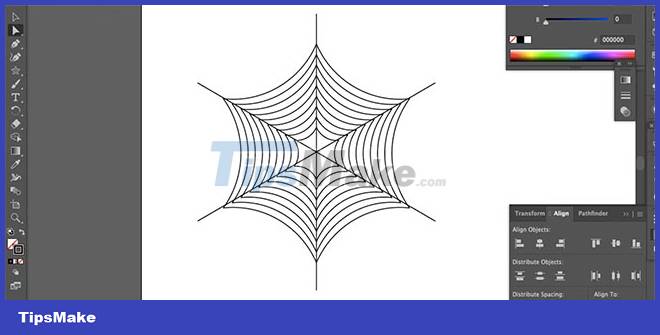
To remove the outer circle, use the Direct Selection tool (A) and select the large circle. Press Delete on your keyboard until the circle disappears.
With the Selection tool (V) , drag over both shapes to select them. Open Window > Pathfinder and select Unite. Then go to Object > Expand > OK .
Once you're done with the web, save this Adobe Illustrator project. Then you can even sell your illustration or design online.
You've just finished reading the article "How to Draw a Spider Web in Adobe Illustrator" edited by the TipsMake team. You can save how-to-draw-a-spider-web-in-adobe-illustrator.pdf to your computer here to read later or print it out. We hope this article has provided you with many useful tech tips and tricks. You can search for similar articles on tips and guides. Thank you for reading and for following us regularly.