Part 3 - Troubleshooting TCP / IP: Structure method: Fix network connections
The Repair feature for network connectivity is a useful tool for troubleshooting network connection problems. However, most administrators do not know much about how this feature works, this article we will try
Table of Contents
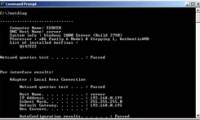
Successful troubleshooting depends on three main issues: logical thinking, technical knowledge and experience working with tools. This series of TCP / IP troubleshooting is mainly based on these basics. For example, the first article has outlined a structured method to demonstrate how to properly remedy problems with TCP / IP networks on Windows - logical thinking.
The second lesson is to examine how routing tables work on Windows computers - technical understanding. In this article, we will take a closer look so you can understand more about how the Repair feature works when fixing common network connectivity problems - experience using tools.

The following articles in the coming time will continue to introduce the above basics (logical thinking, technical knowledge and tool use experience) so you can improve your skills as a who specializes in handling real incidents.
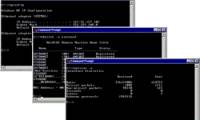
The Repair feature is a powerful tool but rarely used because it is difficult to understand for many people. Accessing this feature is easy - just right-click the network connection in your Networking Connections folder (or on the connection icon in your system notification area) and select Repair from the right-click menu.
Then, a dialog box will appear and a series of messages will appear showing the repair process that needs to be performed. What happens is a series of commands being executed and each progress message displayed indicates one of the actions to be taken. Check each step that occurs when you use Repair to understand what they do and why they are done.
Step 1: Refresh DHCP
This step master appears if the network connection is configured to receive its address automatically by DHCP. If you have configured this connection manually with a static IP address and other TCP / IP settings, this step is skipped. Order to perform this action:
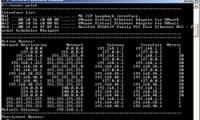
ipconfig / renew
This command tries to contact the DHCP server from the address of the computer that was previously introduced. If the DHCP server can be contacted, the computer will check its current TCP / IP configuration with the server to confirm that this configuration is valid. When this command is executed using the Repair feature, it usually runs differently than when you run it from the command line.
Instead of sending a non-broadcast DHCP Renew message to the DHCP server from the computer that obtained its DHCP configuration, the command line sends a broadcast DHCP Renew message to all DHCP servers on the network. The reason for doing this is that if the current TCP / IP configuration on the computer is invalid, the computer may attempt to obtain new TCP / IP settings from any DHCP server by requesting a new address.
The effect of doing this step in the Repair process is twice as much: resolving DHCP configuration issues on the client and resolving issues that cannot be contacted by a specific DHCP server on the network.
Tip : You can prevent problems that are causing errors from an unavailable DHCP server by adding redundant DHCP servers on your network.
Step 2: Delete ARP Cache
Order to perform this action:
arp –d *
This command cleans the content of the Address Resolution Protocol (ARP) cache on the local computer. ARP is a protocol used for IP addresses to MAC (usually encrypted in LAN adapters). ARP cache consists of the MAC address of the neighboring nodes processed.
MAC addresses that are stored on the computer to communicate with IP nodes can occur without resolving them repeatedly. If one of the inputs in the ARP cache is incorrect, network communication may fail for IP nodes on the network. If incorrect cache input occurs with a node on the local subnet, communication with the node will fail.
If the cache input is incorrect for the default port, communication with the nodes on remote control subnets will fail. Such a type of network communication failure has occurred (probably nodes on the internal subnet or remote subnets) that can tell you which ARP cache inputs are corrupted.
Step 3: Delete NetBIOS Cache
Order to perform this action:
nbtstat -R
This command will delete the NetBIOS cache contents on the local computer. Running this command also reloads the entries in the LMHOSTS file into the cache. In most Windows, Active Directory networks deployed and DNS used for name solutions, the legacy NetBIOS name solution is still used for specific functions.
Because the remote host's NetBIOS names are addressed in their associated IP addresses, by querying the WINS server or by using NetBIOS broadcast communication, mapping 'hostname-to-IP This add-on is added to the NetBIOS cache on the local computer to communicate with remote hosts that may occur without processing them repeatedly.
If one of the inputs in the NetBIOS cache is incorrect, network communication may fail for IP hosts on the network. If the cache input is incorrect for a host in the local subnet, communication with that host will fail. If the cache input is incorrect for the default port, communication with the host on remote subnets will fail. This type of network communication error (hosts on the subnet or remote subnets) will show you which NetBIOS cache input is wrong (this is indeed an important issue).
NetBIOS cache entries can sometimes be caused by old entries in the WINS database on WINS servers. This is because WINS cuts the NetBIOS broadcast name solution when WINS is added, so old or corrupted entries can recover in the NetBIOS cache with error input even after the cache has been deleted. The solution in this case is to record the error logs in the WINS database, continue to delete the NetBIOS cache and then check the cache with the 'nbtstat -c' command to ensure that the entries are not correct saved.
Step 4: Delete DNS Resolver Cache (storing DNS analysis)
Order to perform this action:
ipconfig / flushdns
This command will delete the contents of the DHS resolver cache on the computer. This command also reloads the inputs in the HOSTS file into the cache. Because the full DNS names of the remote hosts are addressed to their related IP addresses by the name server query (DNS server), the mapping of 'FQDN-to-IP-address' is added to the DNS resolver. Internal computer cache to communicate with remote hosts may occur without having to resolve them repeatedly.
If one of the entries in the DNS resolver cache is incorrect, network communication may fail and network communication may fail for some IP hosts on the network. To observe the current contents of DHS resolver cache, enter ipconfig / displaydns at the command window.
If the IP address of the remote host you are trying to process is recently changed, you cannot connect to that host using its FQDN until you delete the DNS resolver cache. Obviously, the cache entries will automatically pause with their specified TTLs obtained from the name server during the name process, but if you accidentally connect to some remote hosts that have tried to fix You can also delete the same DNS resolver cache.
Step 5: Re-register with WINS
Order to perform this action:
nbtstat -RR
This command will re-register the local computer in the WINS database on WINS servers. That means all NetBIOS names for local computers are freed then created in the database. This is only useful if your network has WINS servers, but most business environments that deploy Active Directory and Exchange Server generally still use WINS.
When the Windows computer is turned off properly, this computer will release its logs from the WINS database. If this computer is not turned off properly, WINS records for the computer will not be removed from the database. Older records in the WINS database can cause other network communication problems, especially in laptops like laptops that can be removed from one network and attached to another. By using the Repair feature you can solve the problems by having to re-register with WINS.
Step 6: Register again with DNS
Order to perform this action:
ipconfig / registerdns
This command registers the local computer in the DNS database on the server. This means that all DNS names for the local computer will be faked and then created in the DNS database (assuming you have Active Directory network using Dynamic DNS or DDNS for registration.) DNS names in the database).
Conclude
The Repair feature for network connectivity is a useful tool for troubleshooting network connection problems. However, most administrators do not know much about how this feature works, this article we have tried to introduce a simple way for you to use this tool.
Understanding how this tool works will help you reduce your troubleshooting efforts by eliminating possible causes such as errors or loss of DHCP configuration settings, invalid input. in ARP, NetBIOS or DNS resolver cache, or invalid old entries in WINS or DNS database.
If you have problems with your network connection and have verified that your network connection is in the old connection environment, the Repair feature will be one of the first features you should try to resolve. this problem.
Was this article helpful?
Your feedback helps us improve.
Related Articles
 Part 2 - Troubleshooting TCP / IP: Structure method : Troubleshooting routing tables12 minutes read
 TCP / IP Troubleshooting: Structural Methods - Part 1: Introduction6 minutes read
 Troubleshoot Mac network problems5 minutes read
 Part 4 - Troubleshooting TCP / IP: Structural Methods: Use Netdiag.exe14 minutes read
 Troubleshoot connectivity problems in the network - Part 67 minutes read
 How to open Network Connections on Windows 103 minutes read
Reader Comments 0
Sign in with email or Google to join the discussion.