Connect 2 Windows XP laptops without cables
Connecting two laptops, or connecting two computers without cables you will need to go through several setup steps. To connect 2 desktops, 2 computers must have a WiFi transceiver.
Table of Contents
Do you think you and your colleagues in the agency can share data, chat or play together easily? Actually, with 2 laptops with wireless and Windows XP operating system, you can do this without going through a network.
Most laptops have wireless (wireless) connectivity, so two laptop computers in the same organization can completely network with each other to work together without having to purchase another device. Any other. There are 2 ways to do this.
Method 1: Create ad-hoc networks with integrated computers
This method is only available for laptops, desktop computers capable of receiving and transmitting WiFi. Ad hoc networks need at least 2 computers, in this example we will use two computers, named computers A and B.
NOTE: Before proceeding, please ensure that Windows Zero Configuration (WZC) service has been started. If you are not sure about this, click here to check the installation.
Part 1: Create an Ad Hoc network configuration on computer A
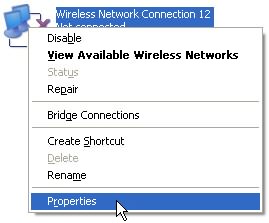
Step 1: Go to Control Panel > Network Connections and find Wireless Network Connection . Right-click Wireless Network Connection and select Properties .

Step 2: On the Wireless Networks tab, click the Add button.

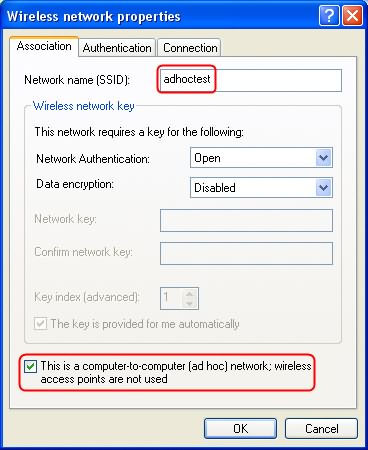
Step 3: On the Association tab of the Wireless network properties window enter a name for the network in Network Name [SSID] . Here we set is adhoctest. Check This is a computer-to-computer [ad hoc] network; wireless access points are not used at the bottom of the window, then click OK .
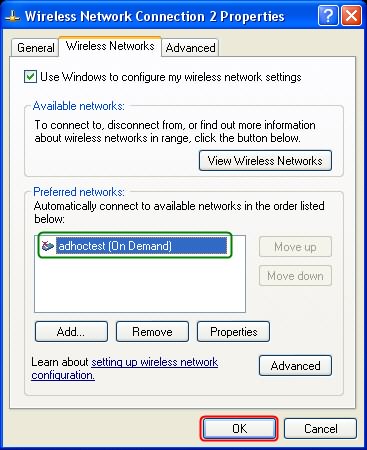
Step 4: After step 3, we have a profile that is adhoctest in Preferred Networks. Click OK to save all settings.
Part 2: Configure the IP address manually on computer A
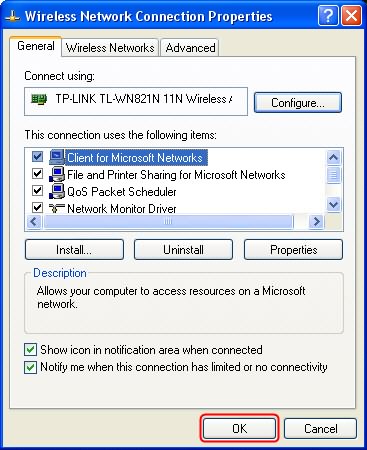
Step 5: Right-click Wireless Network Connection and select Properties .
Step 6: On the General tab, double-click Internet Protocol (TCP / IP) .

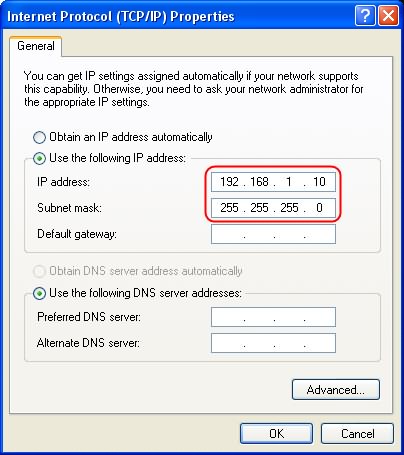
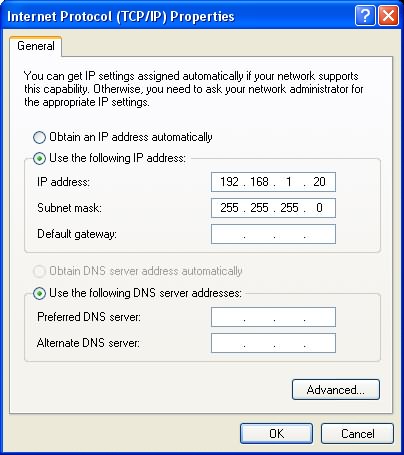
Step 7: Select Use the following IP address , and enter IP address and Subnet mask . Then click OK .
Step 8: Click OK on the Properties Network Connection Wireless window.
Part 3: Search Ad Hoc networks on computer B.
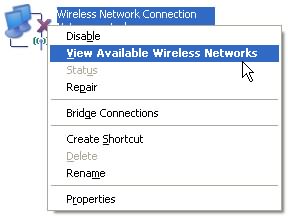
Step 9: Right-click Wireless Network Connection , select View available wireless networks .
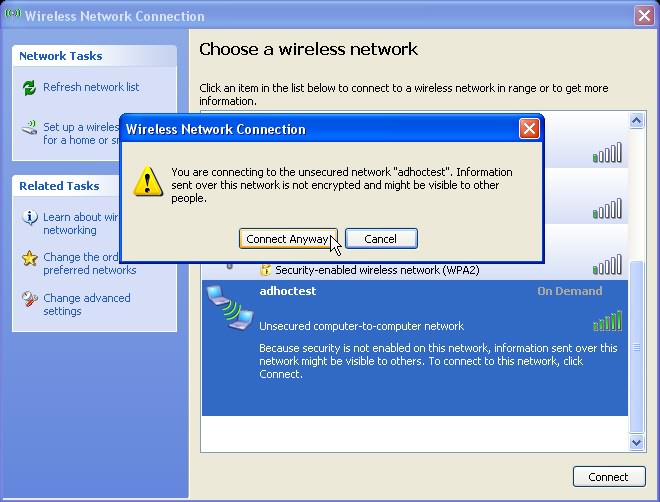
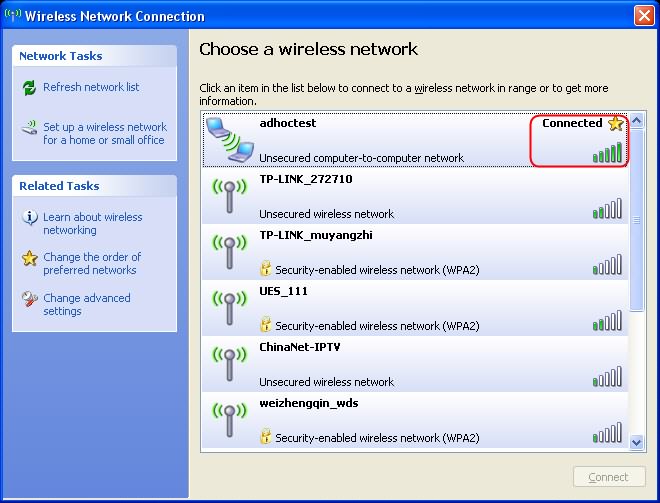
Step 10: Find the adhoctest network (set up on computer A) in the scan window. Then double-click it and click Connect Anyway .
Part 4: Configure IP addresses on computer B
You do the same steps as you did on computer A (Step 5 to Step 8). The problem is that we need to specify a different IP address for computer B and it must be in the same subnet as computer A. In this example, we can get 192.168.1.20/255.255.255.0.
At this point, all basic settings for building Ad Hoc network have been completed. If we reopen the network scan window, we can see the adhoctest network is Connected.
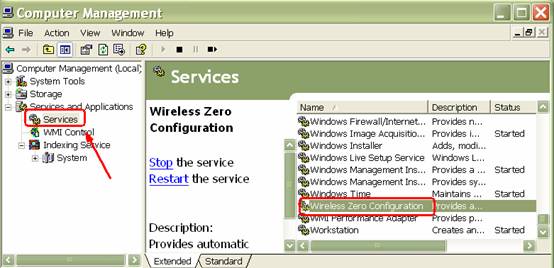
Turn on Windows Zero Configuration (WZC):
- Right-click My Computer > Manage > Services and Applications> Services , find Wireless Zero Configuration in the right pane.
- Chuot must go to Wireless Zero Configuration > Properties
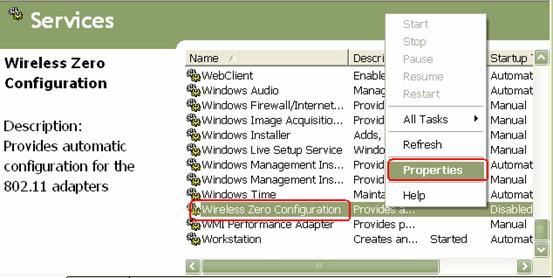
- Change Startup type to Automatic and click OK

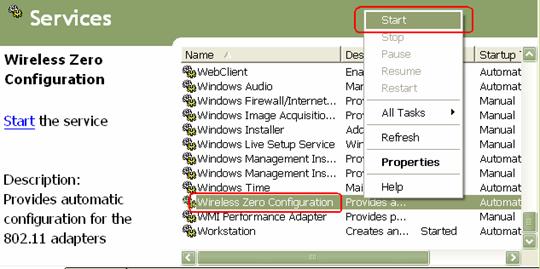
- Right-click Wireless Zero Configuration and select Start
Method 2: Create peer connections between two computers
To solve the problem, you need to create a pear to pear connection between the two machines. But because there is no access point, IP is not automatically granted, but you must manually assign it. Therefore, the first step is to manually assign the IP and the next steps are as follows:
1. Self-assign IP to 2 machines
In this step you need to perform on both machines to give them the same IP class. Do as follows:
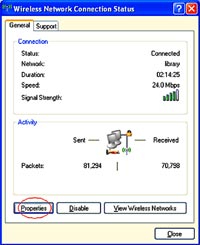
- Go to the wireless connection status window (Figure 1) by double clicking on the network icon to the right of the screen.
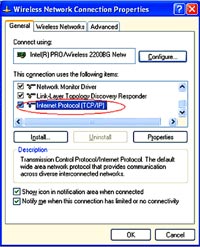
- Click on Properties , the next window will appear (Figure 2).
- Double-click the Internet Protocol (TCP / IP) line and set IP for both laptop computers. You can assign arbitrary but it is required that both machines must be in the same class and the same Subnet mask. Specific examples:
IP: 10.0.0.45
Subnet mask: 255.255.255.0 Machine 2
IP: 10.0.0.46
Subnet mask: 255.255.255.0
Other lines are left blank.
So you have completed step 1, now the step to connect for 2 machines.
2. Create a wireless connection between the two devices
 In this step you will make two transmitters and receivers of each other. Do as follows:
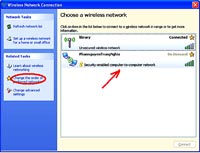
- Right click on Wireless Network Connection icon under taskbar, select View Available Wireless Network . Click on the Change the order of preferred networks line in the dialog box that appears (Figure 3).
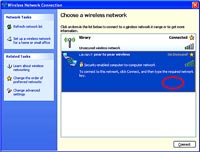
- Continue to click the Add button to create a new network (Figure 4).
- Name your network in the Network name line.
- Set a password to access the network at the Network key line. Note that you must select the line This is a computer to computer . At this point, you have completed step 2.
3. Go to the network
 - Click the Wireless icon on the right of the screen. Select the View wireless network button.
- Click on Connect . Machine 1 will now generate a signal and wait for device 2 to connect. If machine 2 detects the network at this time, it will see the network of machine 1. The computer clicks Connect then both machines will connect to each other (Figure 5).
4. Application
You can now share the file so that the other computer can receive it, or you can chat directly between the two computers, send the file directly using Windows' Net meeting utility (Figure 6) by going to Run , enter the conf command to open it. Get this utility, or you can play games like in a LAN.
Phan Nghĩa
Was this article helpful?
Your feedback helps us improve.
Related Articles
 How to Connect a Vizio Soundbar to a TV7 minutes read
 How to Connect HDMI Cables10 minutes read
 How to Connect VCR to TV7 minutes read
 How to Connect PC to TV Without Wires6 minutes read
 KDE Connect - Download the latest KDE Connect here3 minutes read
 These are the types of printer cables needed to connect to the computer6 minutes read
Reader Comments 0
Sign in with email or Google to join the discussion.