Transfer printer from Server 2003 x32 to Server 2008 R2 x64
This article will walk you through the process of transferring a printer from Windows Server 2003 to Windows Server 2008 R2 x64 using the Printer Migration Wizard..
TipsMake.com - This article will step by step guide the process of transferring printers from Windows Server 2003 to Windows Server 2008 R2 x64 using the Printer Migration Wizard. If you are migrating Windows 2000 Server to Windows Server 2003, you need to use Print Migrator 3.1. Print Migrator 3.1 will not work with Windows Server 2008. To switch between x64 Windows Server 2003 and Windows Server 2008 R2 systems, you need to use the Print Migration Wizard.
Attention:
- You cannot transfer directly from the old operating system (Windows NT Server 4.0, Windows 2000 Server) to Windows Server 2008 R2 x64.
- To get the printer server up to date, use the Print Migration Wizard to back up and restore the printer server configuration. A standard system transfer will not retain printer server information and may cause printer configuration data to be lost if this data is not backed up properly before installing a new operating system.
- A 32-bit Windows printer driver will not switch to a 64-bit Windows version due to some changes in the way the kernel communicates with the printer. For each printer in the x32 server, you need to install a driver compatible with Windows 2008 R2 x64
Prepare:
Use the 'Microsoft Print Migrator 3.1' tool to back up current printers and drivers on server 2003 sources.
http://www.microsoft.com/downloads/details.aspx?FamilyID=9B9F2925-CBC9-44DA-B2C9-FFDBC46B0B17
Install the x64 driver for each printer on server 2003. Windows Server 2008 R2 requires a 64 bit driver. If this 64 bit driver is lost, the Printer Migration Wizard will fail.
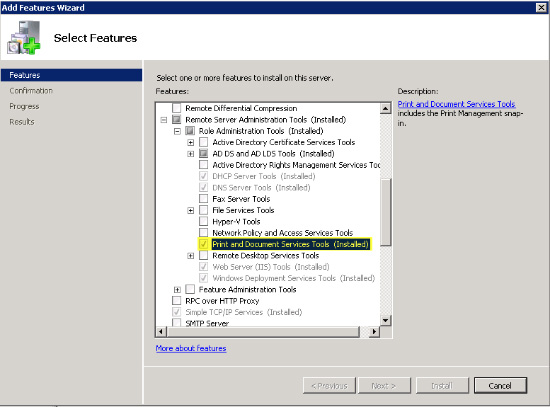
Install Print and Document Services Tools via Features> Add Features Wizard> Remote Server Administration Tools> Role Administration Tools> Print and Document Services Tools
Moved on
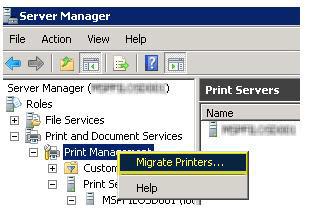
Run Server Manager> Roles> Print and Document Services> Right mouse Print Management and select Migrate Printers .
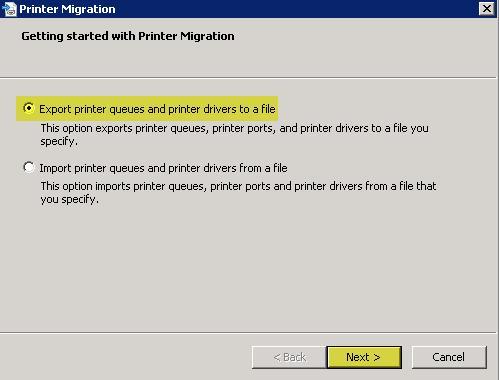
Select Export printer queues and printer drivers to a file and click Next
Click Browse . or type in the source server name. Click Next .

Review the items that will be exported. Click Next .

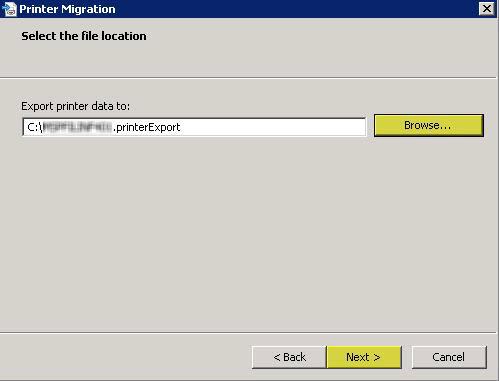
Click on Browse . and select the location to export the output file. Click Next .
The export process will begin.
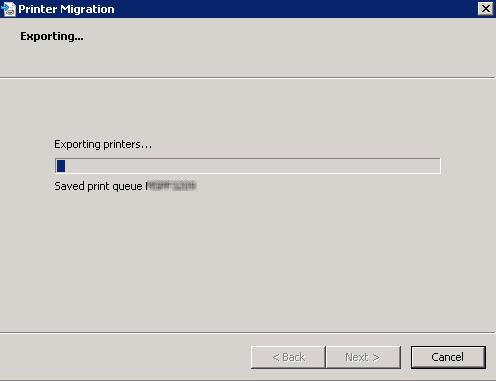
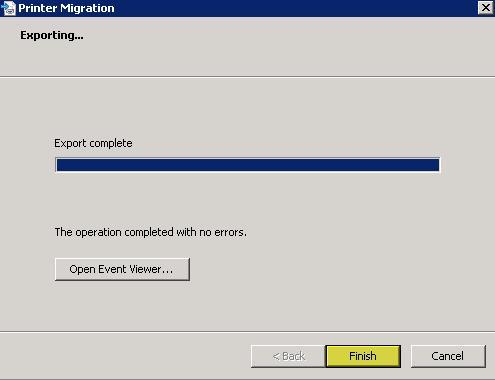
When you finish exporting, click Next
Right click on the printer server name and select Import printers from a file .

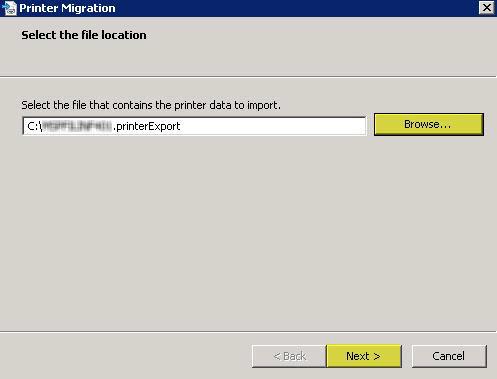
Click Browse . and select the exported file to import. Click Next .
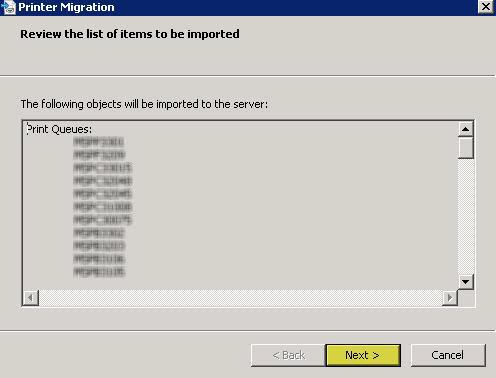
Review the items that will be imported. Then, click Next .
Choose Select Keep existing printers and List all printers . Click Next .
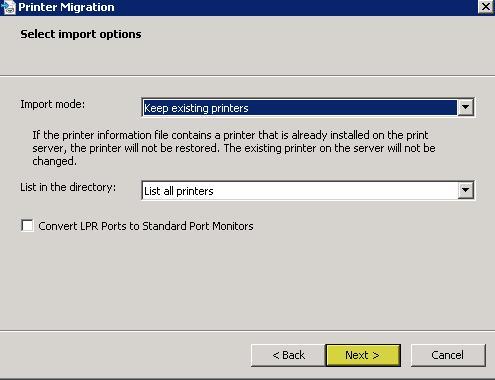
Import mode : Determines the action to take if a certain printer already exists on the destination computer. (Hold or overwrite)
List in the directory : Determine whether or not to export the list of imported printers in Active Directory Domain Services.
Convert LPR Ports to Standard Port Monitors : Determine whether to transfer the Line Printer Remote (LPR) printer port in the printer setup files to Standard Port Monitor when importing the printer.
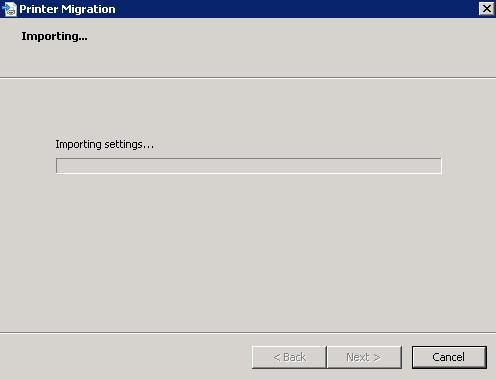
The import process starts
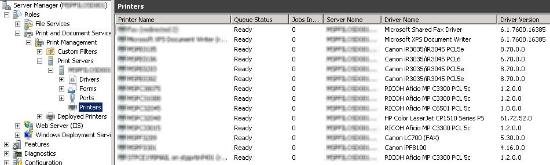
Confirm that the printer is enabled and shared.
Tasks after transfer
Confirm that each printer has an x32 and x64 driver installed Properties> Sharing> Additional Drivers .
If possible, confirm the security settings for printer data (HR, Execs, Etc)
Review application events (Use custom display) with the Printbrm.exe source to decide whether or not the next action is needed.
Connect to each printer and complete the test page.
Option made by command
Users can also use the following command option to transfer the printer server to Windows Server 2008 R2 x64
To perform a remote backup task:
1. CD% WINDIR% System32SpoolTools
2. Printbrm -s -b -f .printerExport
To perform a remote recovery task:
1. Printbrm -s -r -f .printerExport