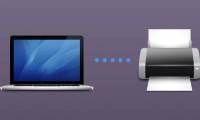
How to Connect a USB Printer to a Network
This wikiHow teaches you how to connect a USB printer to a network by connecting it to a router or using a print server. If your router has a USB port, you can connect your printer directly to your router. You will then need to configure...
Table of Contents
Method 1 of 3:
Connecting to a Router on Windows
-
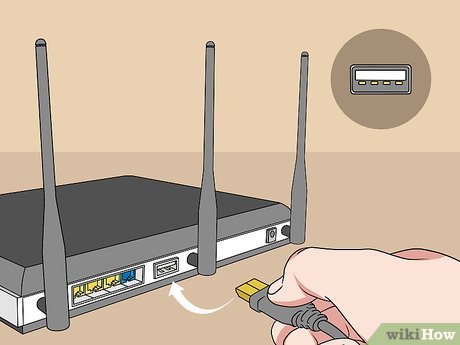
 Locate a USB port on your router. Not all routers support a USB connection. Most high-end routers offer USB functionality. If your router does not support USB functionality, you will need to purchase a print server to connect your printer to a network.
 -
 Connect the printer to the USB port on your router. If your router has a USB port, you can easily connect your printer to the router using the USB port.
 -
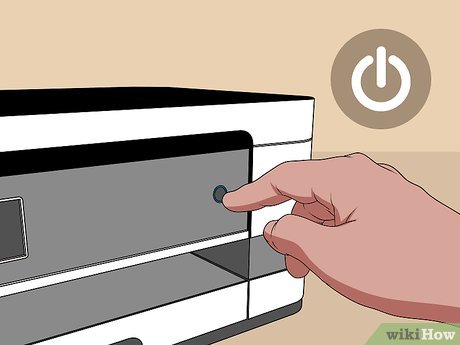
 Power on the printer and wait 60 seconds. If you haven't already done so, plug the printer into an electrical outlet or power strip. Turn on the printer and wait 60 seconds for your router to recognize the printer.
 -
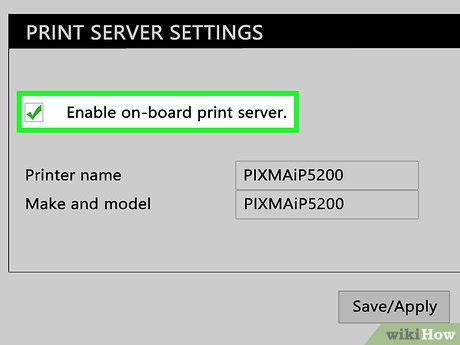 Enable print sharing on your router. To enable print sharing on your router, open a web browser and type the router's IP address in the address bar (it's usually 192.168.0.1, 192.168.1.1, or 10.0.0.1, or something similar). Then log in to your router. This takes you to the router's firmware settings screen. Look for the USB menu and enable USB printer support or Printer Server mode and then save your settings. Each router has a different firmware settings screen and login method.
- Consult the user's manual or technical support for your particular router to learn how to log in and enable Print sharing as some routers may not support Print sharing. If you cannot locate print sharing, you may need to purchase an external print server.
-
 Click the Starticon in Windows. The Start button has the Windows logo. By default, it's in the lower-left corner in the Windows taskbar. Make sure you are using the same computer that is connected to the router.
-
 Type Printers. This displays the "Printers & Scanners" settings option at the top of the Windows Start menu.
 -
 Click Printers & Scanners. It's at the top of the Windows Start menu. This opens the Printers & Scanners menu.
 -
 Click Add a printer or scanner. Windows will scan for available computers. Most likely, it will not detect the printer you want.
 -
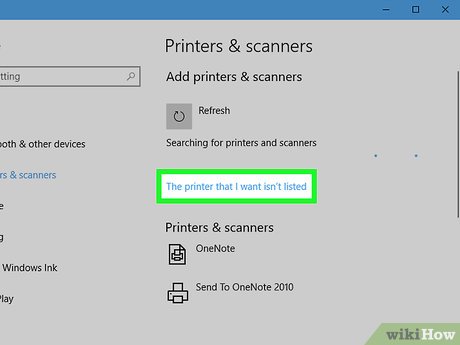 Click The printer that I want isn't listed. This option appears after Windows finishes scanning for nearby printers.
 -
 Select "Add a local printer or network with manual settings" and click next. This option is at the bottom of the "Find a printer by other options" menu. Click the radial button next to it and click "Next" in the lower-right corner of the menu.
 -
 Select "Create a new printer port". It's the second option in the "Choose a port" menu. Click the radial button to select it.
 -
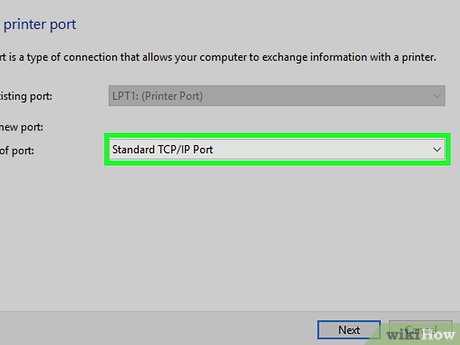 Select "Standard TCP/IP" and click Next. Using the drop-down menu next to "Type of port" select "Standard TCP/IP" and click "Next" in the lower-right corner.
 -
 Type your router's IP address and click Next. Type the same IP address you used to log in to your router in the bar next to "Hostname or IP address". The port name can be anything you want. Click "Next" in the lower-right corner when you are finished. Windows will begin the process of detecting the port.
 -
 Select "Custom" and click Next. This creates a custom port with default settings. Click "Next" in the lower-right corner when you are finished.
 -
 Install the printer drivers and click Next. After you add a custom port, a window pops up for installing the printer driver. You can select the printer brand in the box to the left and the printer model in the box to the right. If you have a CD with the printer driver, you can insert the CD in computer's disk drive and click the button that says "Have disk".
 -
 Type a name for the printer and click Next. You can add a name for your printer by typing it in the bar next to "Printer name", or you can leave it as the default and click "Next" in the lower-right corner.
 -
 Select "Do not share this printer" and click "next". This concludes the printer setup. You can now click "Print a test page" to make sure it is working and click "Finish".
- Repeat steps 5-17 on all Windows computers on your network that you wish to have access to your printer.
Method 2 of 3:
Connecting to a Router on Mac
-
 Locate a USB port on your router. Not all routers support a USB connection. Most high-end routers offer USB functionality. If your router does not support USB functionality, you will need to purchase a print server to connect your printer to a network.
 -
 Connect the printer to the USB port on your router. If your router has a USB port, you can easily connect your printer to the router using the USB port.
 -
 Power on the printer and wait 60 seconds. If you haven't already done so, plug the printer into an electrical outlet or power strip. Turn on the printer and wait 60 seconds for your router to recognize the printer.
 -
 Enable print sharing on your router. To enable print sharing on your router, open a web browser and type the router's IP address in the address bar (it's usually 192.168.0.1, 192.168.1.1, or 10.0.0.1, or something similar). Then log in to your router. This takes you to the router's firmware settings screen. Look for the USB menu and enable USB printer support or Printer Server mode and then save your settings. Each router has a different firmware settings screen and login method. Consult the user's manual or technical support for your particular router to learn how to log in and enable Print sharing. Some routers may not support Print sharing. If you cannot locate print sharing, you may need to purchase an external print server.
 -
 Click the Appleicon. The Apple icon opens the Apple Menu. It's in the menu bar at the top of the screen.
-
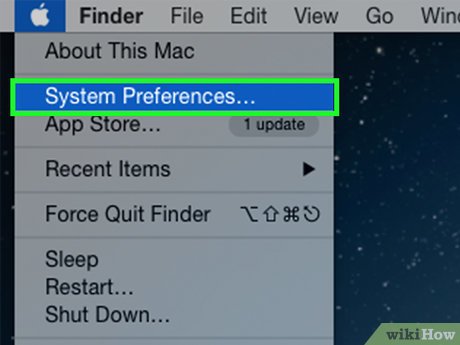 Click System Preferences. It's the second option in the Apple Menu. This opens the System Preferences screen.
 -
 Click the Printers & Scanners icon. It's the icon that resembles a printer.
 -
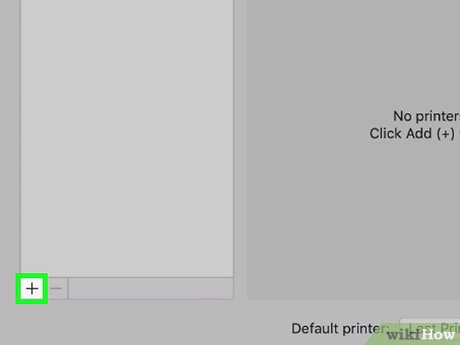 Click + to add a printer. It's below the box with the list of printers to the right of the "Printers & Scanners" window.
 -
 Click the IP tab. It's the icon below a blue globe at the top of the window.
 -
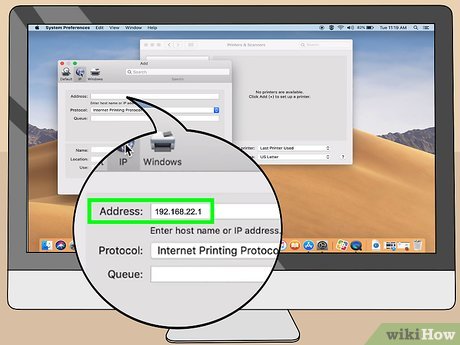 Type the router's IP address next to "Address". The Address bar is the first line in the window. Use the same IP address you use to log in to your printer.
 -
 Select "Line Printer Daemon" next to "Protocol". The "Protocol" drop-down menu is below the address bar. Use the drop-down to select "Line Printer Daemon".
 -
 Select "Select Software" next to "Use". Use the drop-down menu next to "Use" to select "Select Software". This displays a list of available printer software.
 -
 Select your printer's make and model and then click Ok. Type your printer's brand name in the search bar that says "Filter". Then select your printer's model number in the list and click "Ok".
 -
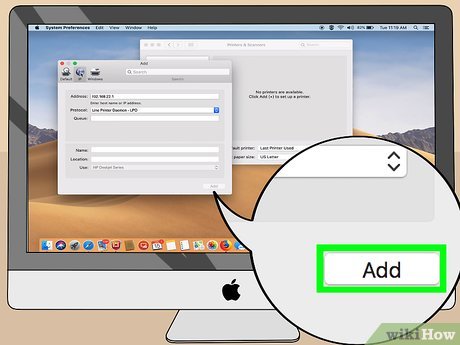 Click Add. It's in the lower-right corner of the "Add" window. This installs the Printer driver and allows you to add the printer so you can print wirelessly using your router.[1]
- Repeat steps 5 -14 on any Mac computer on your network you wish to have access to your printer.
Method 3 of 3:
Using a Print Server
-
 Plug in your print server. The print server is a device that looks like a router. Plug it in somewhere near your printer and router.
 -
 Connect your printer to the print server. Use the USB cord connected to your printer to connect it to the print server.
 -
 Connect the print server to your router. There are a few ways to connect a print server to your router:
- Using an Ethernet cable: You can connect it to your router using an Ethernet cable, in fact, some wireless print servers may require a wired connection during the setup process.
- Wireless: If the print server has a "WPS" or "INIT" button, you can connect it to your router wirelessly by powering on the print server, press the "WPS" button on your router and then quickly press the "WPS" or "INIT" button on the print server.[2]
-
 Power the print server on. If you haven't already done so, power on your print server by turning on the power button.
 -
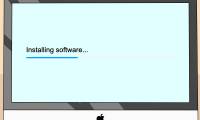
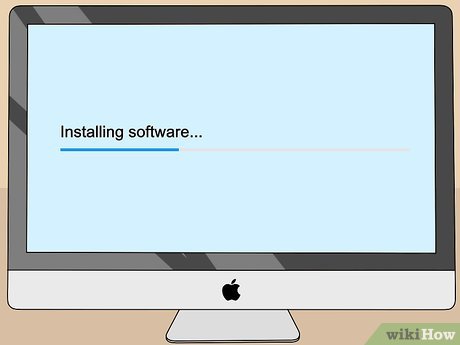 Install the print server software. Most likely, the print server you purchased came with a CD that has the print server software on it. You can also download the print server software from the manufacturer's website. Use this CD to install the print server software on all computers on your network you wish to have access to your print server. Place it in the CD tray and launch the installer. The install process will be different from one print server model to the next. The CD installer will walk you through the process of connecting to your printer, and set up a wireless connection (if it is a wireless print server). You may need to provide your wireless password in order to connect a wireless print server to your network. Once you are finished, you can print a test page to make sure your printer is working.[3]
Was this article helpful?
Your feedback helps us improve.
Related Articles
 How to Add an HP Printer to a Wi Fi Network5 minutes read
 How to fix Windows cannot connect to the printer error, cannot connect to the printer5 minutes read
 How to Connect a USB Printer to a Network11 minutes read
 Steps to connect the printer to the computer4 minutes read
 Instructions on how to connect the printer via wifi6 minutes read
 How to fix Windows errors not connected to the printer8 minutes read
Reader Comments 0
Sign in with email or Google to join the discussion.