Top 5 helpful edits you can do in Paint.NET
If you are a Windows user who only needs to make small modifications to images and screenshots, Paint.NET is a great, lightweight and easy-to-use middleware platform for this purpose. I'll show you some of the most useful tweaks this tool allows you to make.
1. Blurring sensitive information
Sometimes, you need to block personal information in a photo before sharing it. You might need to send a screenshot of the website to tech support, but don't want your recipient to see the recovery code. Or maybe you want to share a picture of a funny letter you received, but don't want to reveal your address.
In these and similar situations, Paint.NET makes it easy to cleverly intercept sensitive information. To do this, first use one of the selection tools to highlight where you want the information to be blurred. The easiest way is to use Rectangle Select (you can open it through the toolbar or by pressing S ).
After marking the area you want to block, go to the Effects section in the top toolbar. You have several different options for blurring the image, of which the two most common are Blur> Gaussian Blur and Distort> Pixelate .
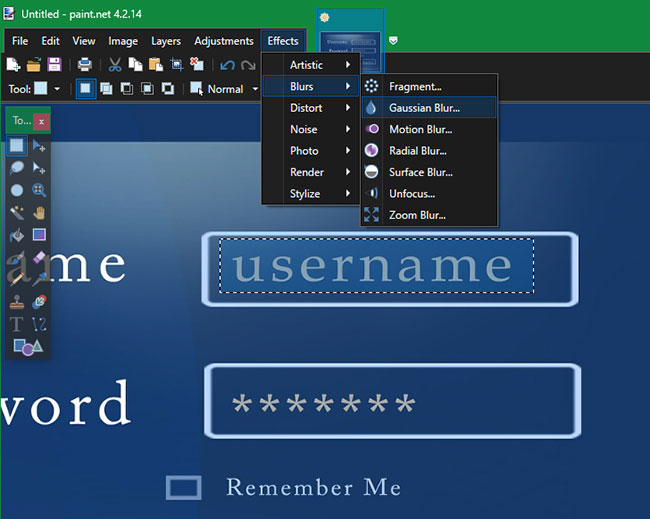
Both options have a intensity slider that changes effects (from 0 to 100). The higher the intensity, the stronger the effect appears. You will have to adjust this value depending on what you want to blur or modify. Make sure to edit to a point where the original text cannot be read by anyone. When you're done, click OK.

Another handy way to use the blur function is to slightly blur everything except the focus of the image. To do this, select what you want to keep from being blurred, then press Ctrl + I or go to Edit> Invert Selection . This will select everything except for what you just highlight.
Now use the blurring tool like above to give the rest of the image a slight blur effect. This is a handy way to get rid of insignificant information that doesn't need to be completely blocked.
2. Resize the image
Next time you need to resize images quickly, don't worry about manually grabbing and dragging a corner in MS Paint. Paint.NET makes it easy to resize images.
After opening an image in Paint.NET, press Ctrl + R or go to Image> Resize . This will open a menu that allows you to resize the image in percent or absolute value.
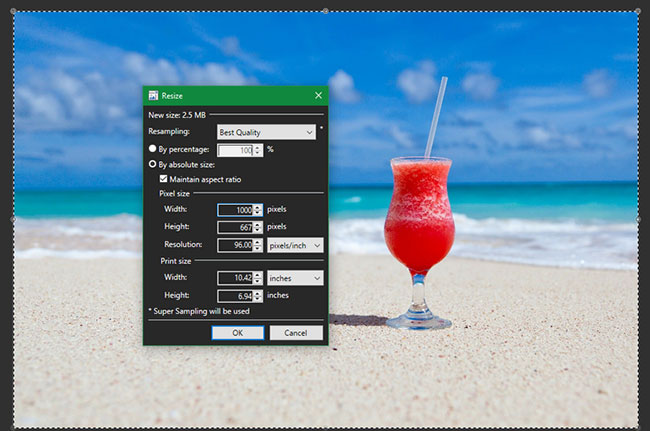
If you are uploading an image to the web with a specific size limit, then resizing by pixel size is probably the easiest. Otherwise, using a raw percentage is a good way to reduce or increase the size without much fuss.
If you choose By absolute size , make sure you click the Maintain aspect ratio to keep the dimensions proportional to avoid distorting the image. You can also choose the Resampling method the software uses. In most cases leave this option at Best Quality unless you have a reason to use something else.
While resizing is useful, keep in mind that enlarging the image digitally won't be perfect.
3. Auto-Level and other picture adjustment features
Even if you are not a professional photo editor, Paint.NET has a number of tools that allow you to edit your images. To access them, open an image and go to the Adjustments tab .
The most convenient is Auto-Level , which will automatically apply adjustments to make the photo look better (although results may vary). If you don't think the image looks good, try running this function to see if it looks better. For example, Auto-Level is useful when scanning old photos.
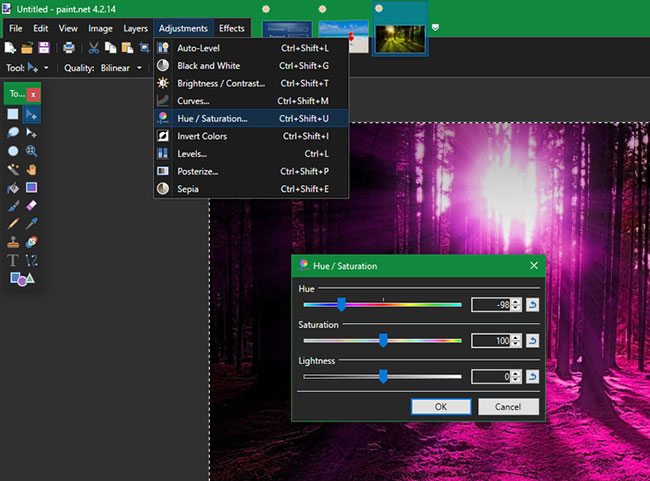
The Black and White, Sepia, and Invert Colors options are all one-click changeable. Use them for easy adjustments without having to install a separate tool or use an online editor.
If your skill is a bit more advanced, you can try individual adjustment options like Curves and Hue / Saturation . These options allow you to adjust the color balance, brightness and other aspects of the image. They can be hard to use well, but they give a lot of power if you get the hang of it.
4. Handy photo effects
If you need to edit images or apply artistic effects, Paint.NET includes some handy options in the toolbar for this. You will find most of them under Effects> Photo .
Red Eye Removal allows you to fix this common problem by using any of Paint.NET's selection tools to select an object's eye. Glow can add fancy lighting effects to your next profile photo. Or try Vignette to add dark rounded borders around an image.
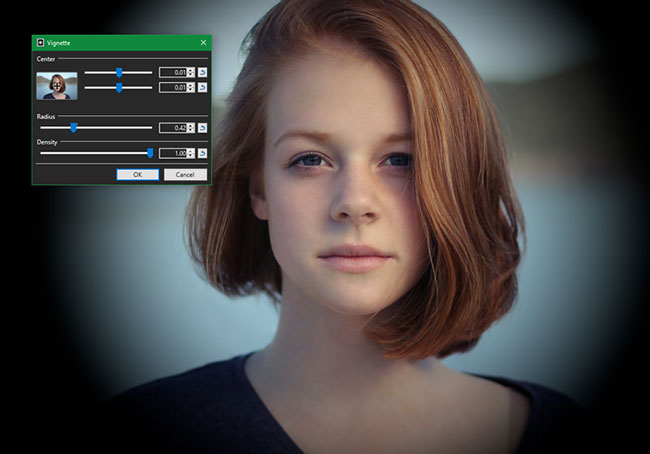
Similar to these, you will find a few interesting options under Effects> Artistic . Try Oil Painting to turn your painting into another kind of art or use Pencil Sketch to make it look like it was drawn by hand.
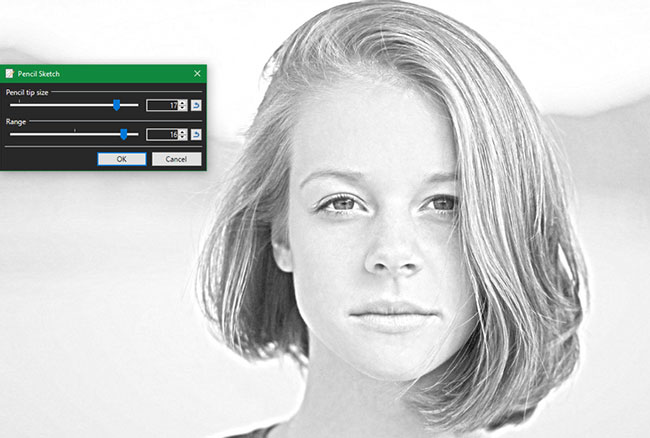
5. Work with layers to make editing easier
If you've used only barebone image editors in the past, you'll really appreciate layers. This feature allows you to add new elements to the image without affecting what is above or below it.
For example, let's say you want to put a logo on the table in the image below. Instead of adding it to the same background layer and worrying about messing up the table's appearance, you can simply create a new layer for the logo (use the Layers box at the bottom right).
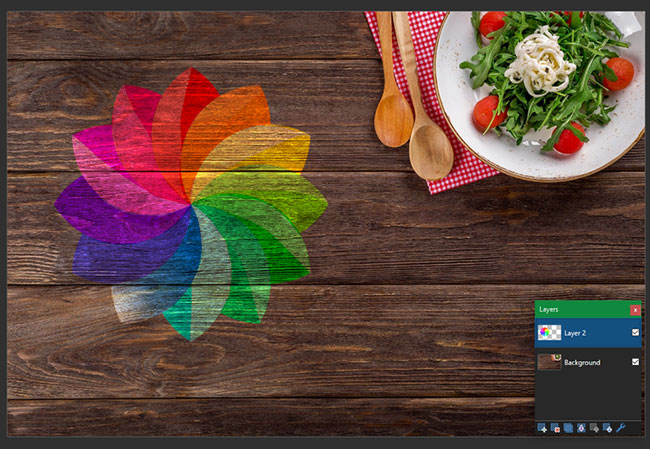
You can now crop, resize, and adjust the colors of the logo without affecting the background image. Press F4 to open the Layer Properties window , where you can adjust the layer opacity, blend it with other layers, or hide it completely.
Layers are important whenever you work with multiple images in a file, so you should definitely add them to your workflow for better efficiency.
