Table of Contents
This guide provides a clear, practical overview of tips to create shortcuts to open applications on Windows 10, with useful context, important details, and straightforward takeaways for everyday readers.
1. How to create shortcuts to open applications directly on Windows 10
Windows 10 operating system allows you to create applications directly on the system through setting application icons on the main screen of the computer.
Step 1: Open the Start Menu and enter the name of the application you want to create a shortcut for. Then, right-click and select Open file location to see the storage folder.
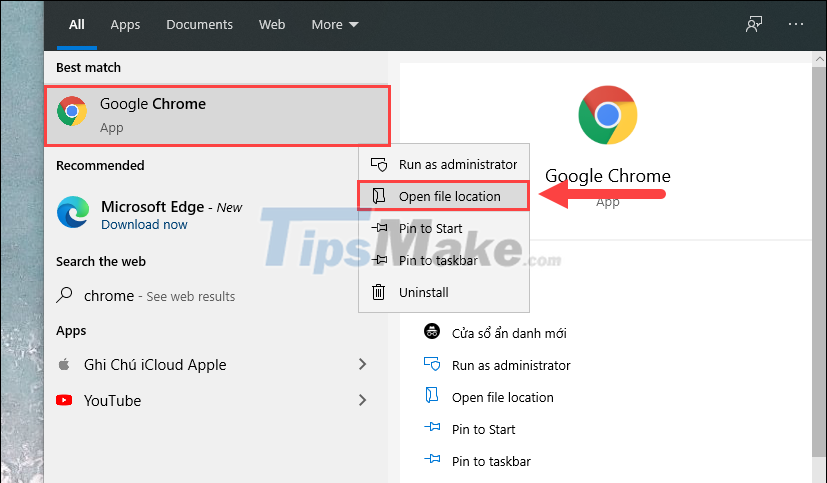
Step 2: Then, find the application that needs to create shortcuts and select Send to => Desktop to bring them out to the main screen.
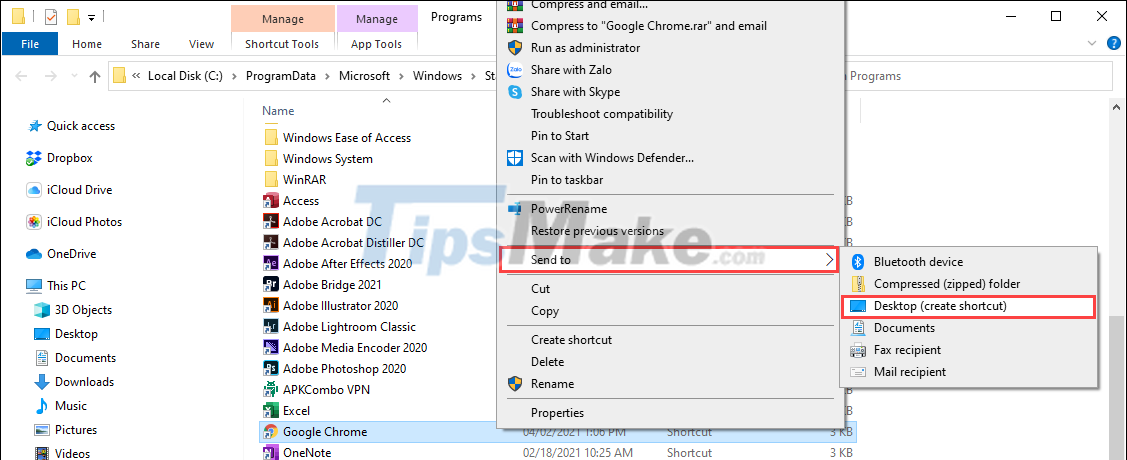
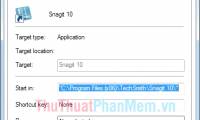
Step 3: Once you have the application on the main screen, right-click the application and select Properties to set up the application.

Step 4: In the Properties window, select the Shortcut item to create the shortcut and the Shortcut key is the place to enter the shortcut.

Step 5: Now, you just need to click on the Shortcut Key line and press the shortcut combination you want to use.
Usually, people will use Ctrl + Shift/Alt + Keys to avoid conflicts with the system. You should limit the key combinations to only Ctrl or only Alt / Shift, should create key combinations with 3 or more buttons to avoid conflicts.
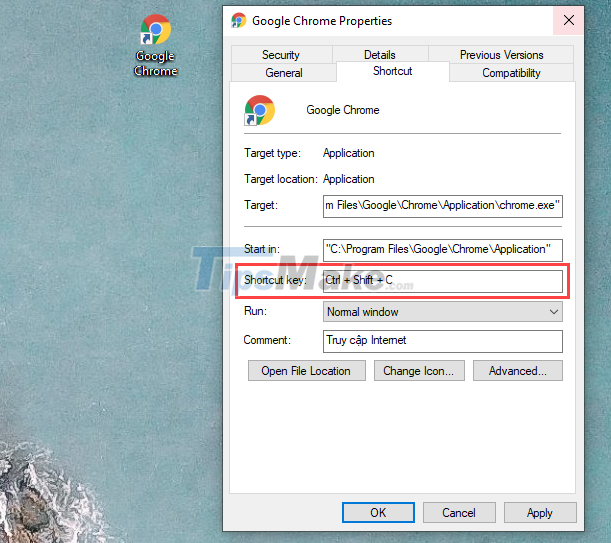
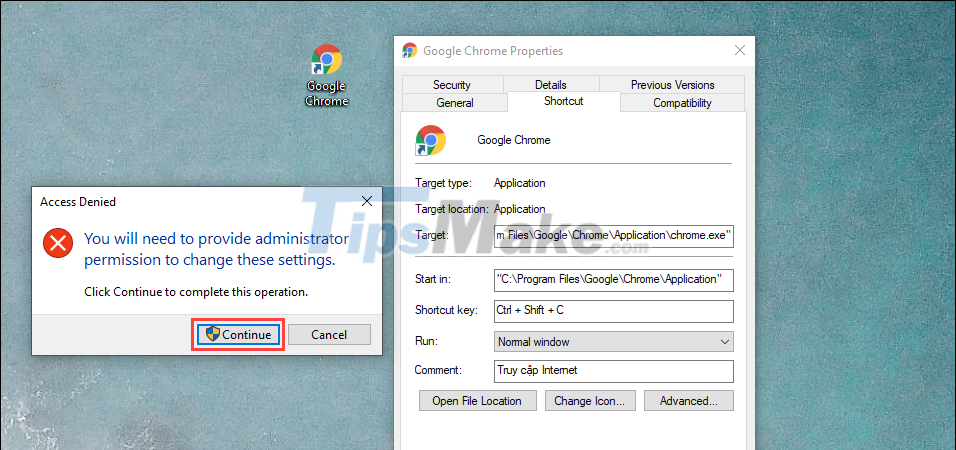
Step 6: Once done, you just need to click Apply to apply and click Continue to confirm the changes on the system.
2. How to create a shortcut to open an application with WinHotKey
WinHotKey is specialized software to create shortcuts on Windows and they are easy to use for the purpose of creating shortcuts for applications and software.
Step 1: Visit WinHotKey's homepage to download the software to your computer and install it. To install WinHotKey, right-click on the installation file and select Run as administrator.

Step 2: Then, you just need to click Next to continue installing the same application as other applications.
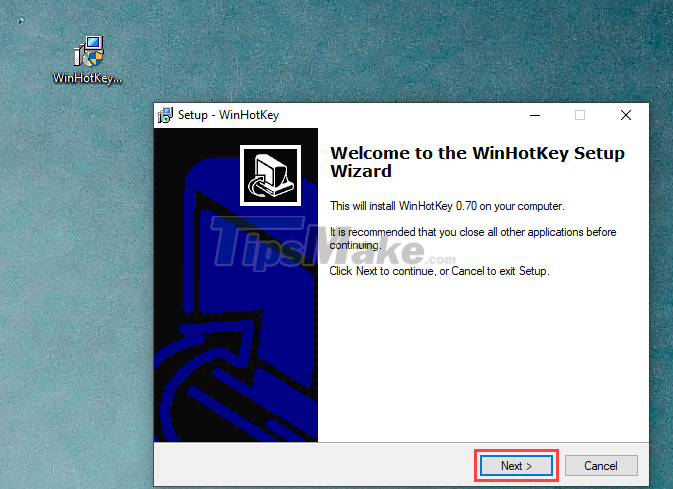
Step 3: The first time you start WinHotKey, you will receive a lot of instructions and you just need to click Next to pass.

Step 4: In the main interface of WinHotKey, select New Hotkey.
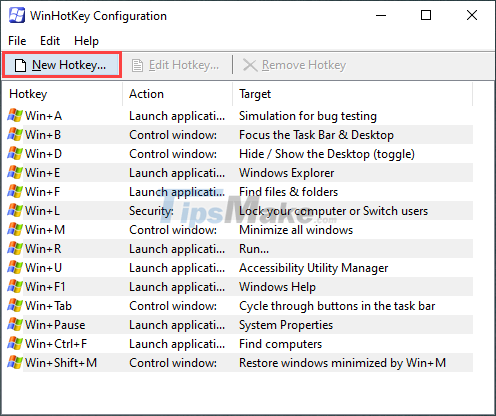
Step 5: In the New Hotkey… section, you will have to select a set of shortcuts in the When I press these keys and Along with the key sections.
- When I press these keys: Combo keyboard shortcuts
- Along with the key: Keyboard shortcuts for letters, numbers, functions, etc.

Step 6: Then, set I want WinHotKey to to Launch an Application.
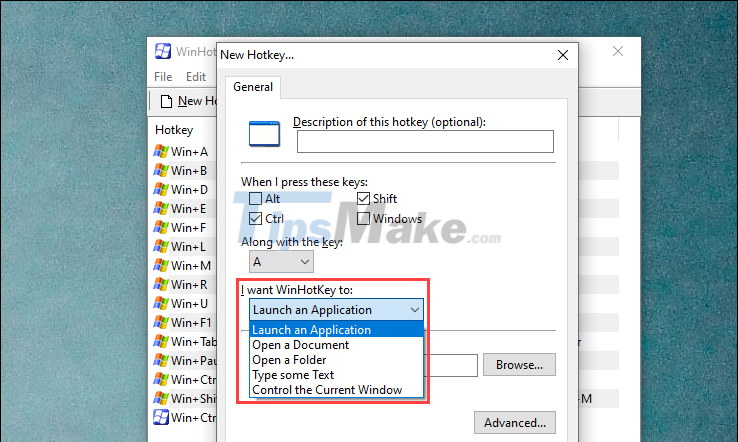
Step 7: Click Browse… and select the folder containing the software's startup file. Normally, the software startup files will be located in the C drive, the Program File or Program File (x86) folder.
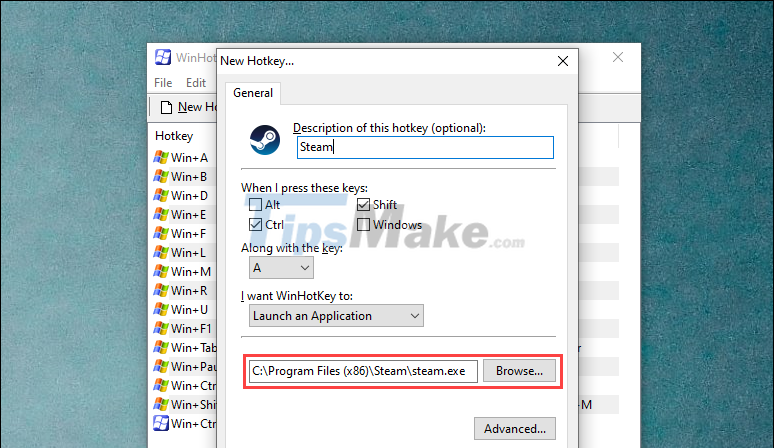
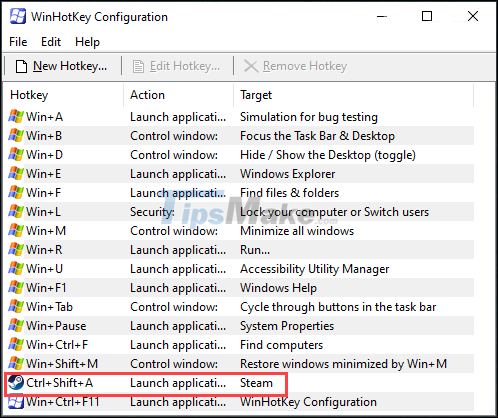
Step 8: After creating the path to the application, click OK to finish. In the list now will appear more shortcuts to open the application you just created.
So you have finished creating the shortcut, now try to press the shortcut to see if the software is started or not?
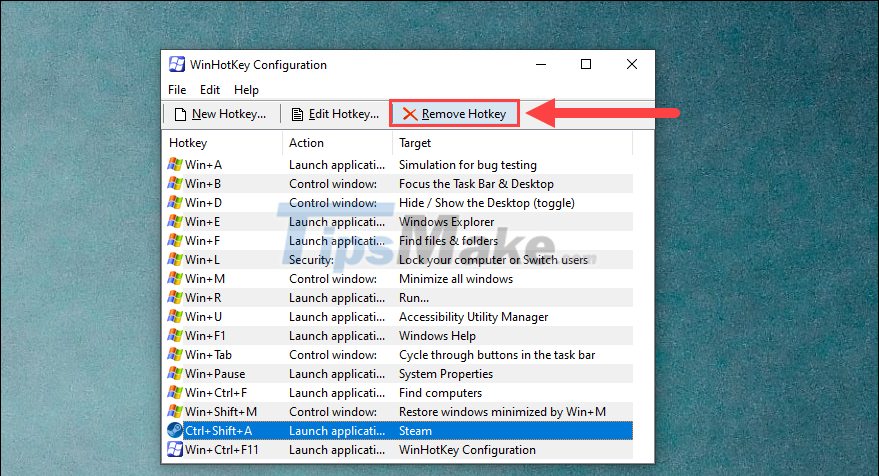
Step 9: When you want to remove the shortcut, simply select the shortcut and click on Remove Hotkey.
In this article, Tipsmake showed you how to create shortcuts to open applications on Windows 10. Have a nice day!
Key Takeaways
Use the information above as a practical reference for tips to create shortcuts to open applications on Windows 10. Review each step carefully, confirm any requirements, and choose the option that best fits your situation.
FAQ
What does this guide explain about Tips to Create Shortcuts to Open Applications on Windows 10?
It explains the main concepts, practical considerations, and useful steps related to tips to create shortcuts to open applications on Windows 10 without requiring advanced knowledge.
Who can benefit from learning about Tips to Create Shortcuts to Open Applications on Windows 10?
This information is useful for readers who want a clear overview, practical guidance, and reliable steps related to tips to create shortcuts to open applications on Windows 10.
What should I check before applying this information?
Review the requirements, confirm that your device, software, or situation matches the instructions, and back up important data before making major changes.
Related Articles
 Instructions on How to Create Shortcuts to Open Applications and Folders in3 minutes read
 Create and Customize Application Shortcuts on Win 106 minutes read
 If You Want to Master Windows, Master These Shortcuts24 minutes read
 Instructions on How to Create Shortcuts to Open Windows Applications Explained7 minutes read
 How to Create Shortcuts to Open Applications on Windows 103 minutes read
 Create Shortcuts for Window Applications2 minutes read
Reader Comments 0
Sign in with email or Google to join the discussion.