The fastest way to take long, scrolling screenshots on Windows 11
Currently on Windows 11 there is no way to take long screenshots, users still need to use third-party software such as ShareX, PicPick, Snip & Sketch ... Today, Taimienphi will guide you to take screenshots. on Windows 11 with ShareX, the software has a simple and easy-to-use interface.
Table of Contents
Windows 11 screen capture tool ShareX has a lot of useful features, you can use ShareX to capture the entire screen, choose to capture each screen, by partition . or take a long screenshot on Windows 11 to Get more information in one photo.

Take a long screenshot to get all the information on Windows 11
Instructions for taking long screenshots on Windows 11 with ShareX
Step 1: First, you access the ShareX download link here.
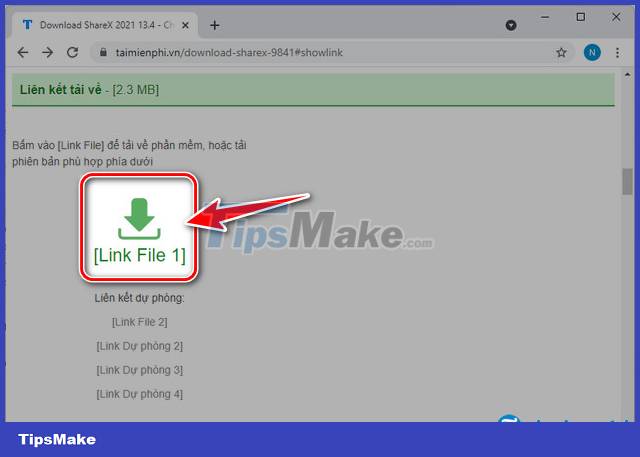
Step 2: Next, click Download => select [Link File 1]
Step 3: After the download is complete, open the folder containing the downloaded file and click directly on ShareX .

Step 4: Select Run , check I accept the agreement => click Next => Next => Next => Install to install ShareX on the computer => Click Finish to launch after the installation is complete.

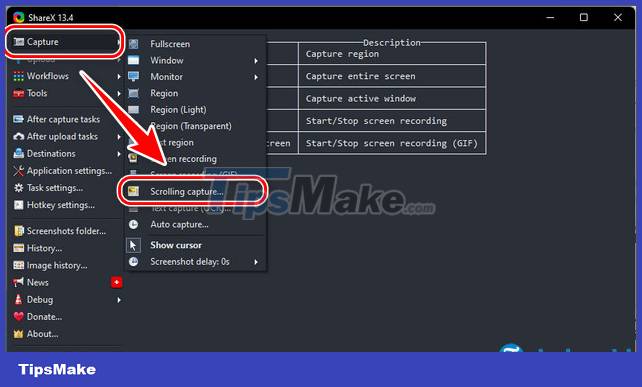
Step 5: On the interface of ShareX , select Capture => click Screen Capture .
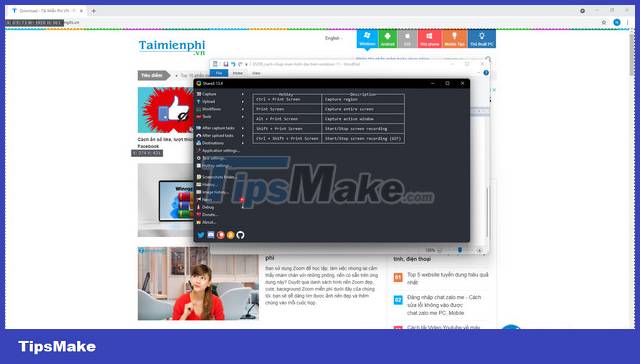
Step 6: At this point, the software will appear for you a frame , select the place to be and click the Left Mouse button .
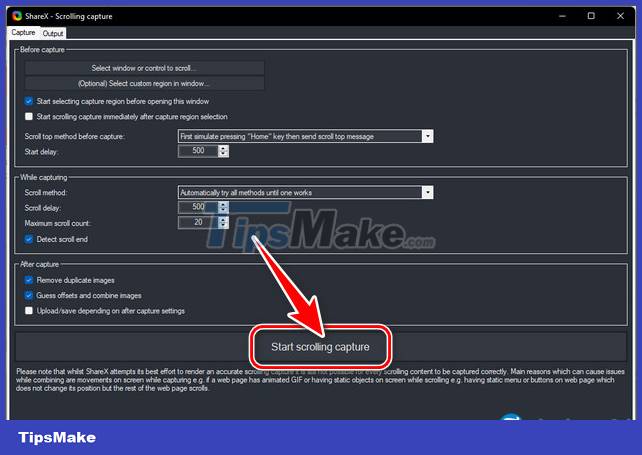
Step 7: In the parameter adjustment section , leave it as is, select Start Scrolling Capture .
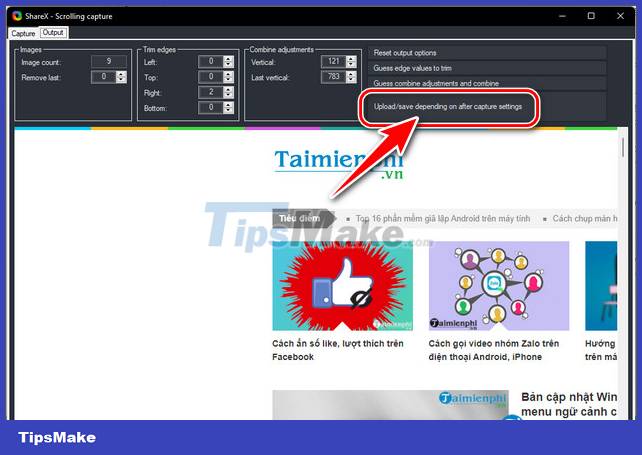
Step 8: When the capture is complete, select Upload / save deping on after capture setting to save it to your device.
- To open the image, right- click the long screenshot on Windows 11 and select Open => Folder to the folder containing the image.

https://thuthuat.taimienphi.vn/cach-chup-man-hinh-dai-tren-windows-11-65208n.aspx
Through the above tutorial. Surely you already know how to take a long screenshot on Windows 11. If you find it interesting, don't forget to Like & Share the article for everyone to know like you. Good luck reading.
- Reference: How to turn sleep on and off in Windows 11
Was this article helpful?
Your feedback helps us improve.
Related Articles
 How to take scrolling, long screen screenshots in Windows12 minutes read
 How to take a long screenshot on a Windows 11 computer3 minutes read
 How to take screenshots Win 10 fastest and simplest4 minutes read
 8 Fastest Ways to Take Screenshots on Dell Computers in 20268 minutes read
 Ways to take screen shots of Windows 1015 minutes read
 The quickest and simplest way to take a screenshot on a computer or laptop.18 minutes read
Reader Comments 0
Sign in with email or Google to join the discussion.