Table of Contents
This guide explains how to take Screenshots Win 10 Fastest and Simplest, with clear steps, practical tips, and important checks before you begin.

1. Use the Snipping Tool
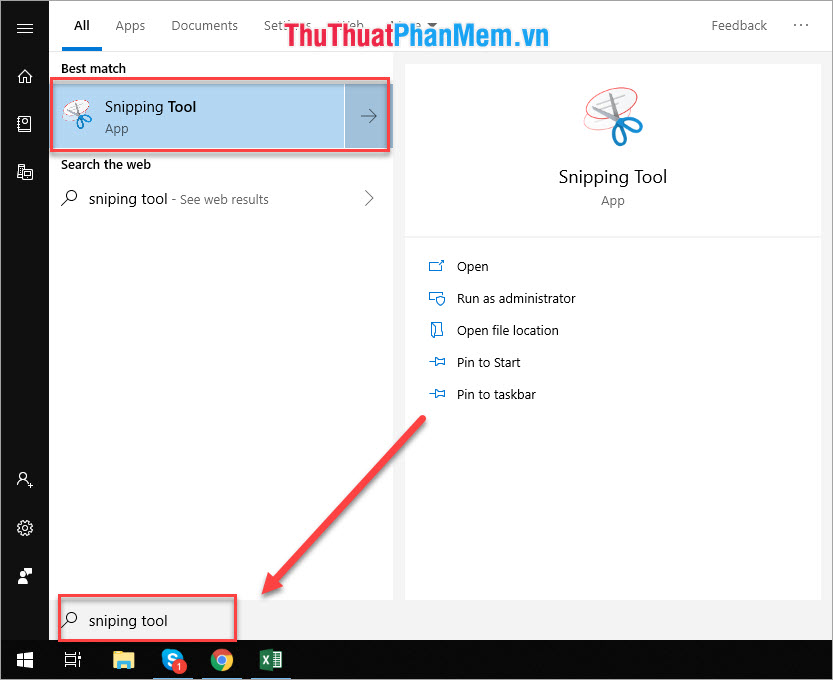
Snipping Tools is a completely new tool on Windows 10. This is an application available on Windows 10 in any version. Windows manufacturers added the Snipping Tool to support users to take screenshots faster. But the Snipping Tool is not available on the main screen, if you want to use it, do the following:
Step 1: Open the Start bar and enter Snipping Tool to open Snipping Tool .
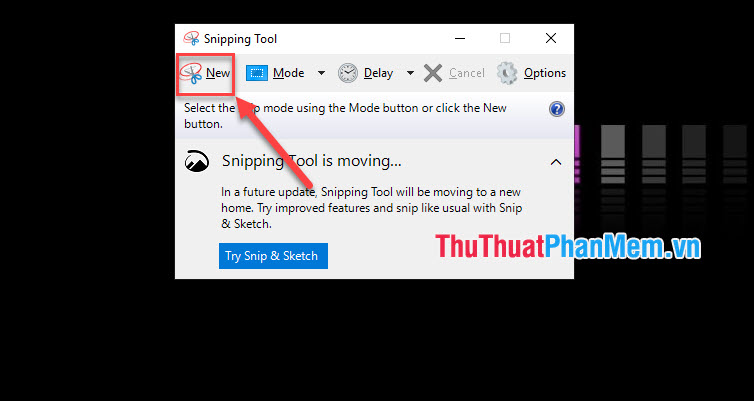
Step 2: When the Snipping Tool software opens, select New to take a screenshot.
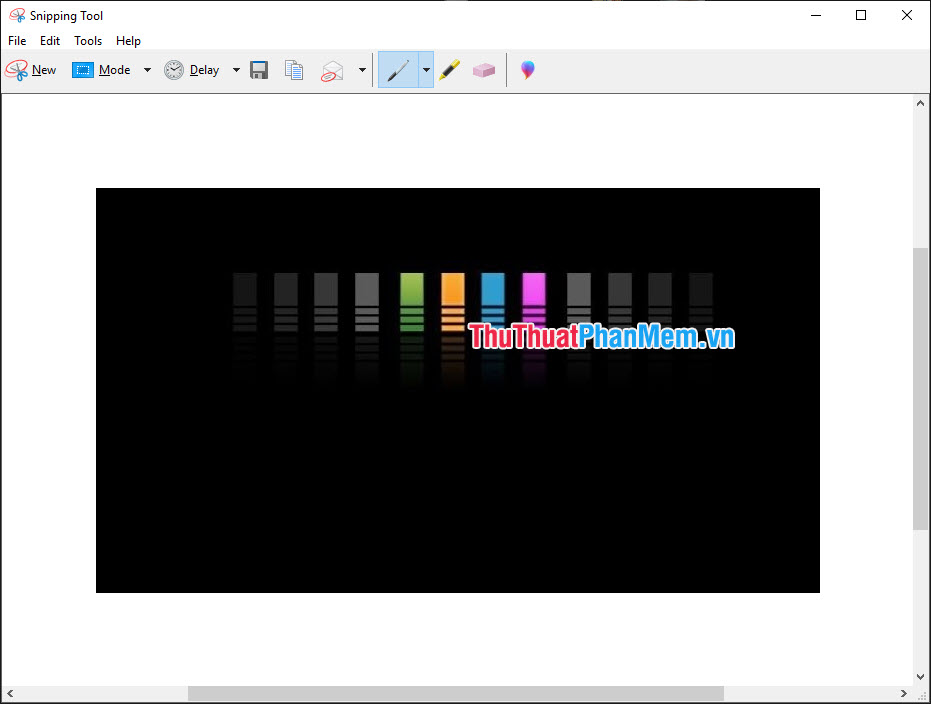
Step 3: Then you drag to select an area on the computer that you want to capture. The screen image of the computer will be captured.
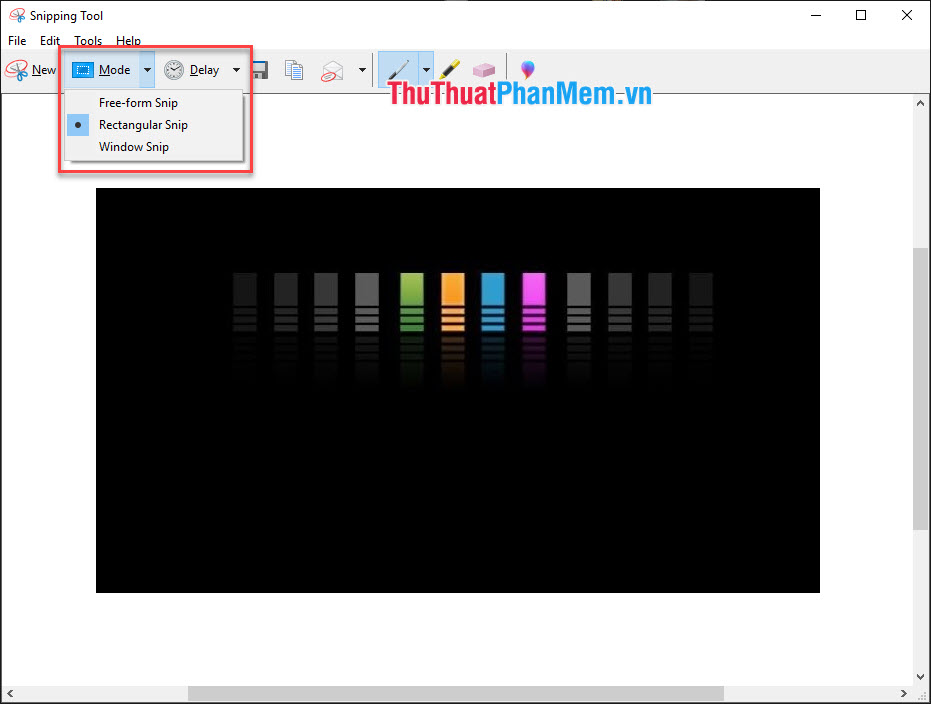
Step 4: If you need many different types of shooting you can choose Mode mode .
- Free-form Snip: Free-form shooting
- Rectangular Snip: Capture square and rectangular frames
- Windows Snip: Take a picture of the window
Step 5: After obtaining the image you like, press Ctrl + S to save.
2. Use the Paint tool
If you've been using Windows since earlier versions, you're probably familiar with this approach. If you don't require a lot of shooting options, this is a very reasonable way.
Step 1: You press the Print Screen key on your keyboard to proceed with the screenshot.

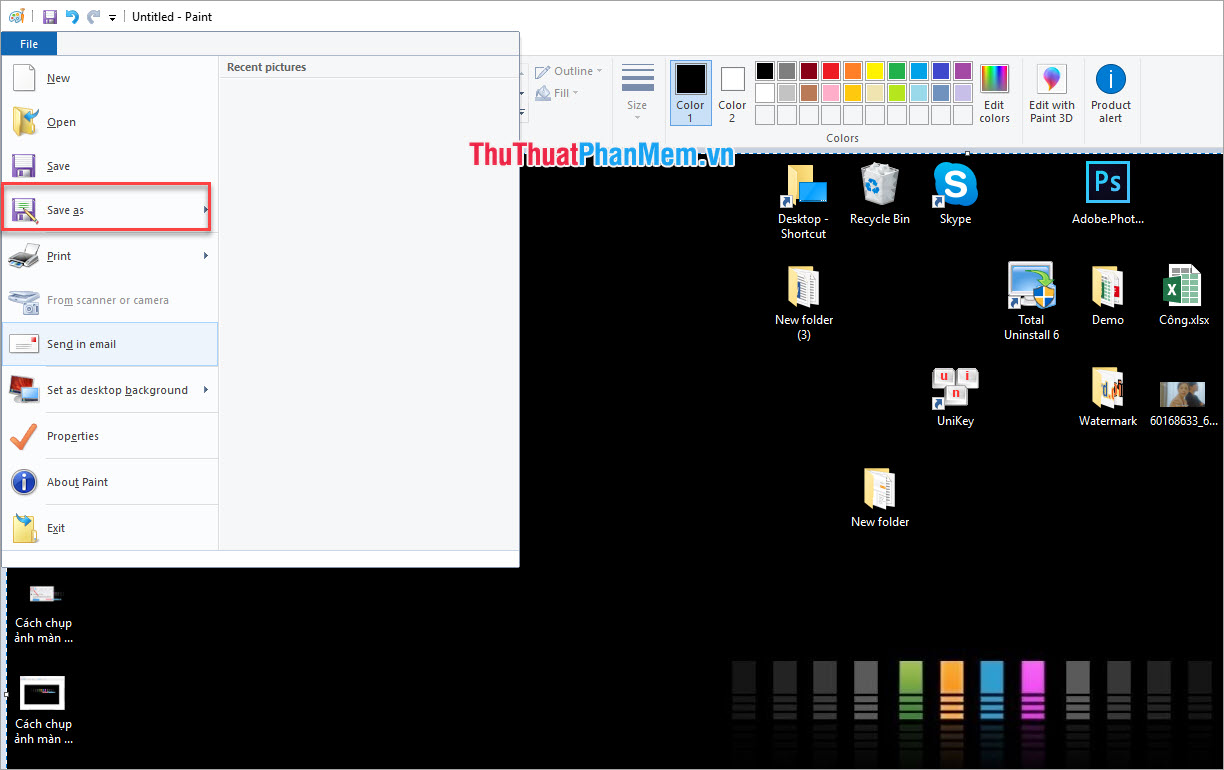
Step 2: Open the Paint tool by entering Paint in the Start bar.
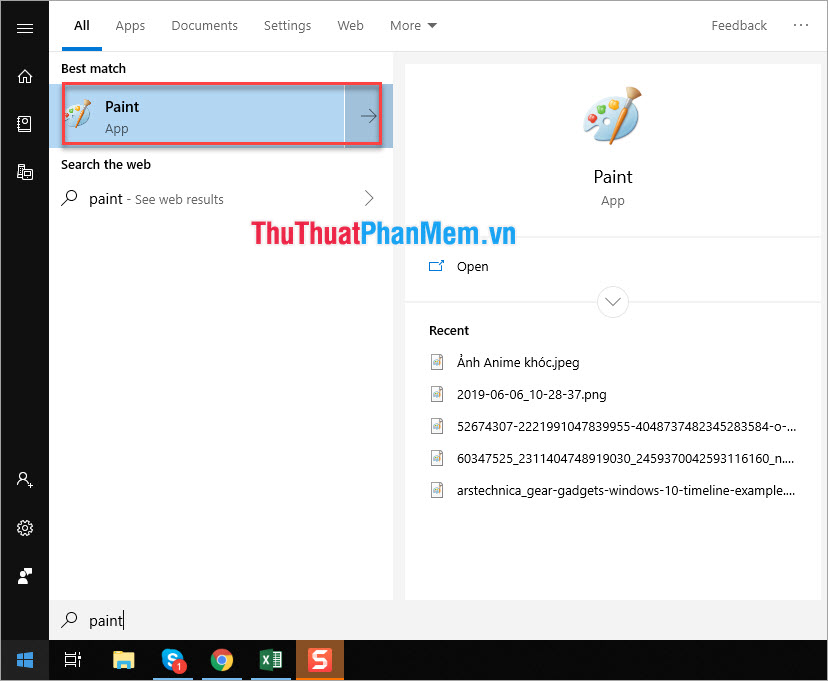
Step 3: When the Paint window appears, press Ctrl + V to paste the image just taken here. Or you can press the Paste key on the toolbar.
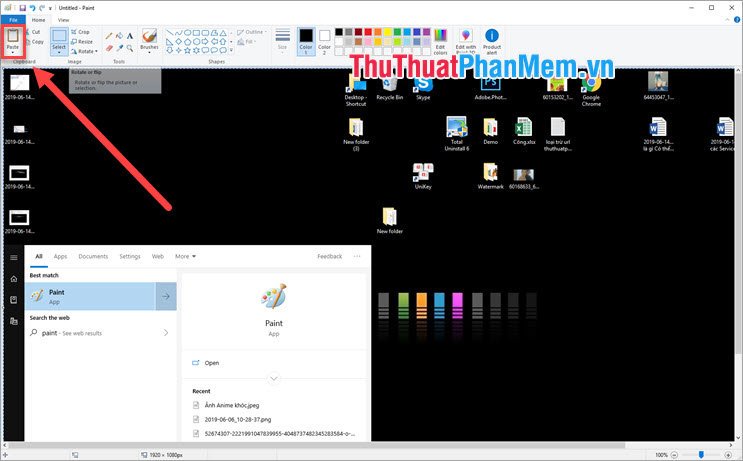
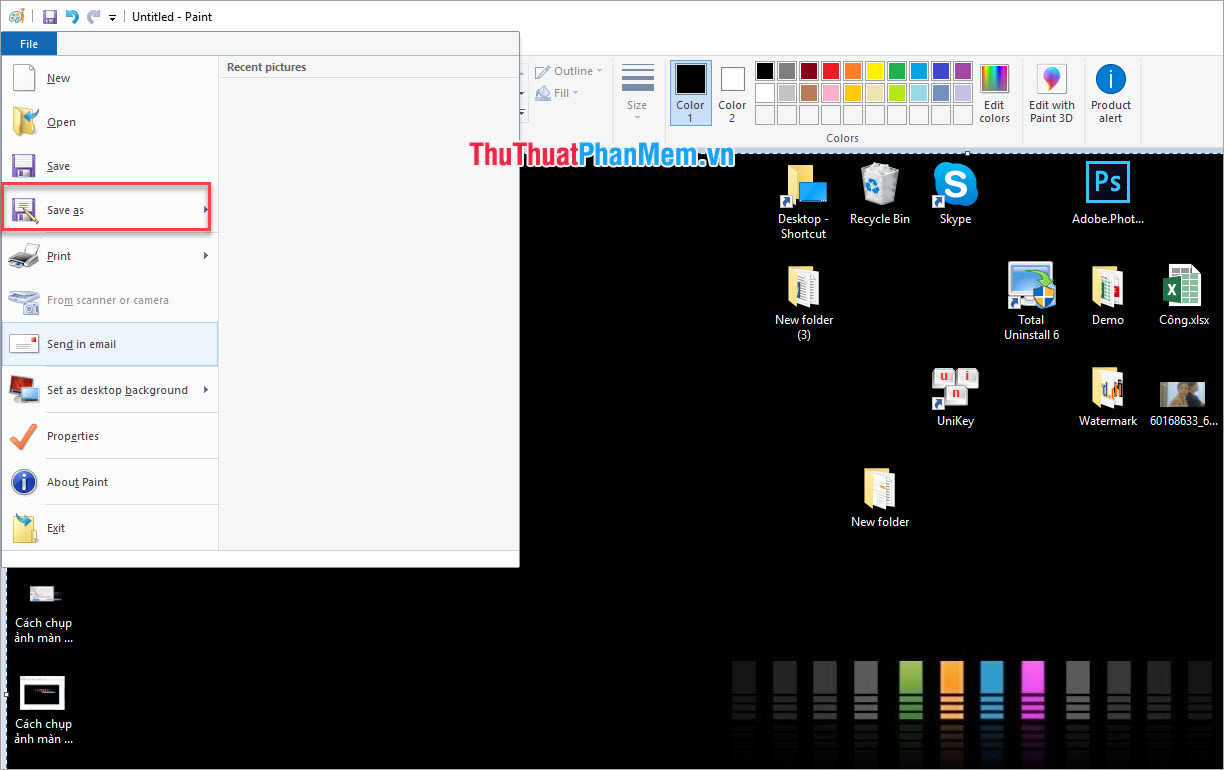
Step 4: Finally, you can save your screenshots by pressing Ctrl + S or clicking File -> Save As .
3. Take photos using Snagit tool
Snagit is an extremely famous software with many features of computer screen capture. Snagit is now easier to use and much faster than before. You can download the software here to use https://www. techsmith. com/screen-capture. html
Step 1: For Snagit you only need to install it once, the next time you start your computer, Snagit will run in the background. Just press the button to take a picture.
Step 2: To take photos with Snagit you have two ways.
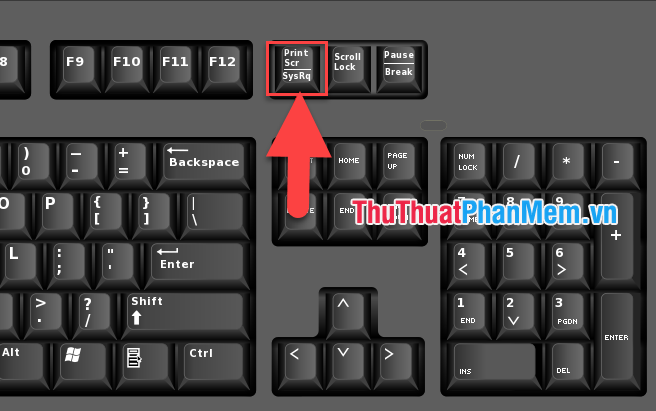
Method 1: You press the Prt Screen key on the keyboard.
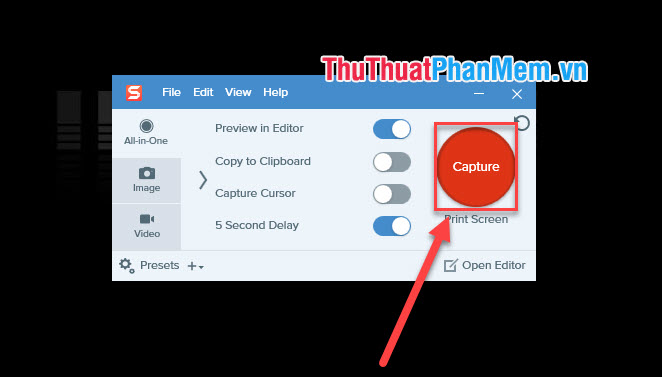
Method 2: You press the Capture key on the software.
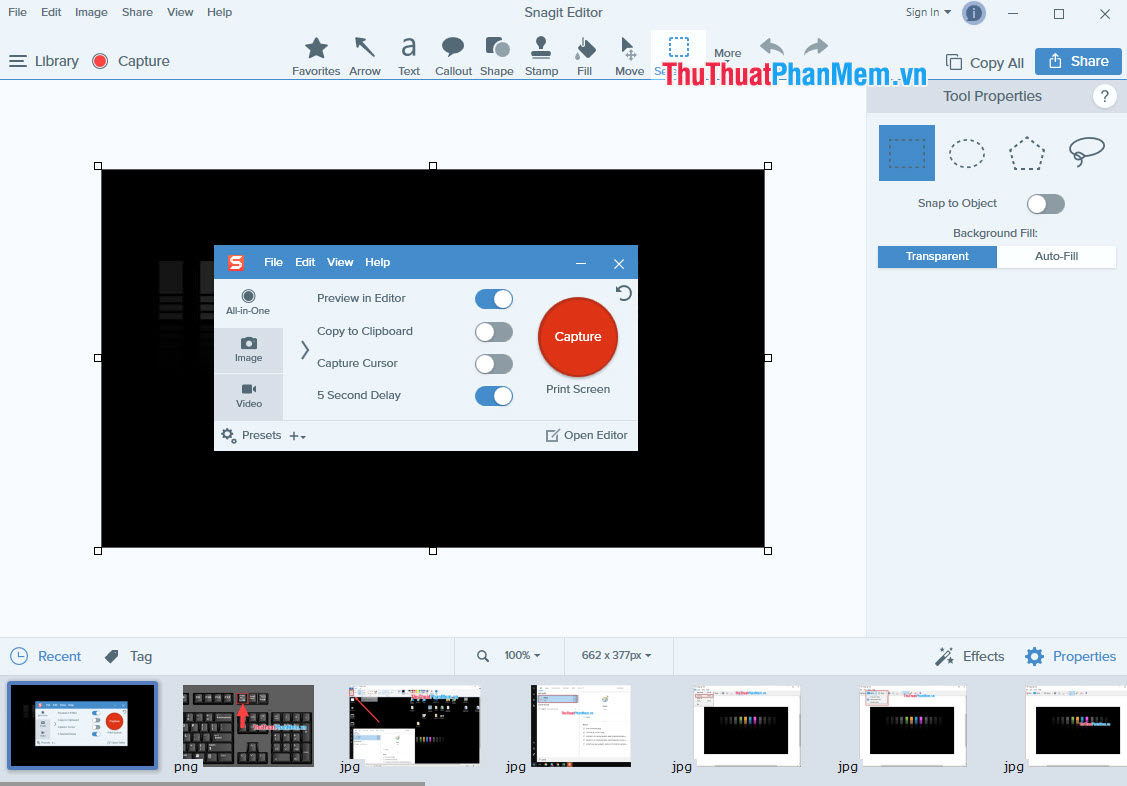
Step 3: Then you drag a selection on the computer screen for software to take photos. After taking a picture, you can use Snagit software to edit the image.
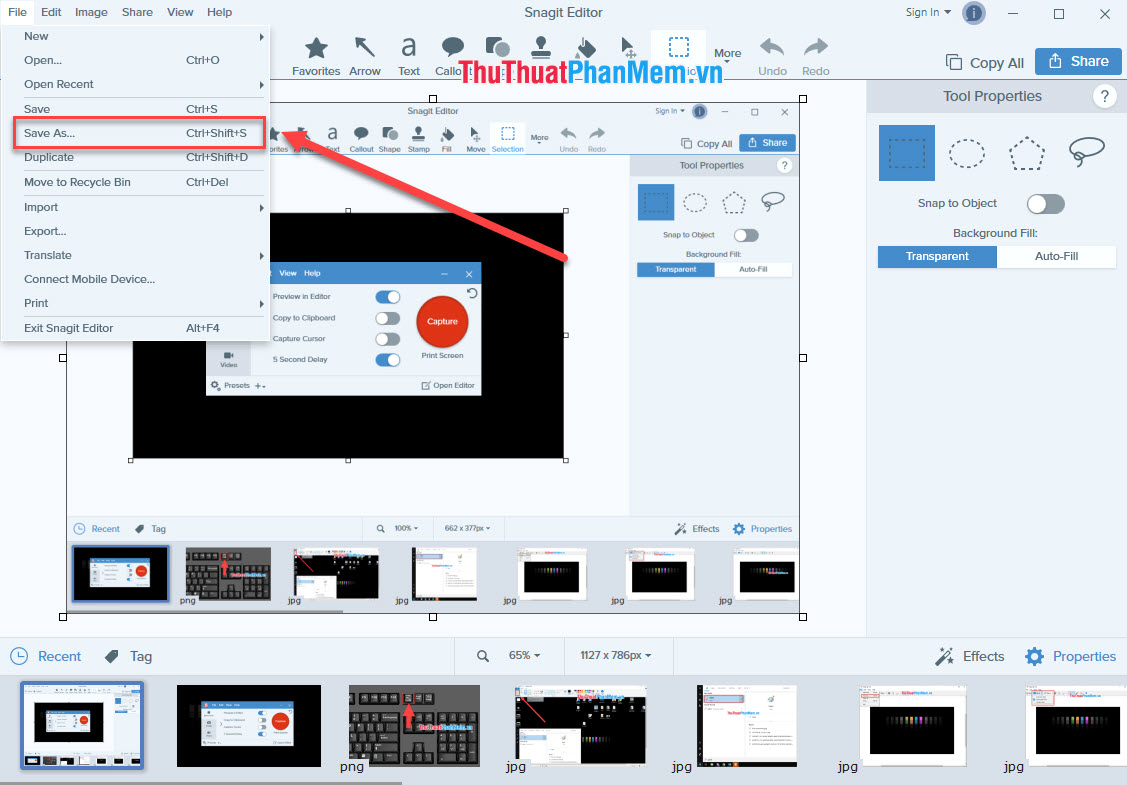
Step 4: After you're done, proceed to save your image by selecting File -> Save As .
Thus, the software tips have shown you how to take screenshots of Windows 10 quickly and easily. Good luck!
FAQ
What should I know about Take Screenshots Win 10 Fastest and Simplest?
Focus on the key features, requirements, limitations, and practical use cases explained in this guide.
How do I get the best results with Take Screenshots Win 10 Fastest and Simplest?
Follow the recommended steps, use current software or information, confirm compatibility, and review settings before major changes.
Are there any risks or limitations?
Potential limitations depend on compatibility, data quality, cost, privacy, support, and how the product or method is used.
Related Articles
 The Quickest and Simplest Way to Take a Screenshot on a Computer or Laptop18 minutes read
 5 Simple and Fastest Ways to Take Macbook Screenshots7 minutes read
 8 Fastest Ways to Take Screenshots on Dell Computers In 20268 minutes read
 How to Take Screenshots of Computers and Laptops 20245 minutes read
 How to Block Ads on Facebook Fastest and Simplest 20204 minutes read
 The Fastest Way to Take Long, Scrolling Screenshots on Windows 113 minutes read
Reader Comments 0
Sign in with email or Google to join the discussion.