Store 25GB of 'cloudy' data for free
With Skydrive, you can now store 25GB of data online for free.
After briefly announcing the development plan on SkyDrive's blog, Microsoft has officially raised the storage capacity on SkyDrive to 25 GB. This is a pretty good signal in the situation of online storage service, but many free users are limited many things like capacity, bandwidth, download speed .
Right now, sign up for a SkyDrive account via http://skydrive.live.com. After successful registration you log in to go to your management page.The initial ' balance ' in your account will be 25 GB.
In addition, your email account has an additional 5 GB, so the real value here is 30 GB. You can upload all of this data to use for personal or shared purposes.
Currently this article only introduces how to store data on Windows 7 operating system.
To start online storage first go to the Control Panel , double-click the User Accounts icon, continue to click the Link online IDs link in the left pane. Then click Add an online ID provider to download the Windows Live ID provider utility.
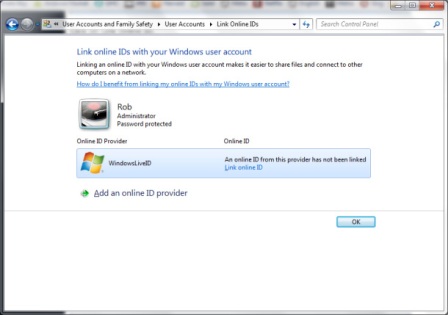
In the window that appears, click Download to download and install this utility on your computer. When the installation is complete, click the Close button to close the window. Go back to the Link online IDs interface, click on the Link online ID link to connect to the Windows Live ID account.
Next, log in to your Windows Live account (if you want to change your password, you need to go back to the Link online ID page in Control Panel ). After that, you have to create or set up SkyDrive storage folder on your computer, but this is also a confusing point for many people.
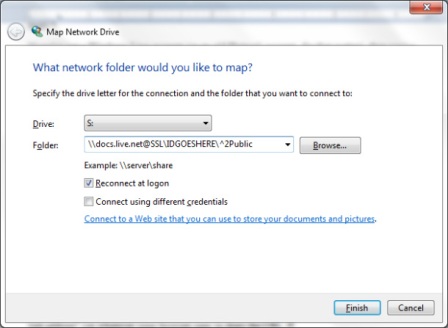
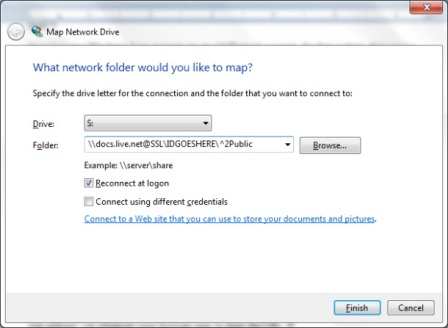
To do this, continue to open My Computer and select Map network drive and select the character for this storage partition (in this example, S ), then enter the code below into the text field next to Folder: docs. live.net@SSLIDGOESHERE^2Public.
To search for the account ID, go to the SkyDrive account management page, right-click the Files section and select Copy link address as shown below:
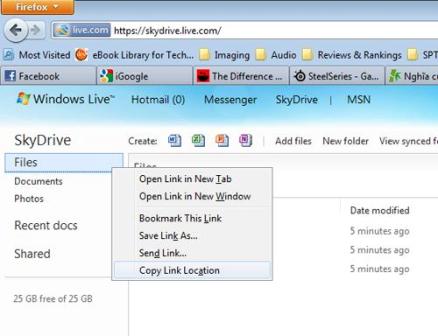
Then, open the NotePad utility, paste the copied content (select the Edit - Paste menu). However, you only need to " keep an eye " to the content after the " = " sign. Next, copy that content (highlight it and select the Edit - Copy menu or press Ctrl - C ).

Then go back to Map Network Drive folder and override the above ID section in the previous parameter (here is IDGOESHERE ), then click Finish to finish.
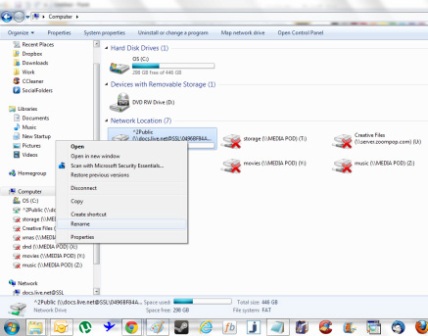
Finally, after logging in with the Windows Live ID, your new storage partition will show up in My Computer as shown below.
