Steps to Install Visual Studio: Powerful Microsoft Programming Tool
Link to download the latest version of Visual Studio. Detailed instructions on how to install Visual Studio on Windows operating system - a powerful programming tool from Microsoft.
Hello friends, when it comes to software products, software services or hardware infrastructure, technology equipment . it is impossible not to mention Microsoft tycoon.
With the programming language C# (C Sharp) rated in the TOP of the programming languages to learn in 2021, Microsoft also launched a very powerful programming tool that is Visual Studio.
Visual Studio is designed to be suitable for projects using the C# programming language and .NET technologies developed by Microsoft.
In this article, I invite you to come with me to the content of how to install Visual Studio (version 2019 – LTS) on Windows 10 operating system. Other operating systems are also completely similar!
#first. Download and install Visual Studio
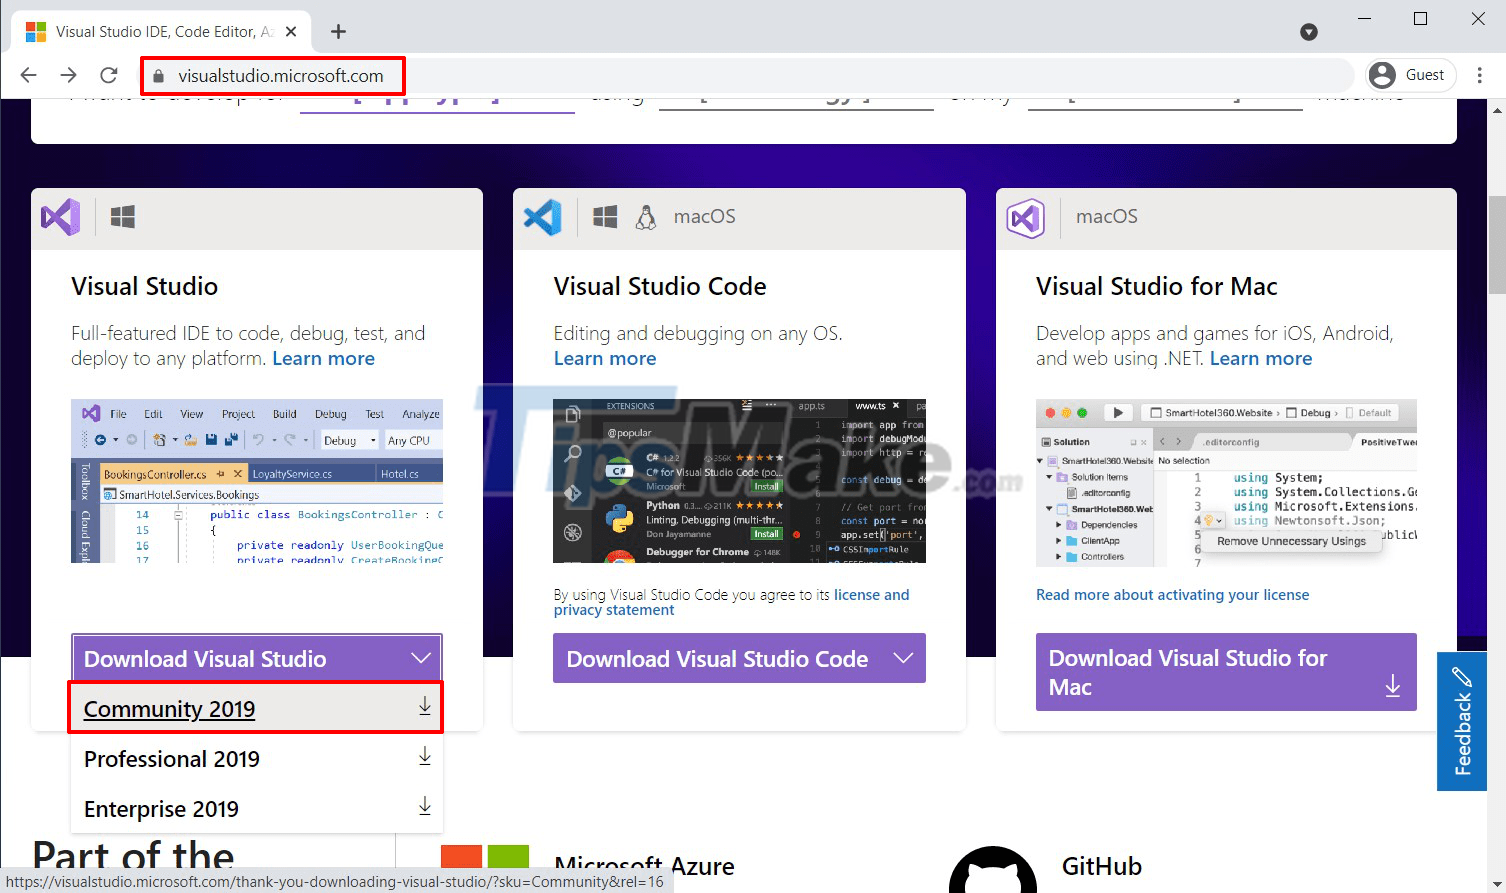
+ Step 1: You can download the installation file here.
+ Step 2: After having the installation file, double click to start the installation. Visual Studio will download some information from the network, so please remember to keep the Internet stable.

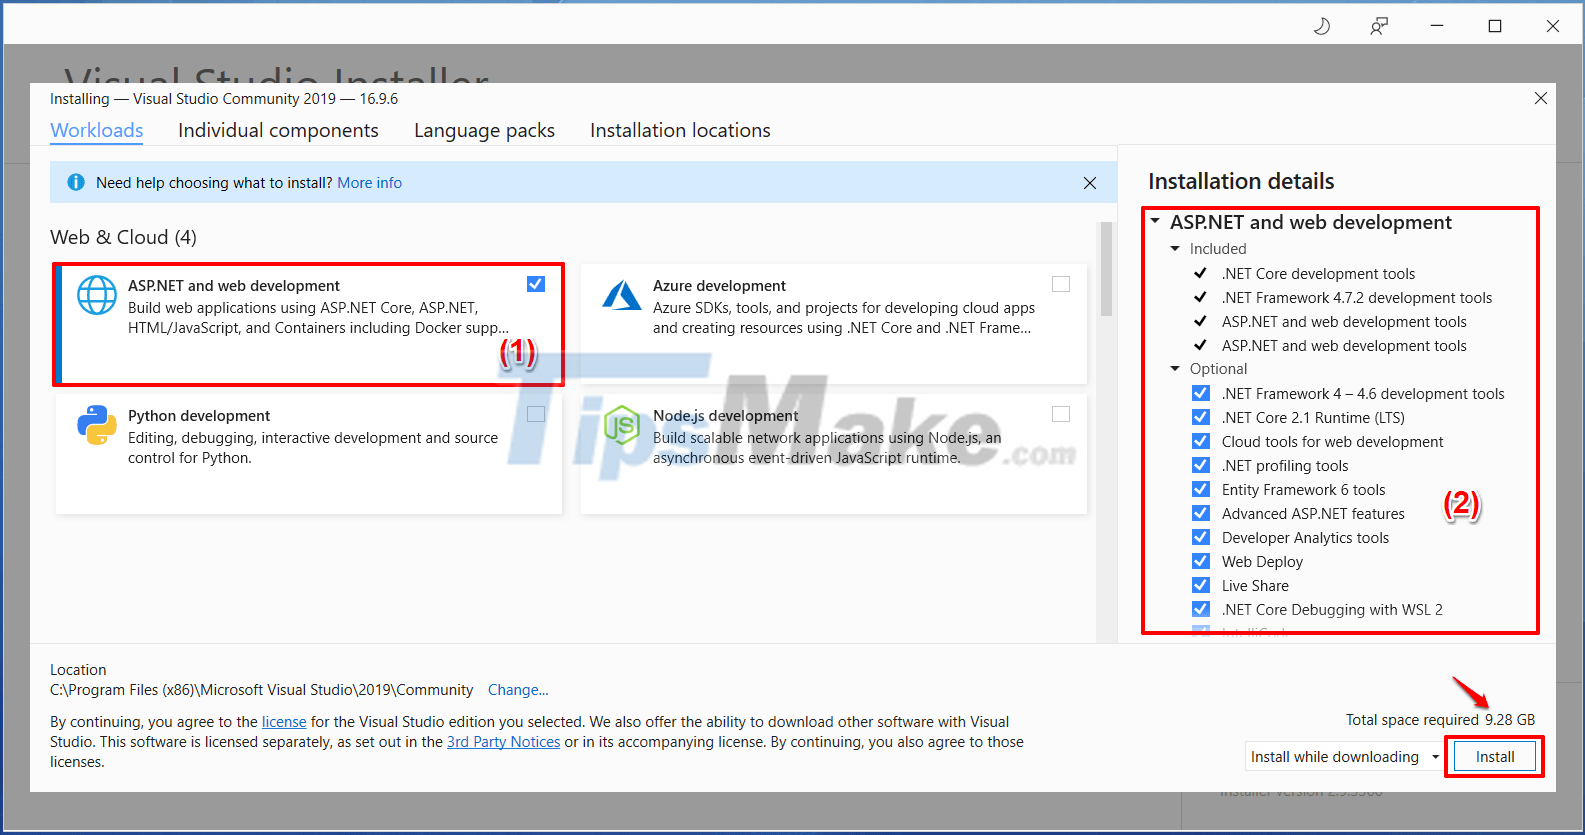
+ Step 3: Next you will choose the options to install, Visual Studio has supported quite a lot of technologies.
Here for quick I only choose ASP.NET and web deveopment. The storage space requirement is 9.28 GB => Then you click Install to start the installation.
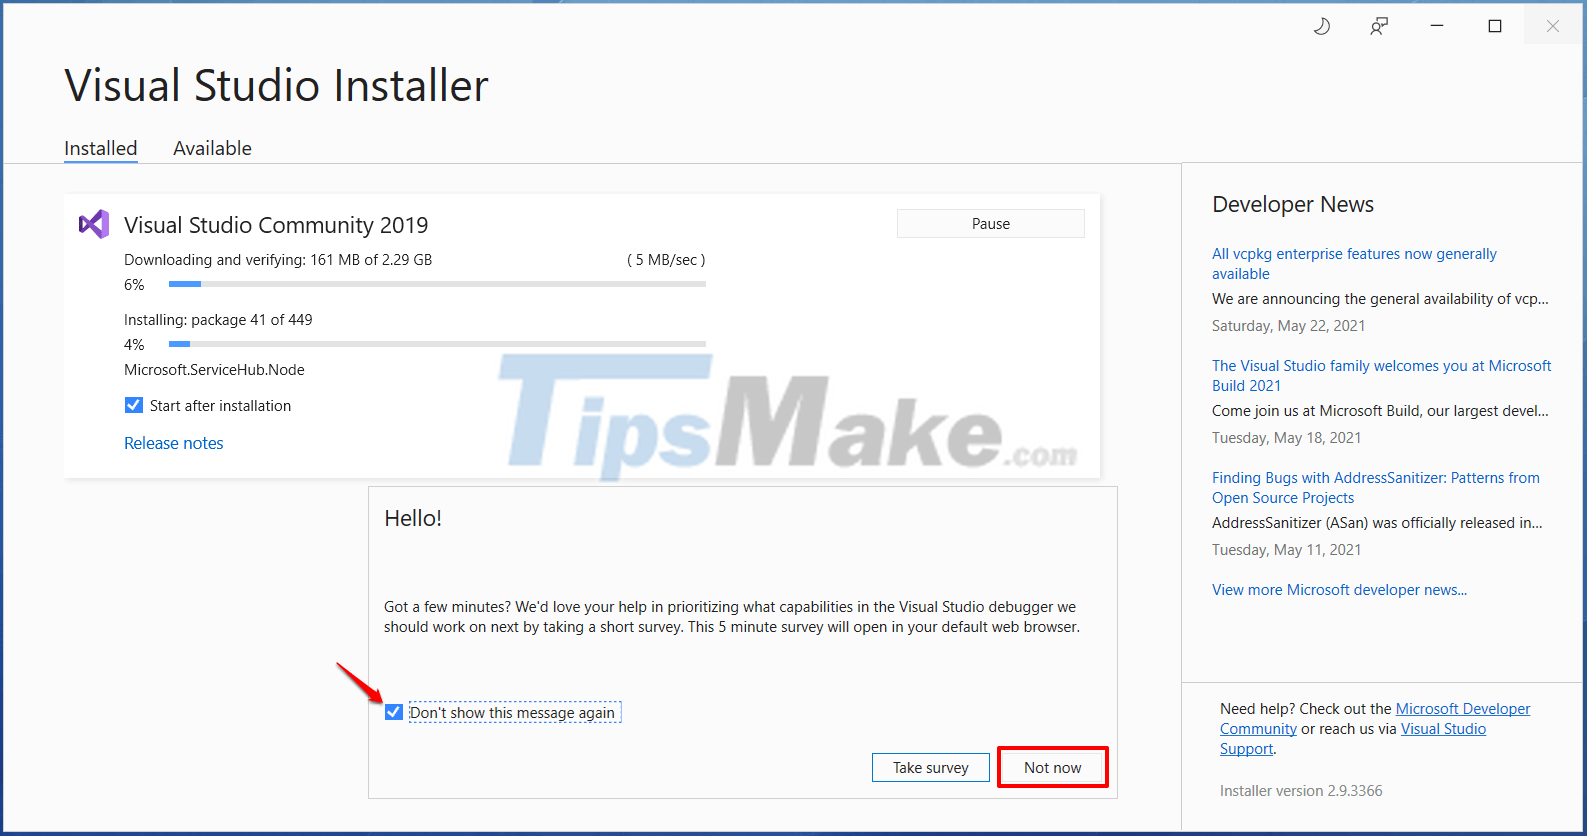
The installation process is relatively long (5-7 minutes) due to the large installation size.
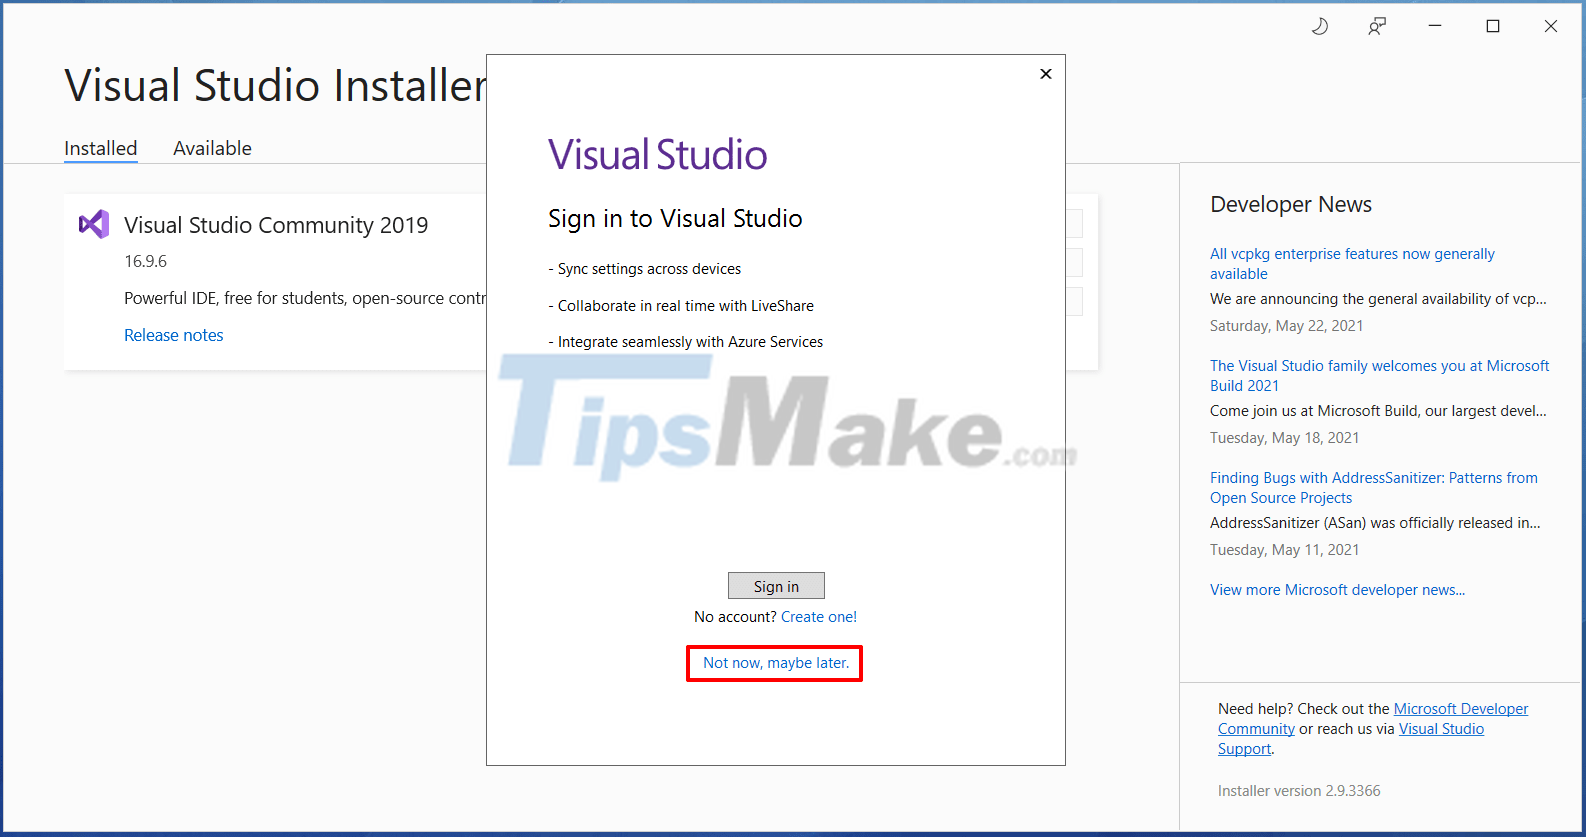
+ Step 4: After the installation is complete, there will be a popup as shown below for you to register for an account. You can click Not now, maybe later to register later.
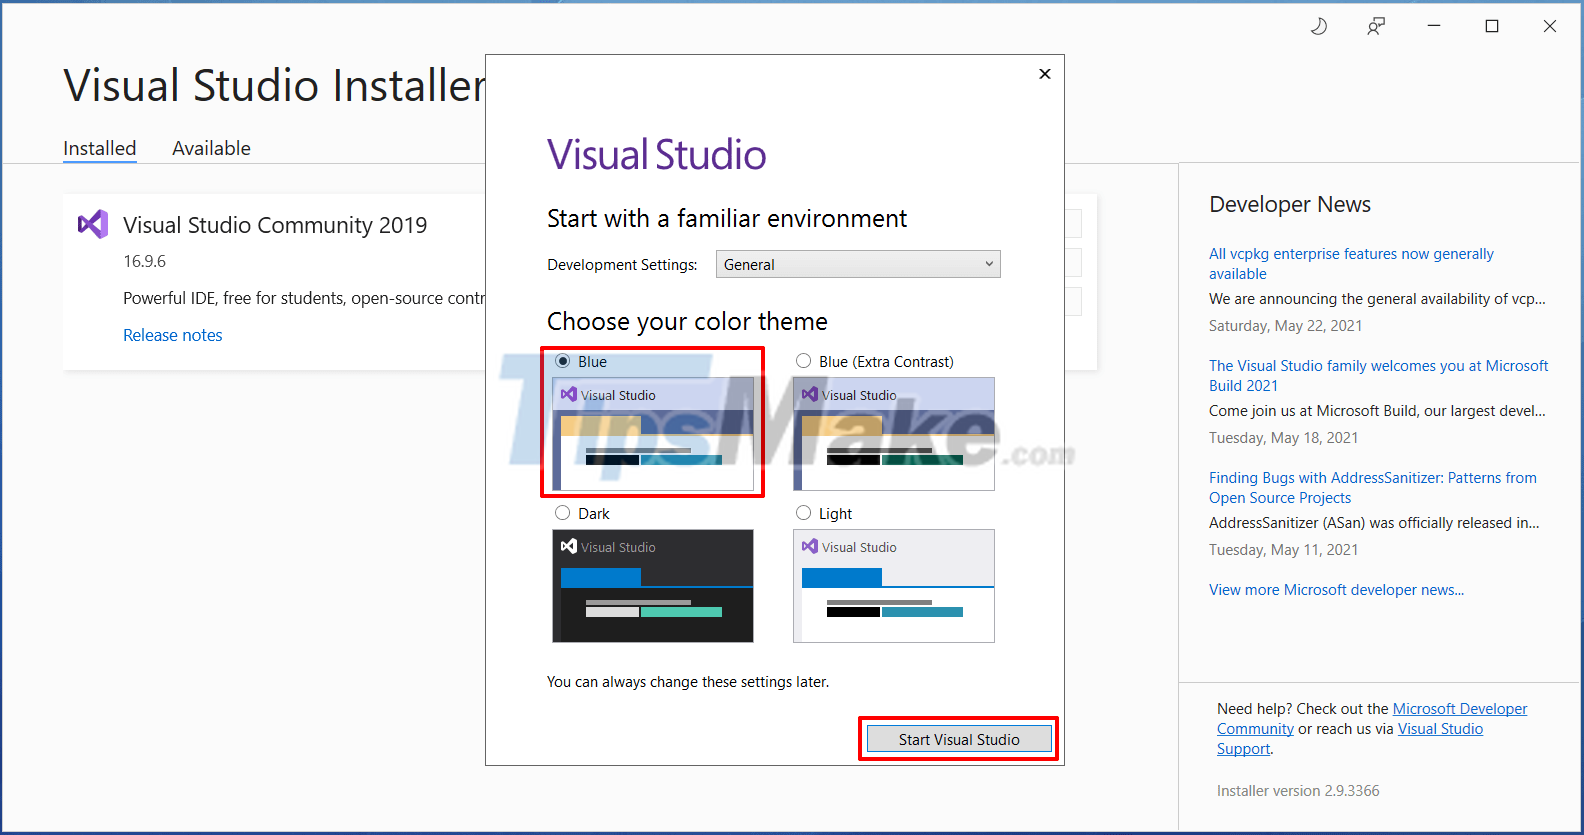
+ Step 5: Next, you will choose a theme for Visual Studio (there are 4 basic themes, you can choose any theme). Here I choose Blue => then click Start Visual Studio.
#2. Create a New Project in Visual Studio
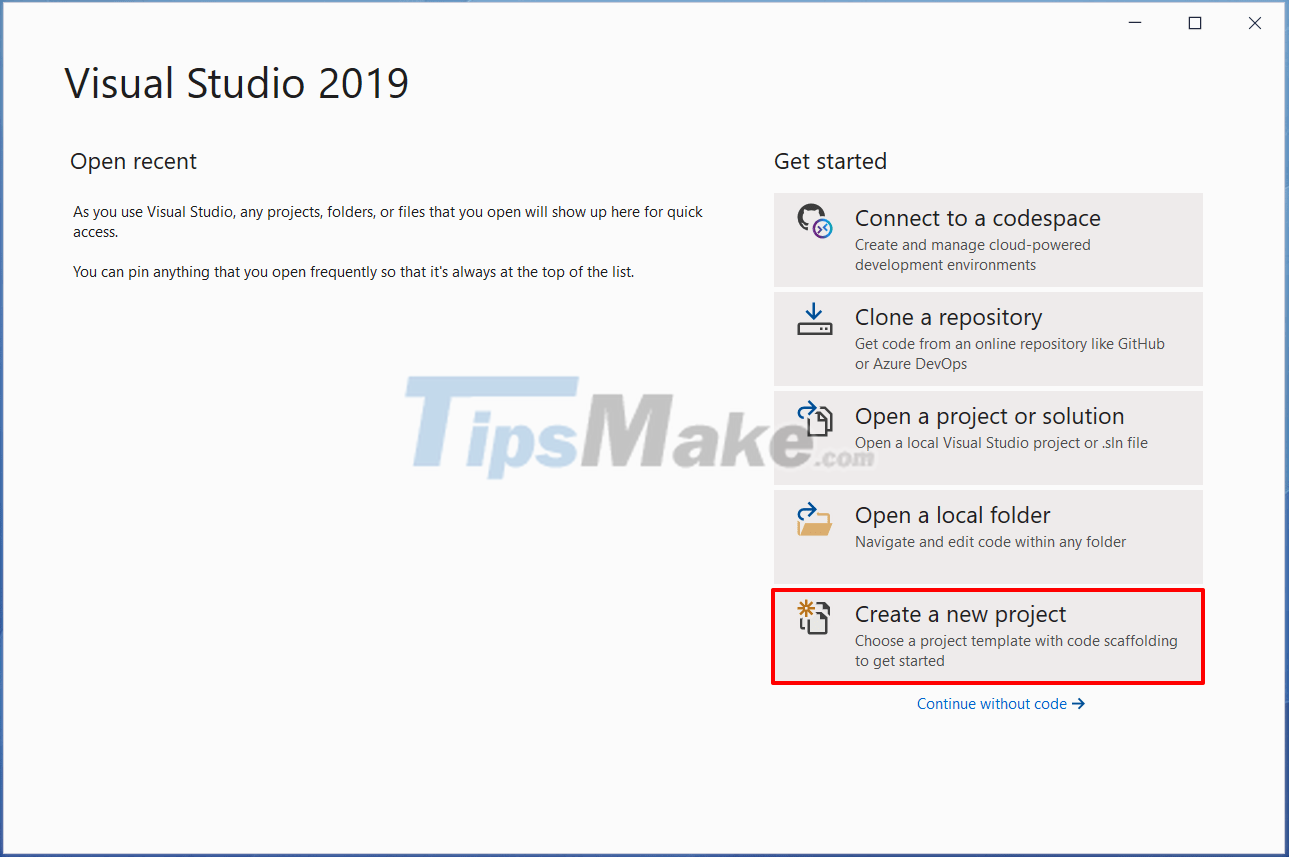
+ Step 1: This is the first interface when you use Visual Studio. There are a few options like:
- Clone a repository: You get code from online repos like Github.
- Open a project or solution: Open an existing Project on your machine.
- Open a local folder: Open a folder on the computer.
- Create a new project: Create a new Project.
+ Step 2: Here I choose Create a new project to create a new simple Project.
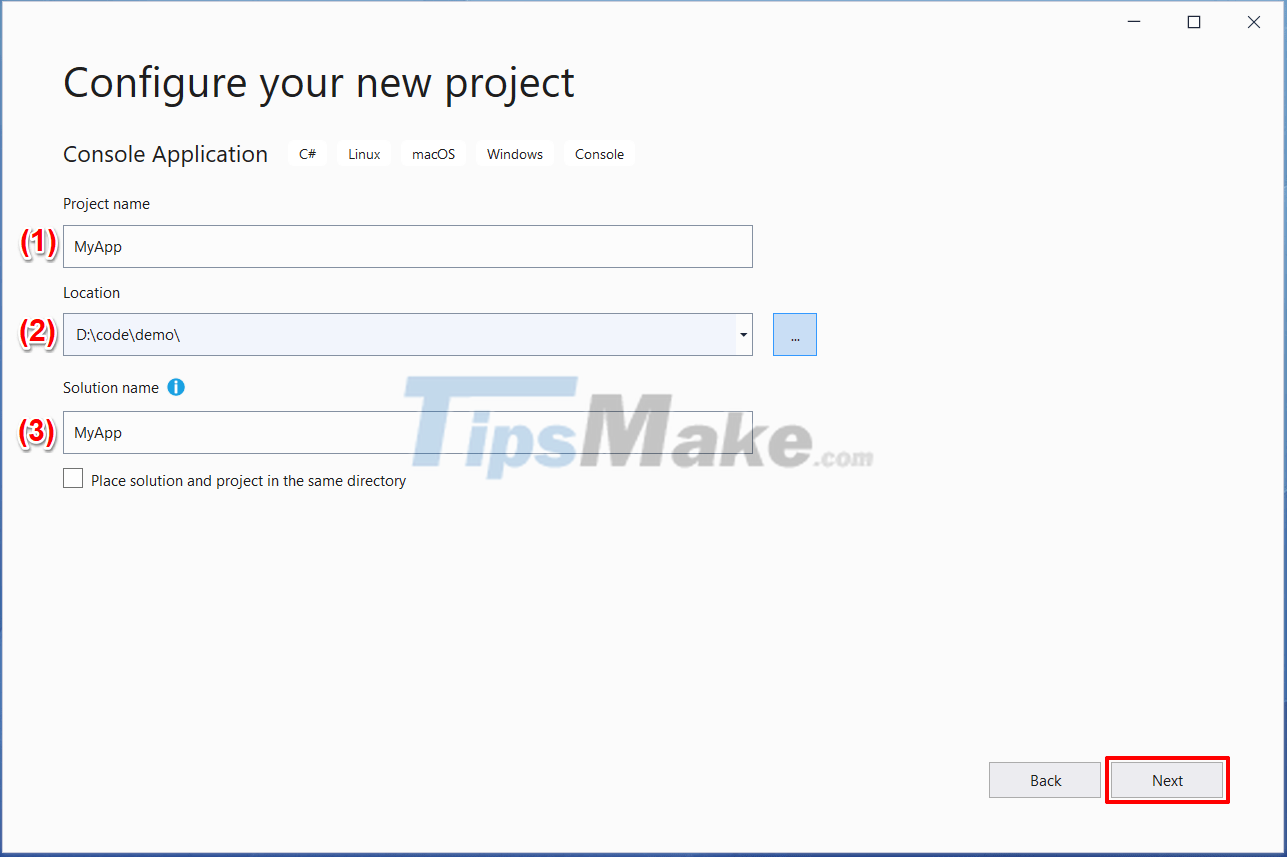
There are many different types of Projects and for simplicity, I will create a Console Project with C# language and function to print the word Hello World to the screen as shown below.
=> Then click Next to continue.

+ Step 3: Some information you have to fill in is:
- Project name: Project name
- Location: Location to save Project
- Solution name: It's the same as the Package name, but in Visual Studio it's called Solution.
=> Then click Next to continue.
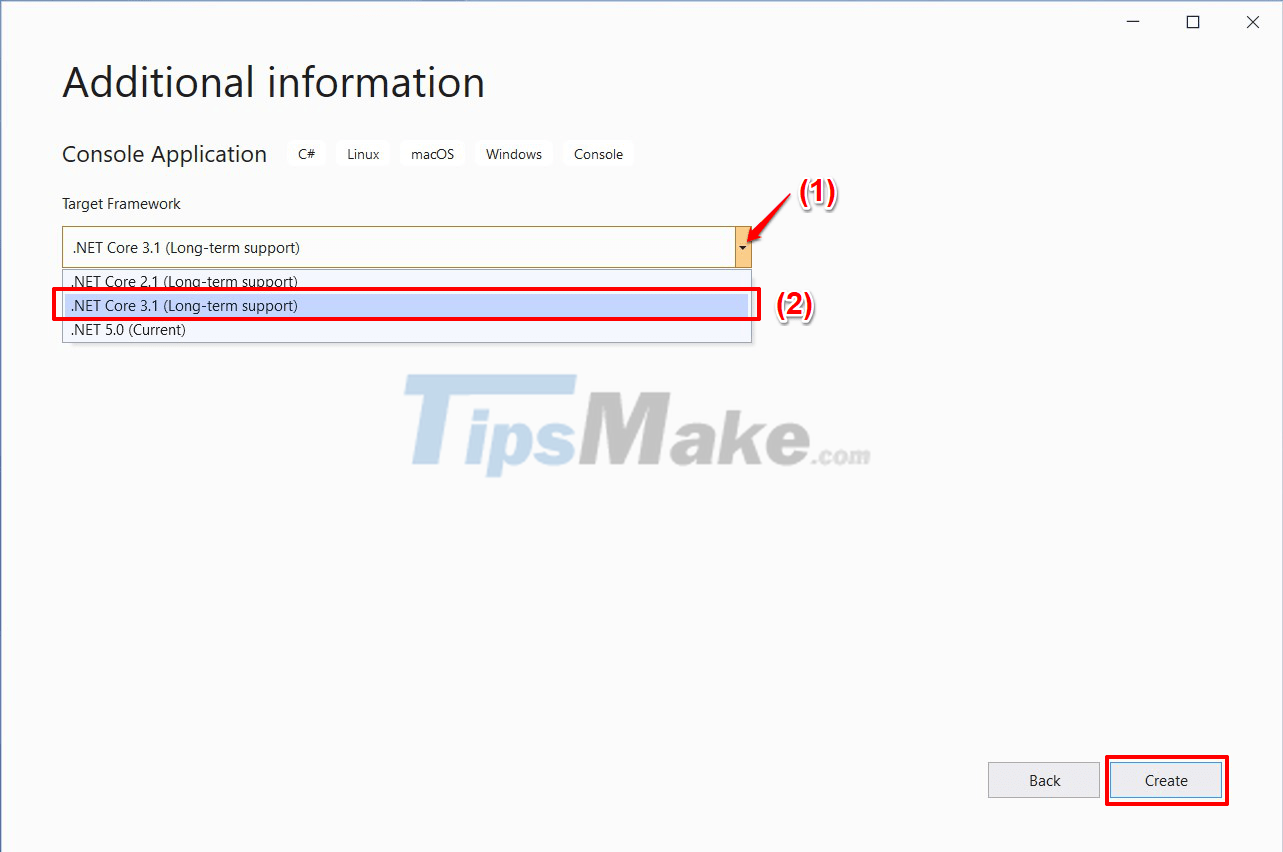
+ Step 4: Next you have to select Target Framework, here I choose .NET Core 3.1 (LTS) => then click Create to create a new Project.
And this is the project as well as the default C# code generated by Visual Studio for you.
- (1) – You can click this icon to run the project.
- (2) – The C# code will print to the console the text 'Hello World'
- (3) – Logs during program running
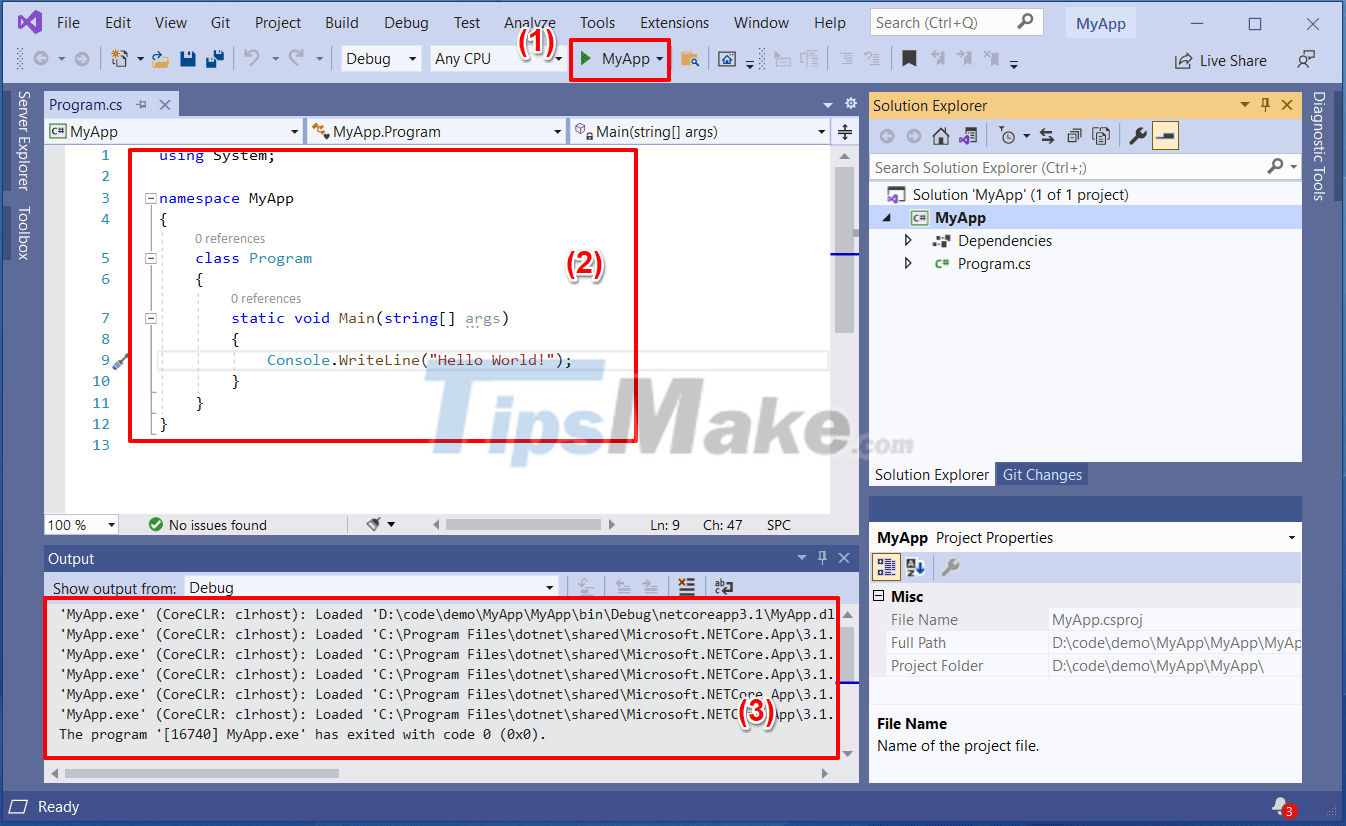
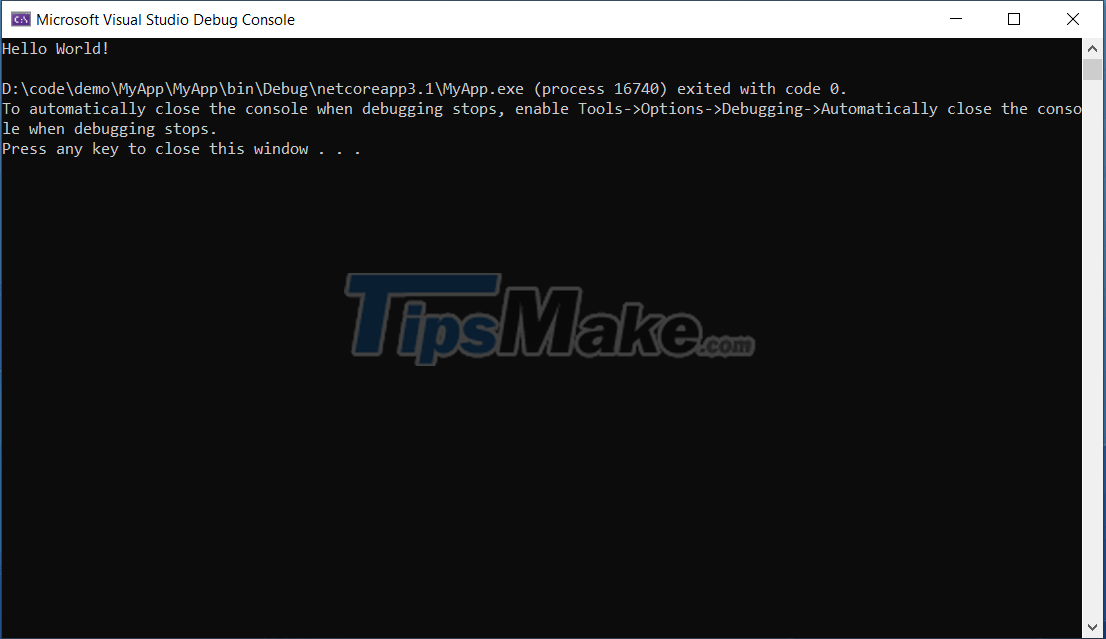
Ok, and this is the text printed after running the program.
#3. Conclude
Okay, so in the article, I have successfully installed Visual Studio with you on Windows computers - a powerful programming tool from Microsoft, which supports very well the C# programming language.
The version I used to install and guide in the article is the community version, the personal version so it's free and of course it will be less functional than the business versions.
Hope this article will be useful to you. See you in the next tutorials.