How to create a file to install Visual Studio offline
Visual Studio 2017 is the most awaited software from Microsoft. The first version of the Visual Studio IDE was released on March 19, 1997, which is Visual Studio 97.
Table of Contents
Microsoft launched Visual Studio 2017 on the occasion of the 20th anniversary of the introduction of Visual Studio IDE. Visual Studio 2017 launched on March 7, 2017. Visual Studio 2017 is the most awaited software from Microsoft. The first version of the Visual Studio IDE was released on March 19, 1997, which was Visual Studio 97. At that time, C # was not yet released and Visual Basic languages, Visual C ++, etc. were part of this great tool.
Readers can download Visual Studio 2017 here. The Visual Studio 2017 has three versions: Community, Professional and Enterprise. If you do not want to register for a Microsoft account to use Visual Studio, readers can choose the Visual Studio Community version. It's free and has most of the features you need. Please install this tool and start programming right away!

It also includes .NET Core features and cross-platform development if you install all necessary packages. Without a Visual Studio 2017 Community license, the features will be limited.
However, if you need all the features of Visual Studio 2017, users need to purchase the license and download it from the Visual Studio site. Readers can also compare features between all three different products of Visual Studio. The free trial version is also available for two Professional and Enterprise products.
Before installing, take note of hardware review and prerequisites. According to the official website of Visual Studio, the following prerequisites must be met.
Supported operating systemsVisual Studio 2017 will install and run on the following operating systems:
- Windows 10 version 1507 or later: Home, Professional, Education, Enterprise (LTSB is not supported).
- Windows Server 2016: Standard and Datacenter.
- Windows 8.1: Basic, Professional and Enterprise.
- Windows Server 2012 R2: Essentials, Standard and Datacenter.
- Windows 7 SP1 (With the latest updates): Home Premium, Professional, Enterprise and Ultimate.
- 1.8Ghz or faster processors. Minimum is dual core.
- 2GB RAM, if there is 4GB of RAM, the better (Minimum 2.5GB if running on a virtual machine).
- Hard space: 1GB to 40GB, depending on the features installed.
- Video card supports minimum resolution of 720p (1280x720): Visual Studio works best with WXGA (1366x768) or higher resolution.
Visual Studio is available in the following languages: English, Chinese (Simplified), Czech, French, German, Italian, Japanese, Korean, Portuguese, Russian, Spanish and Turkish.
Users can also choose the language for Visual Studio during the installation process.
Visual Studio Installer is also available in the above 14 languages and matches the Windows language (if available).
Note : Visual Studio Team Foundation Server Office Integration 2017 is available in 10 languages supported by Visual Studio Team Foundation Server 2017.
Required requirementsNET Framework 4.5 is required to install Visual Studio. Visual Studio requires .NET Framework 4.6.1 to be installed during setup.
Windows 10 Enterprise LTSB version is not supported. You can use Visual Studio to build Windows 10 LTSB-based applications.
Internet Explorer 11 or Edge is required in Internet-related cases. Some features will not work without installing IE 11 / Edge version or newer versions.
Requires Windows 8.1 Pro or Enterprise (x64) versions to promote emulator support. In addition, a processor that supports Client Hyper-V and Second Level Address Translation (SLAT) is also required.
When the necessary conditions are met, the user can start the installation.
Create an offline installation file
Visual Studio 2015 or earlier versions of Visual Studio come with installation packages and when users download any of these versions the entire package will also be installed. However, this time Visual Studio has taken a step to make installation easier. Sometimes, users do not need the entire installation package. Simply download what you need. It is a custom installation package.
Therefore, when Visual Studio 2017 is released, Microsoft only provides vs_enterprise.exe (this name will be different for each version). When running this EXE file, users will choose the installation package according to their needs. The software will download all these packages online and install them.
Even if you can install it online, sometimes you still need an offline installation file (aka Offline Installer). Readers can cause Offline Installer to use the downloaded EXE file by following these steps. First, open the command prompt and type the following command into:
- For .NET web and .NET desktop development, run the command: vs_enterprise.exe as the download file name, if the Visual Studio file has a different name, the right side will change the file name in the installation command.
vs_enterprise.exe --layout c:vs2017layout --add Microsoft.VisualStudio.Workload.ManagedDesktop --add Microsoft.VisualStudio.Workload.NetWeb --add Component.GitHub.VisualStudio --includeOptional --lang en-US
- For .NET desktop and Office development, run the command:
vs_enterprise.exe --layout c:vs2017layout --add Microsoft.VisualStudio.Workload.ManagedDesktop --add Microsoft.VisualStudio.Workload.Office --includeOptional --lang en-US
- For development C ++ desktop, run the command:
vs_enterprise.exe --layout c:vs2017layout --add Microsoft.VisualStudio.Workload.NativeDesktop --includeRecommended --lang en-US
In the following article, we will install all features and use the following command:
vs_enterprise.exe --layout "C:Visual Studio 2017" --lang en-US
Important note: C: Visual Studio 2017 is the folder that will contain the offline Visual Studio 2017 installer. The full feature set can weigh more than 40GB, so if your C drive doesn't have enough free space, choose another drive to save the installation file.
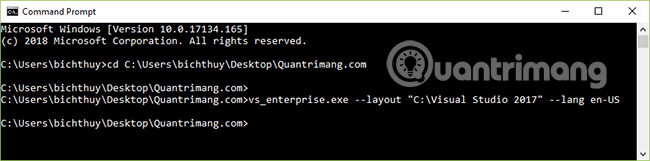
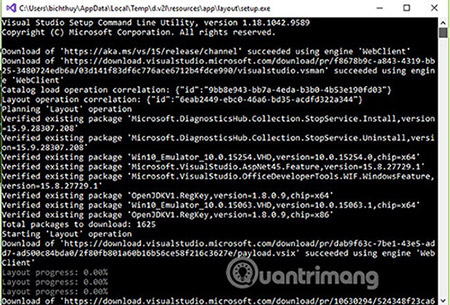
The download location ' C: Visual Studio 2017 ' and the language can be changed if needed. After pressing Enter, it will take a few minutes to finish downloading the package, so be a bit patient.

You will see the following screen:
After the download process is complete, you will find the installer offline with all packages in the directory you originally selected as follows:

Install Visual Studio 2017
Go to the location where the Visual Studio 2017 download file is located and run the setup (in this example, vs_enterprise.exe).
- vs_enterprise.exe for Visual Studio Enterprise.
- vs_prof Profession.exe for Visual Studio Professional.
- vs_community.exe for Visual Studio Community.
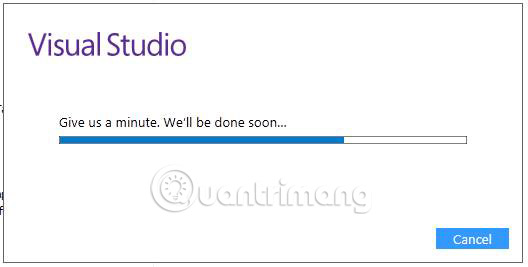
The installation process will take place within a few minutes and display the first screen as follows:
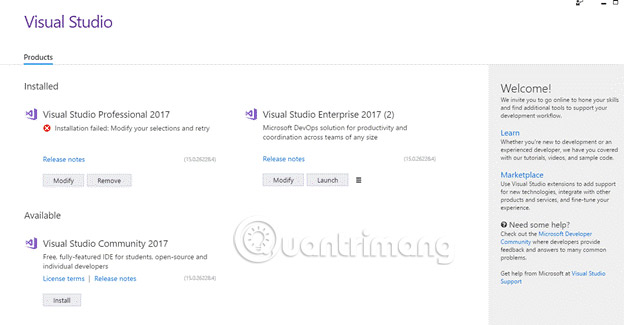
Now, Products Window will display and all available products will be displayed. As in the example given below, all the products listed are related to the Visual Studio IDE. You can install any of them but if you don't have a license or have not registered, you should switch to the Visual Studio Community 2017.
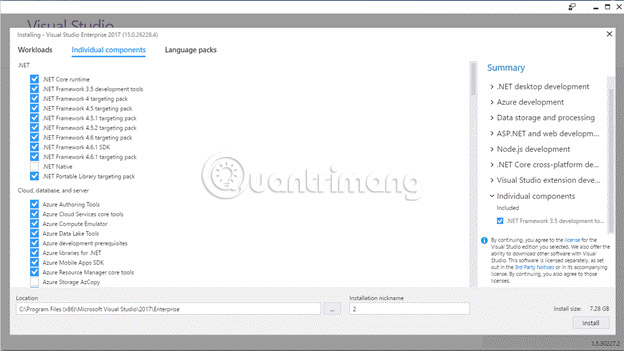
In the case of today's example, the article will install the Enterprise version of Visual Studio 2017. The first screen will show where you can select the required components to install: .NET Desktop Development, ASP.NET and Web Development, Azure Development, Node.js Development, etc. Just select the components you want to install.

If you are interested in installing individual packages, go to the Individual Components tab , select the required individual components and click on the Install button at the bottom. Visual Studio 2017 with selected components will be installed.
After installation, you can also modify the components. That means you can install additional components or remove installed components. It all depends on you. If you forgot to install a component, just click the Modify button below and add / delete components.
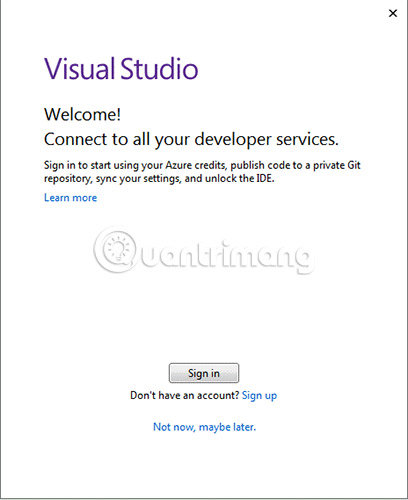
To complete the installation process, just click the Launch button . The program will proceed to login to authenticate the Visual Studio 2017 Enterprise license.
After clicking the Launch button , you will be asked to log in with your Visual Studio account to verify the license. When successfully logged in with valid login information, users will be redirected to the first screen of the Visual Studio 2017.
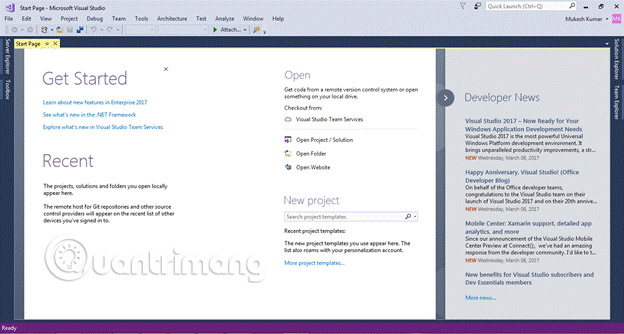
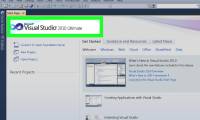
This is the first screen of the Visual Studio 2017.
Today, readers have learned how to install Visual Studio 2017 with the offline installation file by following these simple steps.
Hope this article will help you. If you encounter any difficulties, please leave a comment in the comment section below. We are ready to assist you in the best possible way!
Good luck!
See more:
- Instructions for installing .NET Framework 3.5 Offline on Windows 10
- Install Tomcat and deploy web applications with Rex
- Instructions to uninstall many applications at once on Windows 8.1
Was this article helpful?
Your feedback helps us improve.
Related Articles
 How to install Visual Studio Code on Windows 103 minutes read
 Visual Studio 2015 is about to be discontinued, what should you pay attention to?2 minutes read
 Steps to Install Visual Studio: Powerful Microsoft Programming Tool5 minutes read
 How to Install Visual Studio Using Parallels Desktop on a Mac4 minutes read
 How to Install Visual Studio Code on Ubuntu 20.044 minutes read
 Visual Studio Community - Download Visual Studio Community here.3 minutes read
Reader Comments 0
Sign in with email or Google to join the discussion.