How to Install Visual Studio Using Parallels Desktop on a Mac
Mac computers don't support most Windows applications, including Visual Studio. There are similar compilers that run natively on Mac, like Xamarin Studio and Visual Studio Code. However, the easiest and most efficient method for using...
Table of Contents
Part 1 of 3:
Installing the Parallels Desktop Application
-
 Purchase Parallels. You can purchase the latest version from the Parallels website or any other third-party seller. If you are student, instructor or faculty staff you can purchase Parallels at a discount.
 -
 Install Parallels. The installation is straight forward, just like you install any other application on your Mac.
- Once you have installed the app on your computer, you can open the application.
Part 2 of 3:
Installing Windows
-
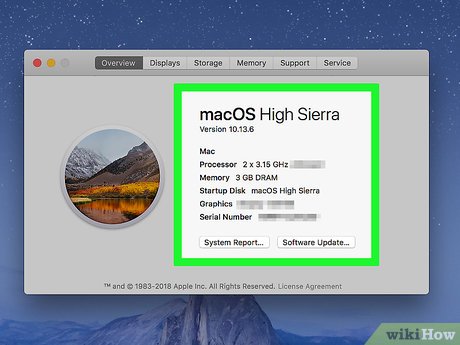 Check the system requirements. Before your buy any Windows software, you need to make sure it's compatible with your system; otherwise it won't work. If you're not sure which OS X version, processor, memory (RAM) and hard drive space your computer has, then use about system information to find out.
 -
 Choose a compatible Windows version. Check which versions of Windows will work with your Mac.[1]
 -
 Purchase Windows. If you have a Windows copy on a DVD, you need to create a disk image. If you have a copy on a flash drive, you just need to to download the ISO disk image from Microsoft. Otherwise, you need to buy full Windows version that come as a disk image file (ISO).
- Purchasing a brand new Windows copy is a bit expensive. There are discounts available for students. Make sure you save product key somewhere safe, because you'll need it later.
-
 Download Windows. This is an easy step; just follow the Windows setup instructions and save the file to your desktop.
 -
 Start the installation. When you first open Parallels, it's going to give you two options. You can choose the first one: 'Install Windows or another OS from a DVD or image file'.
 -
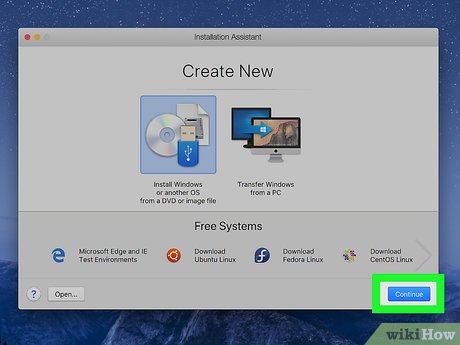 Click Continue.
 -
 Enter the product key you were given when you purchased Windows.
 -
 Pick your integration preference. If you want Windows and all its programs and applications to appear in one window, choose the second option. However, both options work fine; the only difference is how the files will display on your computer.
 -
 Click Continue and choose a name and location.
 -
 Wait and let Parallels do its magic. The installation period shouldn't take longer than 20 minutes.
 -
 Start up and use Parallels.
- You can make the Windows a full screen so it looks like it would if you were using a regular Windows PC by choosing full screen mode.
- To switch back and forth between Mac and Windows, make sure to share Windows applications with Mac.[2]
- Since the virtual machine is set up now, you can run any Windows application. Next part we are going to install Microsoft Visual Studio.
Part 3 of 3:
Installing Microsoft Visual Studio
-
 Download Visual Studio. There are several versions of Visual Studio. Choosing which version to download is up to you. Unlike the Parallels and Windows, Visual Studio is free. To download the application check out the official website here and choose the community edition.
 -
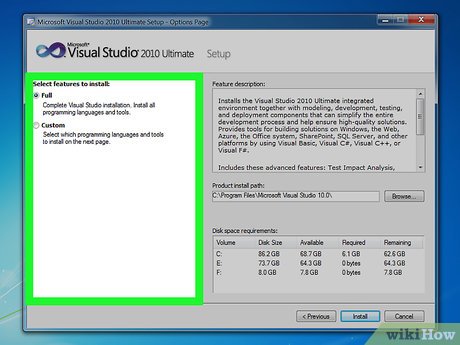 Install Visual Studio. The Visual Studio installation is simple, since the application is now running on its native Windows platform. The installer will automatically finish the installation.
 -
 Run Visual Studio smoothly on your Mac!
Was this article helpful?
Your feedback helps us improve.
Related Articles
 How to create a file to install Visual Studio offline10 minutes read
 How to install Visual Studio Code on Windows 103 minutes read
 Visual Studio 2015 is about to be discontinued, what should you pay attention to?2 minutes read
 Steps to Install Visual Studio: Powerful Microsoft Programming Tool5 minutes read
 Install Windows on Mac with Parallels Desktop 94 minutes read
 How to Install Visual Studio Code on Ubuntu 20.044 minutes read
Reader Comments 0
Sign in with email or Google to join the discussion.